Seat Leon >> Remove and install footwell light W9 / W10
Special tools and workshop equipment required
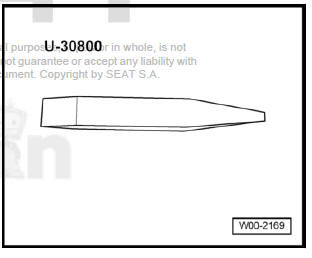
- Lever - U30800-
Removing
- Switch off ignition and all electrical consumers.
Vehicles without access and start authorisation system
- Remove ignition key, if fitted.
Vehicles with access and start authorisation system
- Store the ignition key outside the vehicle to prevent the ignition from being switched on unintentionally.
Continued for all vehicles
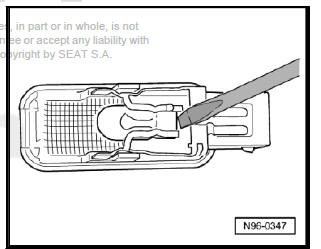
- Footwell light, left side - W9- or Footwell light, right side - W10- -1-, carefully lever out using the lever - U30800- .
- Disengage and disconnect the plug connector -arrow- and remove the footwell light, left side - W9- or footwell light, right side - W10- .
Installing
Installation takes place in reverse order.
Removing and installing front footwell light bulb L151 / L152
Removing
- Switch off ignition and all electrical consumers.
Vehicles without access and start authorisation system
- Remove ignition key, if fitted.
Vehicles with access and start authorisation system
- Store the ignition key outside the vehicle to prevent the ignition from being switched on unintentionally.
Continued for all vehicles
- Remove footwell light, left side - W9- / Footwell light, right side - W10- .
- Carefully prise off cover over bulb -arrow-.
- Carefully pry bulb out of bulb holder.
Removing and installing central locking deadlock function warning lamp -SAFE- - K133-
Removing
- Switch off ignition and all electrical consumers.
Vehicles without access and start authorisation system
- Remove ignition key, if fitted.
Vehicles with access and start authorisation system
- Store the ignition key outside the vehicle to prevent the ignition from being switched on unintentionally.
Continued for all vehicles
- Remove door trim .
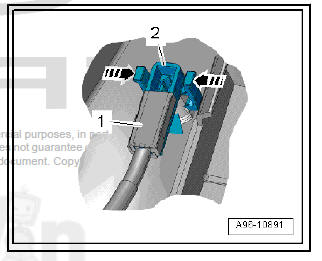
- Release retaining clips -arrows-.
- Remove LED -1- for central locking downwards out of door trim -2-.
Installing
Installation takes place in reverse order.
Removing and installing selector lever display unit - Y26-
Note The selector lever position display - Y26- -1- is integrated in the selector lever gaiter and cannot be removed individually.
- Removing and installing selector cover .
 Glove compartment light - W6- : Removing
and installing
Glove compartment light - W6- : Removing
and installing
Special tools and workshop equipment required
Lever - U30800-
Note
For removing and installing of components located in a visible
zones (switches, covers, linings, etc.) always protect the ...
 Remove and install luggage compartment
light W3
Remove and install luggage compartment
light W3
Special tools and workshop equipment required
Lever - U30800-
Removing
Switch off ignition and all electrical consumers.
Vehicles without access and start authorisation system
Remo ...
See also:
Removing and installing turn signal bulb
Installing and removing turn signal
bulbs, Leon / Leon SC
Removing
Switch off ignition and all electrical consumers.
Vehicles without access and start authorisation system
Remove ignition ...
