Seat Leon >> Removing and installing wind deflector
SEAT Leon Service and Repair Manual / General body repairs, exterior / Sunroof / Sun roof / Removing and installing wind deflector
Removing
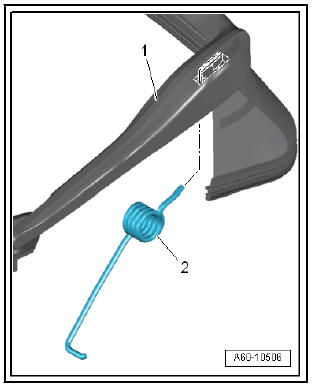
Note To remove the wind deflector -3- it is not necessary to remove the bracket -1-.
- Completely open the panoramic window.
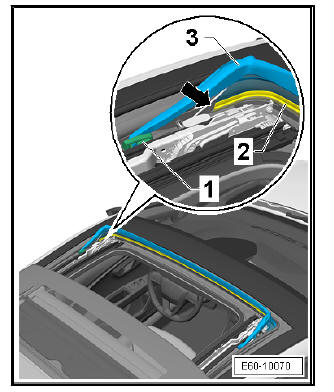
- Push against the frame of the wind deflector -3- to loosen the net
- Remove the sealing strip -2- from its seat (unclip it). Start at the end -arrow-.
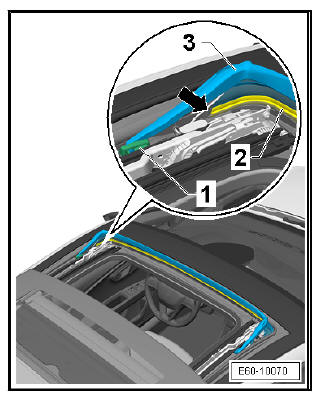
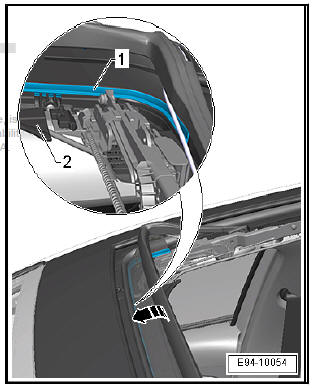
- Continue pushing against the frame of the wind deflector -arrow- and completely remove the sealing strips -1- from its seat in the sliding/tilting sunroof frame -2-.
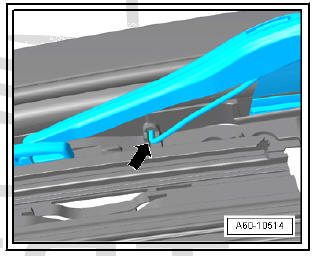
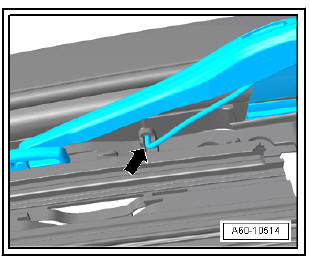
- Move the wind deflector forward and remove the spring
-arrow- from the opening in the sliding/tilting sunroof frame.
Remove the other end of the spring attached to the wind deflector frame (unclip the end).
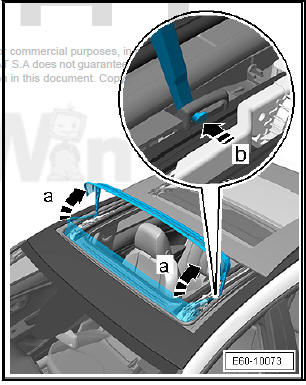
- Move the wind deflector into a vertical position -arrow a- and remove it laterally from both sides -arrow b- of the bracket.
fitting
Fit in reverse order from removal, remembering the following:
- Insert the spring -2- in the wind deflector frame -1-.
- Move the wind deflector forward and fit the spring -arrow- from the opening in the sliding/tilting sunroof frame.
- Push against the frame of the wind deflector -3- to loosen the net
| Caution When fitting sealing strips do not use metal parts, as they may damage the net of the wind deflector! |
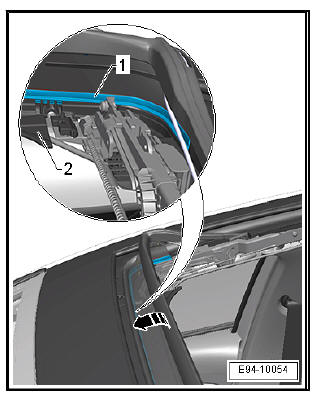
- Using the lever - U30800- apply pressure from both sides and fit the sealing strip -2- in its seat. Start at the end -arrow-.
- Continue pushing against the frame of the wind deflector -arrow- and completely fit the sealing strips -1- into the groove in the sliding/tilting sunroof frame -2-.
 Removing and installing sliding sunroof frame
Special tools and workshop
equipment required
Electric cutter - SAT
1561A-
Knife 207 - SAT 1561/12-
Pull handle - VAG 1351/1-
(x2)
Dual component window
sealant - VAS 5237-
Mater ...
 Removing and installing glass panel
Removing glass panel (with functional
control motor)
Removing
Open the panoramic window by moving it about 150 mm to the
back.
From the outside, remove the screws -arrow- on both sides ...
See also:
Removing and installing rear part
Removing
Remove front glass panel.
Remove rear glass panel.
Remove sun blind.
Remove assembly frame from vehicle.
Pull interior seal -2- off assembly frame -1-.
Remove any adhesive res ...
