Seat Leon >> Removing and installing door lock
SEAT Leon Service and Repair Manual / General body repairs, exterior / Rear doors, door components / Door components / Removing and installing door lock
| Caution The following does not have to be removed to remove the lock from the back door:
|
Removing
- Move door window to "closed" position.
- Remove the interior protection cover.
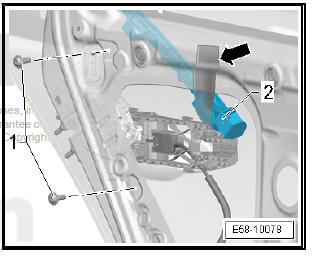
- Unscrew the fixing screws -1- of the window frame -2- and fix the frame using masking tape -arrow- so that work is not impaired.
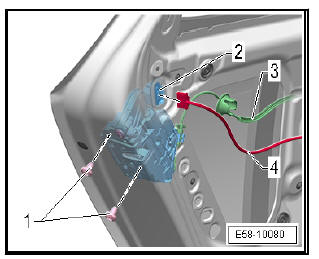
- Pull off the plug connector of the wiring harness -4-.
- Remove screws -1-.
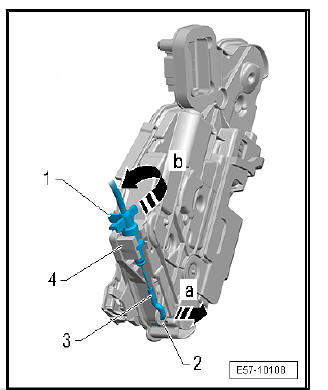
Remove the cable -3- of the inside handle on the -door lock side- To do so, proceed as follows:
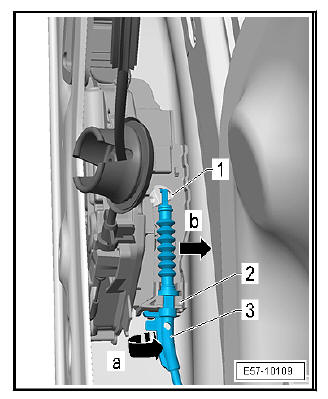
- Carefully move the lock -2- in order to obtain access to the fixing points of the cable -3-.
- Turn the cable on lever -1- 90º in direction of -arrow b- and take it out of cable support bracket of the control cable -4-.
- Unfasten sleeve -3-, arrow -a- of release lever -2- on door lock.
Remove the cable of the outside handle on the -door lock side-.
To do so, proceed as follows:
Note Take particular care not to damage the retaining clip of the cover.
- If fitted, remove the cover -1- by clipping it out in the direction of -arrow a- and then move in the direction of -arrow b-.
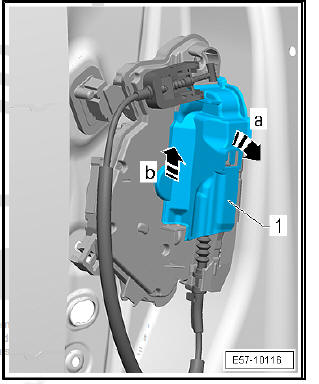
- Turn the cable on lever -3- 90º in direction of -arrow a- and take it out of cable support bracket -2-.
- Turn the cable in lever -1- in the direction of -arrow b-.
- The cable must form a line with the recess in the lever.
- Detach the cable from the lever -3-.
- Remove the lock -2-.
fitting
Fit in reverse order from removal, remembering the following:
Note
- Do not close the door.
- After completing the installation work, check for trouble-free function as Bowden cables set or hung in incorrectly may prevent the door from opening.
 Removing and installing door handle
Special tools and workshop equipment required
Hooks - 3438-
Removing
Remove the lock cover of the handle.
Carefully pull handle -2- in direction -arrow a- and remove from
mount -1-.
...
 Removing and installing window guide
Special tools and workshop equipment required
Thrust piece - T20098-
Note
The sequences below describe the processes for removal and
installation for the left side of the vehicle. The c ...
See also:
Seat belt release
The seat belt must not be unfastened until the vehicle has
come to a standstill.
Fig. 15 Removing latch
plate from buckle
– Press the red button on the belt buckle fig. 15. The latch pla ...
