
Seat Leon >> Integral wheel trim
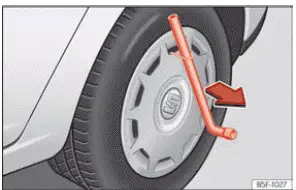
Fig. 249 Remove the wheel cover.
Full plastic wheel covers must be removed from steel wheels to expose the underlying wheel nuts before loosening them.
Removing
- Extract the box spanner wrench and the stiff wire pull-hook from the vehicle tool kit.
- Guide the curved end of the wire hook through one of the outer ventilation openings of the trim.
- Slide the wheel wrench shaft through the loop of the wire hook, leverage the tool against the tyre sidewall, and pull firmly outward to pop the wheel trim free ››› Fig. 249.
Fitting
- Align the wheel trim against the rim face so that the valve stem cutout lines up precisely over the tyre valve.
- Firmly press the trim around its entire circumference until all retaining clips snap securely onto the steel rim flange. If an anti-theft wheel lock bolt is fitted, ensure it is installed in the bolt hole located opposite the tyre valve stem.
Wheel nut caps
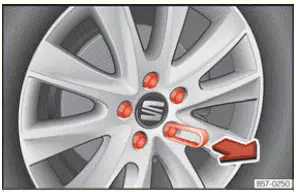
Fig. 250 Wheel: wheel nuts with caps.
Removal
- Push the plastic extraction clip from your vehicle tool kit over the bolt cap until its jaws snap firmly into place ››› Fig. 250.
- Pull the plastic clip straight outward to slide the cap off the lug nut head.
These protective plastic caps shield the wheel nuts from dirt, moisture, and road corrosion; always press them back into place after completing a wheel change.
The anti-theft wheel locking bolt features a distinctly shaped protective cap. This specialized cap is shaped exclusively to fit anti-theft locking bolts and cannot be fitted onto standard hex-head wheel nuts.
 Location and use of the temporary spare wheel
Fig. 247 In the luggage compartment: load floor raised.
Fig. 248 In the luggage compartment: remove the subwoofer.
The temporary spare wheel is stowed neatly beneath the boot floor panel in the ...
 Anti-theft wheel nuts
Fig. 251 Anti-theft wheel nut with cap and adapter.
Loosening the anti-theft wheel nut
Remove the plastic wheel trim, decorative cover, or protective nut cap to access the security bolt head ...
See also:
Control and display unit
Removing and installing control and display
unit
Special tools and workshop equipment required
Lever for the front-end - 3370-
Removal:
Note
The picture shows a vehicle with Climatronic. ...
