Seat Leon >> Removing and installing brake calliper pistons, vehicles with manual parking brake
SEAT Leon Service and Repair Manual / Brake system / Brakes - hydraulics / Rear brake calliper / Removing and installing brake calliper
pistons, vehicles with manual parking
brake
Special tools and workshop equipment required
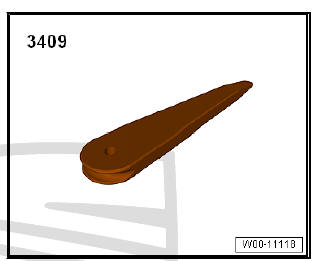
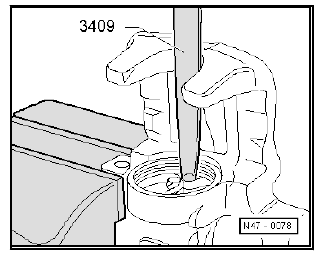
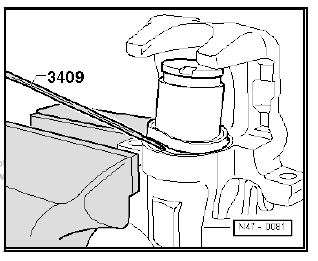
- Wedge - 3409-
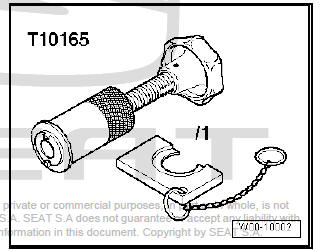
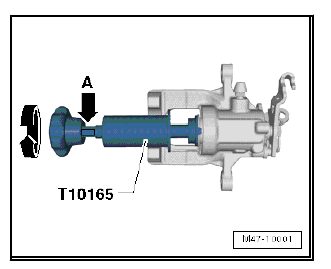
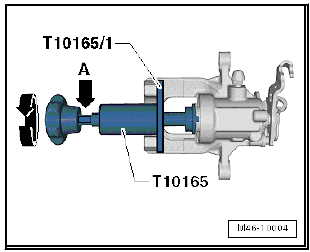
- Opening/closing wrench - T10165-
Note
- Other than removal and installation of the brake calliper piston, no repairs are permitted on the brake calliper.
- When carrying out repairs, install all parts supplied in repair kit.
- Use only methylated spirits for cleaning the brake.
- New brake calipers are filled with brake fluid and are pre-bled.
- Apply thin coat of assembly paste G 052 150 A2 to brake cylinder, piston and sealing ring.
Removing:
| WARNING Setting the brake piston can only be carried out with the piston compressing tool - T10165- . |
- Fit the wrench open / closed - T10165- on the brake calliper housing piston.
- Extract the piston from the brake calliper housing by turning the handle on the tool to the left.
- If the piston will not move easily, a 13 mm open-end spanner can be applied at the flats provided -arrow A-.
- Remove seal using wedge - 3409- .
Installation:
- The piston and join ring surfaces can only be cleaned using alcohol and immediately dried.
- Before fitting the piston and seal ring, apply a thin coating of assembly paste.
- Introduce the join ring into the brake caliper housing.
- Fit the protective hood with the outer sealing lip over the piston.
- Using the removal wedge - 3409- , insert the inner sealing lip into the groove of cylinder.
Note During this operation, the piston has to be supported in front of the brake caliper housing.
- Fit the wrench open / closed - T10165- on the brake calliper housing piston.
- In order to turn the piston, use the disc - T10165/1- .
- Fit the piston to the brake calliper housing by turning the handle on the tool to the right.
Note
- Insert piston compressing tool (make sure that the collar contacts the brake caliper).
- If the position of the piston is modified with the open/close wrench - T10165- then the automatic readjustment of the brake calliper will be broken.
- Fit the brake pads.
Pre-bleeding brake caliper:
- Open the air purge screw -arrow A- and, using the brake fluid collection flask, fill the brake fluid up to a point where fluid without bubbles comes out of the screw hole (connection for the brake hose) -arrow B- .
- Close bleeder valve.
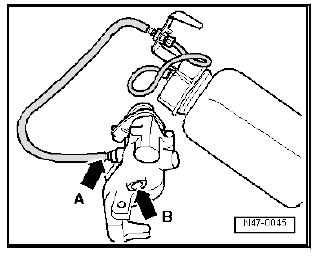
Note For the initial purge, fit the brake calliper as shown in the illustration.
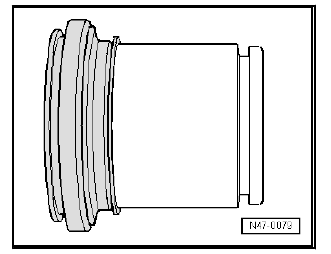
 Exploded view - rear brake calliper
Assembly overview - rear brake calliper, vehicles with manual parking
brake
- Air drain plug, 10 Nm
Before tightening, apply
a fine layer of assembly
paste to the screw
thread .
...
 Removing and installing protective cap,
vehicles with electronic parking brake
Removing and installing protective cap,
vehicles with electronic parking brake
Special tools and workshop equipment required
Lever - 3409-
attachment tool - T10502-
Thrust piece - T10145-
Removing
Only the protective cap is intended to be renewed.
Note ...
See also:
Rear interior and reading lights*
Fig. 79 Detail of the roof:
Rear interior light and
reading lights
The switch fig. 79 C is used to select the following positions:
Interior light switched off 0
In switch position f ...
