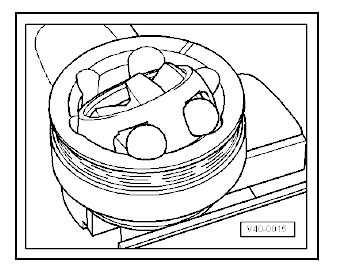
Seat Leon >> Checking outer constant velocity joint
The joint is to be dismantled to renew the grease if it is heavily soiled, or to check the running surfaces of the balls for wear and damage.
Removing
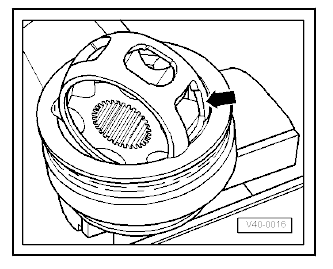
- Before dismantling, mark position of ball hub in relation to ball cage and joint body with an electric scriber or oil stone.
- Swing ball hub and ball cage.
- Remove the balls one by one
- Turn cage until the two rectangular windows -arrow- lie on joint body.
- Take out cage with hub.
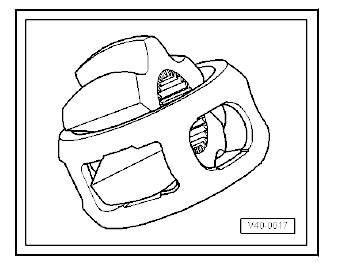
- Swing segment of hub into square cage window.
- Remove the hub from the cage.
The six balls for each joint belong to a tolerance group. Check stub axle, hub, cage and balls for small indentations (pitting) and traces of seizing. Excessive backlash in the joint will cause knocking or jolts under load change. In this case the joint must be replaced. Smoothing and traces of wear of the balls are no reason to change the joint.
Installing
Carry out installation in the reverse sequence, noting the following:
- Insert half of the recommended amount of grease (40 grams) on the casing of the joint.
- Fit cage with hub into joint body.
- Fit opposite balls one after another. In doing so, take care to re-establish the original position of the ball hub relative to the cage and the joint body.
- Fit new retaining ring into hub.
- Distribute remaining grease in boot.
 Dismantling and assembling drive shaft
Dismantling and assembling drive shaft, constant velocity joint VL100
Special tools and workshop
equipment required
Tightening plate - VW 401-
Tightening plate - VW 402-
Die - VW 408 A-
Di ...
 Checking inner constant velocity joint
Removing
The joint is to be dismantled when following work is done:
Replacement of grease if very contaminated
Check of running surfaces for wear
Check of balls for wear
Swing ball hub ...
See also:
Removing and installing door hinge
Special tools and workshop equipment required
Torque wrench - V.A.G 1331-
Release lever - 3409-
Note
The sequences below describe the processes for removal and
installation for the ...
