Seat Leon >> Multifunction steering wheel
Overview - multifunction steering wheel
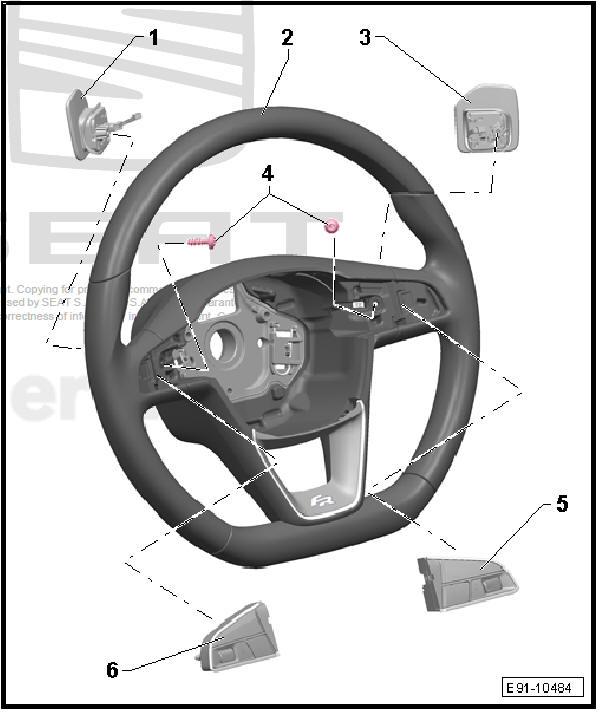
- - Tiptronic switch in steering
wheel to shift down - E439-
- Removal and installation
- - 3-spoke steering wheel
- - Tiptronic switch in steering
wheel to shift up - E438-
- Removal and installation
- - Screw
- 2.0 Nm
- - Multifunction buttons on
right in steering wheel - E441-
- Removal and installation
- - Multifunction buttons on left
in steering wheel - E440-
- Removal and installation
Removing and installing steering wheel multifunction buttons -E441- / -E440-
Special tools and workshop equipment required
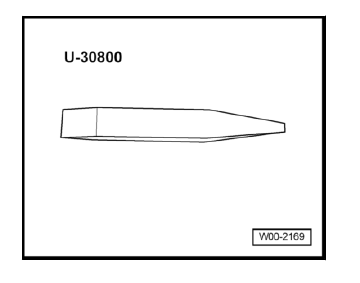
- Release lever - U30800-
removing
- Switch off ignition and all electrical equipment.
Vehicles without access and start authorisation system
- Remove ignition key, if fitted.
Vehicles with access and start authorisation system
- Store ignition key outside the vehicle to prevent the ignition from being switched on unintentionally.
Continued for all vehicles
- Remove driver airbag.
- Take connecting wires out of their guides in steering wheel.
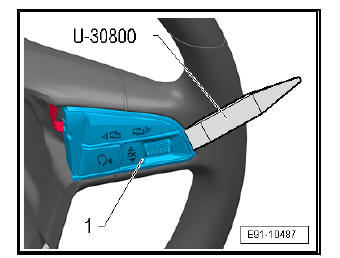
- Clip out the multi-function buttons -1- with the wedge - U30800- as shown in the figure.
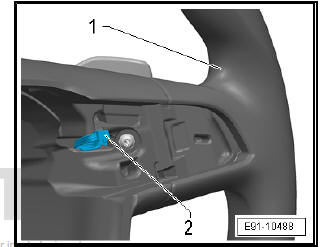
- At the same time, pay attention to connectors leading to Tiptronic switches -2-.
- Release and detach the plug connectors of the multi-function buttons.
fitting
Installation is carried out in the reverse sequence; note the following:
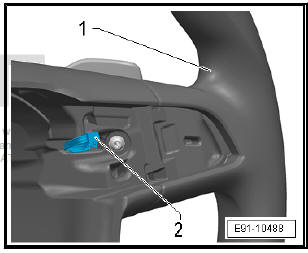
- Ensure connecting wiring -2- for Tiptronic switches is routed as shown in illustration.
- Route remaining connecting wiring, including connectors, through guides in steering wheel.
- Finally, check again that wiring in steering wheel is correctly routed.

Removing and installing Tiptronic switch in steering wheel -E439- / -E438-
removing
- Switch off ignition and all electrical equipment.
Vehicles without access and start authorisation system
- Remove ignition key, if fitted.
Vehicles with access and start authorisation system
- Store ignition key outside the vehicle to prevent the ignition from being switched on unintentionally.
Continued for all vehicles
- Remove the multi-functional buttons on steering wheel.
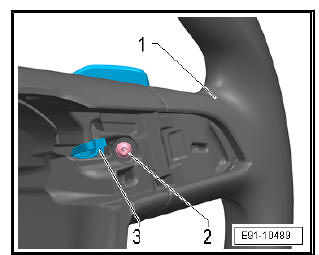
- Remove bolt -2- on steering wheel -1- and detach Tiptronic switch with connecting wire towards rear.
fitting
Installation is carried out in the reverse sequence; note the following:
- Observe position/routing of wiring -2- to multifunction button.
 Reversing camera system
Layout - reversing camera system
The reversing camera supports the driver during reversing by
providing the driver with an image of the traffic situation behind
the vehicle on the radio/navigation ...
 Connection for external multimedia
devices
Removing and installing connection for
external audio source - R199-
Connection for external audio sources -
R199- : Removal and installation, in the
glove compartment
Special tools and workshop ...
See also:
Removing and installing brake master
cylinder
Removing and installing brake master
cylinder, LHD
Special tools and workshop equipment required
Torque wrenches - V.A.G 1331-
Brake filling and bleeding equipment - VAS 5234-
Remov ...
