Seat Leon >> Removing and installing emblems at vehicle front
Removing and installing emblem at vehicle front
Special tools and workshop equipment required
- Release lever - U 30800-
Removing
- Remove bumper cover (front).
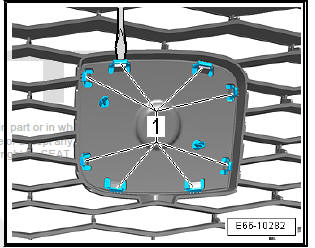
- Use a small screwdriver to remove the retaining clips -1- from the radiator grille.
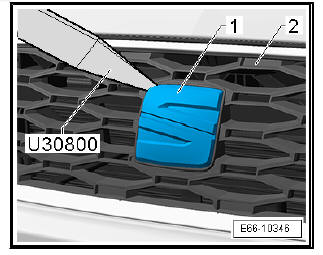
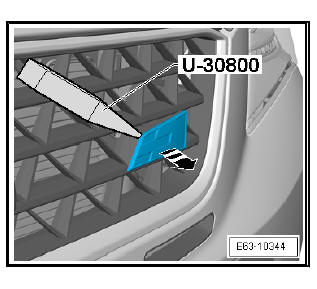
- Remove the company emblem -1- on the radiator grille -2- using the lever - U30800- .
fitting
Fit in reverse order from removal, remembering the following:
- Press the company emblem on -1- until it can be heard to engage.
- Make sure that the company emblem is fixed correctly.
Removing and installing "FR" emblems at vehicle front
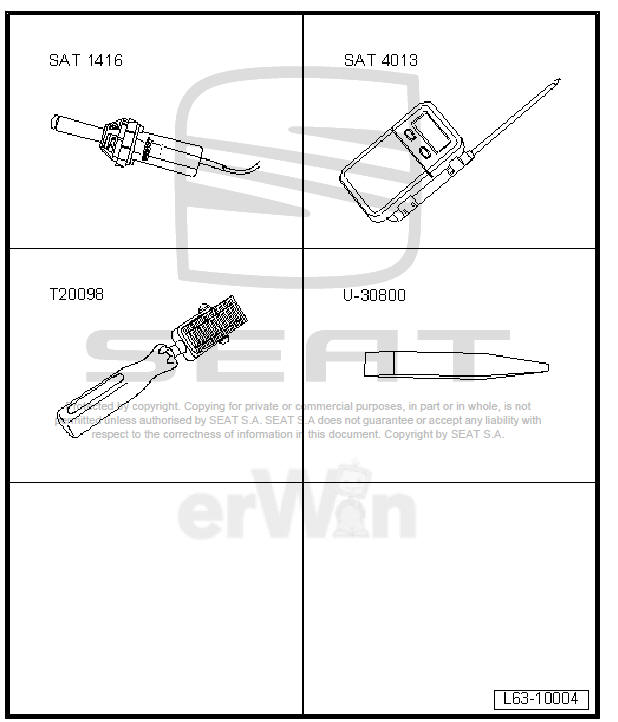
Special tools and workshop equipment required
- Hot-air blower - SAT 1416-
- Digital thermometer - SAT 4013-
- Thrust piece - T20098-
- Release lever - U 30800-
Removing
| Caution To remove the self-adhesive FR emblem, the following must not be removed:
|
- Before removing the self-adhesive emblem on the upper grille of the bumper trim, heat it up to approx. 25 ℃ with a hot air gun - SAT 1416- .
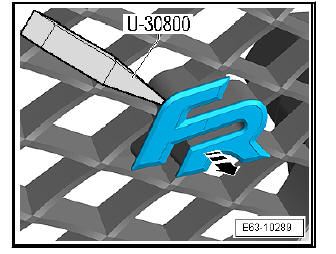
- Carefully remove the self-adhesive emblem from the upper grille of the bumper trim using the lever - U 30800- .
- Remove any remaining adhesive residues left by the adhesive tape from the upper grille of the bumper trim.
fitting
- Clean the area of the upper grille of the bumper trim where new self-adhesive emblem is to be applied with isopropanol or heptanes alcohol.
- Allow to dry well.
- Using the hot air blower - SAT 1416- , the contact area of the self-adhesive emblem to approx. 35ºC. Check the temperature using the digital thermometer - SAT 4013- .
- Remove the protective film of the new self-adhesive emblem "FR".
- Apply the self-adhesive emblem "FR" in the correct position in the area of the upper grille of the bumper trim so that the nipple engages in the guide openings.
- Apply the self-adhesive emblem and press tight using the pressure piece - T20098- .
Removing and installing "CUPRA" emblems at vehicle front
Special tools and workshop equipment required
- Hot-air blower - SAT 1416-
- Digital thermometer - SAT 4013-
- Thrust piece - T20098-
- Release lever - U 30800-
Removing
| Caution In order to remove the self-adhesive FR emblem it is not necessary to remove the following:
|
- Before removing the self-adhesive emblem on the upper grille of the bumper trim, heat it up to approx. 25 ℃ with a hot air gun - SAT 1416- .
- Carefully remove the self-adhesive emblem from the upper grille of the bumper trim using the lever - U 30800- .
- Remove any remaining adhesive residues left by the adhesive tape from the upper grille of the bumper trim.
fitting
- Clean the area of the upper grille of the bumper trim where new self-adhesive emblem is to be applied with isopropanol or heptanes alcohol.
- Allow to dry well.
- Using the hot air blower - SAT 1416- , the contact area of the self-adhesive emblem to approx. 35ºC. Check the temperature using the digital thermometer - SAT 4013- .
- Remove the protective film of the new self-adhesive badge "CUPRA".
- Apply the self-adhesive emblem "CUPRA" in the correct position in the area of the upper grille of the bumper trim so that the nipple engages in the guide openings.
- Apply the self-adhesive emblem and press tight using the pressure piece - T20098- .
 Self-adhesive, side emblems (3 and 5-
door models): replacing
Self-adhesive, side emblems (3 and 5-
door models): replacing
Company badge "ITECH"
Special tools and workshop
equipment required
Hot-air blower - SAT 1416-
Digital thermometer - SAT
4013-
Thrust piece - T20098-
Release lever - U 30800-
Adhesive ...
 Towing bracket
Assembly overview - towing bracket
- Bolt.
4 off
50 Nm + 90º
Always renew bolt after
loosening
- Towing bracket
Tow hitch with removable
ball head
- Sealing pl ...
See also:
TDI common rail engines
NOTICE
For "extracting" the engine oil with TDI Common Rail engines,
the flexible probe with a diameter of 5 mm and length of 750 mm
must be used to make sure that this has been inserted completely ...
