Seat Leon >> Lock cylinder, removing and installing
Special tools and workshop equipment required
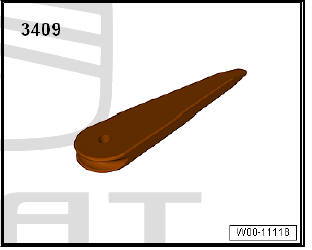
- Release lever - 3409-
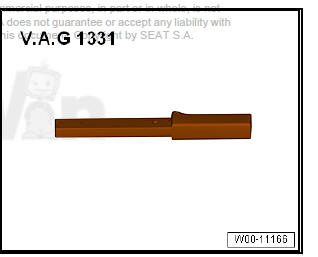
- Torque wrench - V.A.G 1331-
- "Extension 1/4""" - T20203A
| Caution Complete this process when replacing a key |
Note The lock cylinder is installed only in the front door on the driver's side.
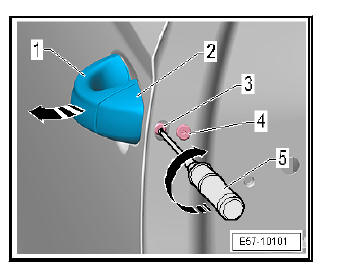
Removing
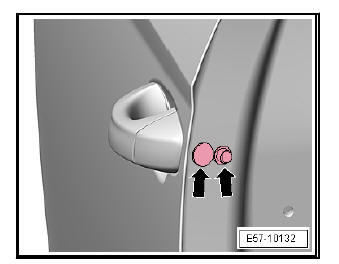
- Remove the anti-jam protection and the cover -arrows-.
- Unscrew the retaining bolt -3-.
| Caution Do not completely remove bolts -2-, only screw out to end of thread. If force is exerted on the bolt, it is possible for the mechanism to be rendered unusable. |
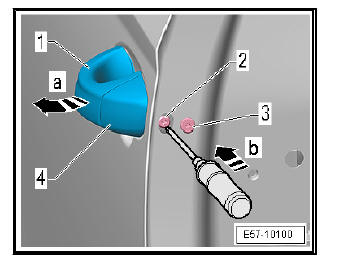
- Using the "1/4" extension" - T20203A- and the Torx insert T20, screw the clamping screw -2- out to the stop.
- Using the tool specified, press on the screws -2- in order to move the locking bar -arrow b- that is holding the lock catch.
- With the lever - 3409- remove the lock cylinder cover -4- from the handle locating point.
- Carefully pull the handle -1- outwards -Arrow a- and remove the lock cylinder with the lever. - 3409- .
fitting
Fit in reverse order from removal, remembering the following:
- Pull the handle -1- in the direction of the -arrow- and secure.
Note
- Check the correct position of the washer .
- Before installing the lock cylinder, make sure that the locking
bar is in the disengaged position that it was in when removing.
If there is a problem when inserting the lock cylinder, apply more pressure to the clamping screw -3- in order to move the clamping bar tot he unlocking position as described in the removal procedure.
- If the locking cylinder cannot be installed, the cover of the cylinder must be removed using the lever - 3409- . Insert the ignition key in lock cylinder, turn a little and then insert the lock cylinder into the handle mount.
- Insert the lock cylinder -2- into the handle mount.
- Using the "1/4" extension" - T20203A- -5- and the Torx T20 screwdriver, completely tighten the clamping screw -3-. In this way, the locking cylinder is retained by the locking bar.
- Tighten fixation screw -4-.
- Reattach the locking cylinder (if it has been removed).
- Then check the correct function of the locking and opening positions of the door lock.
| Caution Complete this process when replacing a key |
 Removing and installing outer window
slot trim panel
Removing and installing outer window
slot trim panel
Special tools and workshop equipment required
Wedge - T10039/1-
Removing
Installation
Removing
CautionThe following does not have to be removed when
removing the
windo ...
 Removing and installing the cover for
the lock of the outside handle (front
door)
Removing and installing the cover for
the lock of the outside handle (front
door)
Special tools and workshop equipment required
Hooks - T40207-
Release lever - 3409-
Note
The lock cover of the outside handle (front door) is installed only
on the passenger side.
...
See also:
Removing and installing the cable for
the outside handle (back door)
Remove the cable for the outside handle (back door)
Install the cable for the outside handle (back door)
CautionRisk of malfunctions.
When removing and installing, make sure the ...
