Seat Leon >> Assembly overview - brake pedal
SEAT Leon Service and Repair Manual / Brake system / Brakes - mechanism / Brake pedal / Assembly overview - brake pedal
Assembly overview - brake pedal, LHD
| WARNING The brake pedal stroke must not be obstructed by fitting extra coverings to the footwell. |
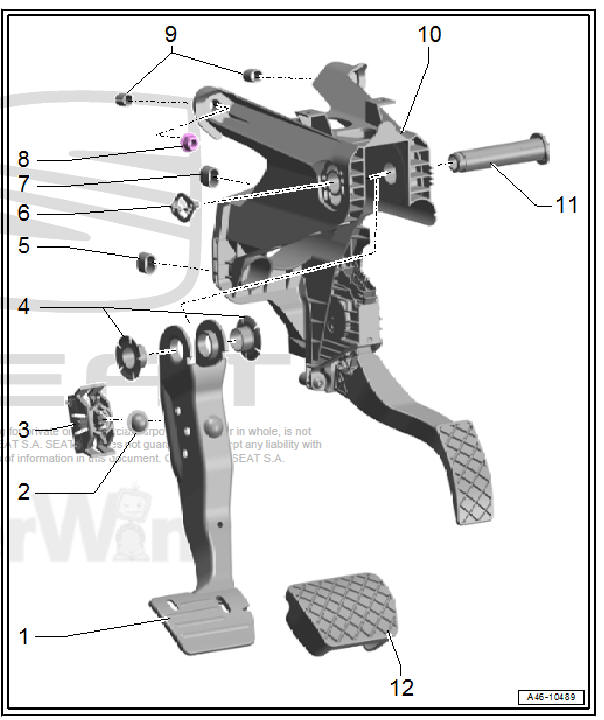
- - Brake pedal
- - Ball socket
- This is located between the support (the seat) on the brake force booster and the brake pedal.
- - Mounting
- For the ball head on the brake force booster
- - Mounting bush
- Not replaceable; check for correct installation position.
- - Bush oval-shaped
- - Threaded fastener for pivot
pin
- Replace after each removal
- For removal, turn the screw on the bearing shaft anti-clockwise; this breaks off the tabs on the bolt.
- For installation, turn the screw until the tabs locate audibly in their limit position.
- - Bush
- oval-shaped
- - Nuts
- Self-locking
- Replace after each removal
- 25 Nm
- Bolting sequence
- - Bushes
- oval-shaped
- - Pedal cluster / mounting bracket
- When installing, insert in guide pins.
- - Bearing shaft
- To remove, first remove mounting bracket
- Unfasten screw for removal by turning it anti-clockwise
- To remove, pull out of bearing block from left to right.
Caution
Do not lubricate or grease pivot pin. Pivot pin must remain dry.
- - Brake pedal rubber
Assembly sequence:
Assembly overview - brake pedal, RHD
| WARNING The travel of the brake pedal must not be restricted with additional floor mats or the like. |
Note Do not lubricate or grease pivot pin. Pivot pin must remain dry.
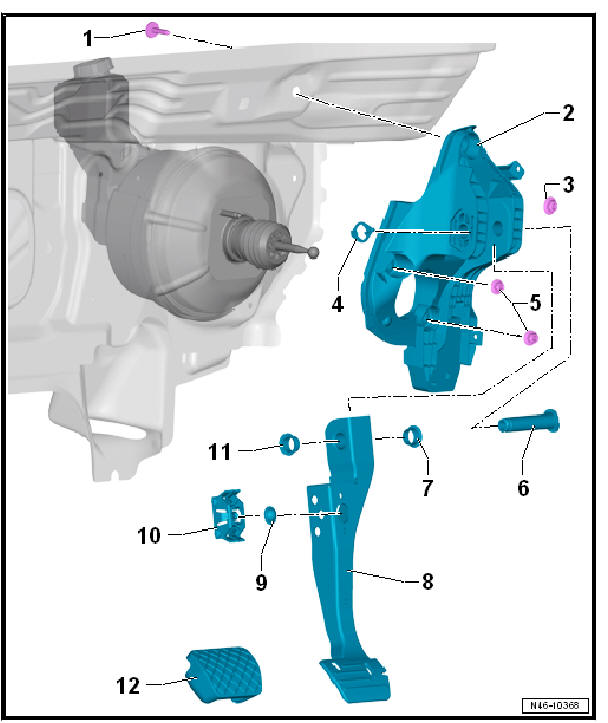
- - Bolt
- 20 Nm
- - Support buck
- - Nut
- 25 Nm
- - Securing clip
- Renew
- Install in both bores of bearing block
- - Nut
- To secure brake servo
- 2 off
- 25 Nm
- - Pivot pin
- You must remove it before removal of the bearing block
- Removal: Turn the bearing pins clockwise. This breaks off the tabs on the bolt
- Renew pivot pin.
- Do not lubricate or grease pivot pin. Pivot pin must remain dry.
- Installation: Turn pivot pin anti-clockwise until tabs engage audibly on stop.
- - Mounting bush
- Cannot be renewed individually; ensure correct installation position.
- - Brake pedal
- - Ball socket
- - Mounting
- For ball head of brake servo push rod
- - Mounting bush
- Cannot be renewed individually; ensure correct installation position.
- - Cover
 Brake pedal
...
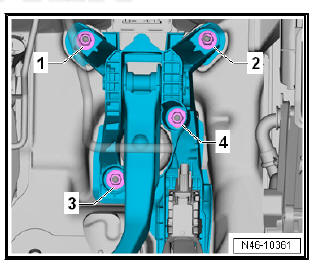
 Separating brake pedal from brake servo
Special tools and workshop equipment required
Release tool - T10159 A- or
Release tool - T10159 B
Removing
Remove driver's side knee airbag and cover (depends on version).
Work seque ...
See also:
Changing engine oil
The engine oil must be changed at the intervals given in the
service schedule.
We recommend that you have the engine oil changed by an Authorised
Service Centre.
The two different oil change int ...
