Seat Leon >> Seat belts: testing
| CAUTION The seatbelt system must be systematically verified following every accident. If tests reveal any damage then the customer must be informed of the need to change the seatbelts. In the event of the customer's refusal to replace seat belts, this should be reported in the Inspection and Maintenance Manual. Observe safety precautions for belt tensioners . |
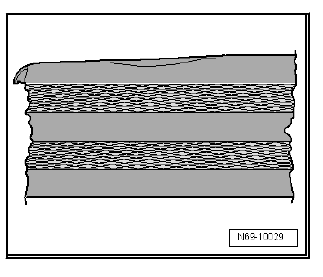
Checking the belt fabric
- Pull the belt webbing completely out of the automatic retractor or lap belt adjustment tongue.
| CAUTION If a vehicle has been in an accident and any of the following damage (1 and 2) is detected, replace the complete seat belt with the belt buckle If any of the damage described in points (1, 2 or 3) is observed in a vehicle which has not been in an accident, it is sufficient to change the worn seat belt. |
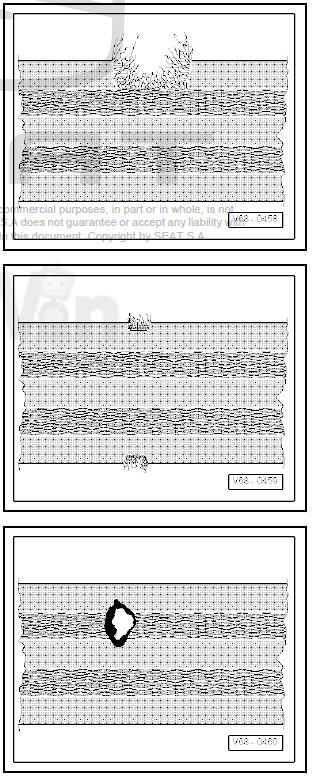
- Belt fabric with cuts, tears, ripped or ragged.
- Fabric loops torn on the edge of the belts.
- Cigarette burn marks or similar.
- Deformation of the belt run on one side or undulated edge.
Checking the automatic roller mechanism (blocking effect)
The automatic inertial reel has two locking functions:
- Verification of the automatic winder using the dynamic test
- Automatic winder dynamic test
Testing automatic inertia real (using static test)
The locking function is actuated when the belt is pulled out of the automatic inertia reel with a jerk.
- Pull sharply the safety belt web
- If it does not lock, replace the complete seat belt with buckle.
- If there are any problems when retracting or extracting the seat belt, check if the position of the automatic winder has been altered.
Testing automatic inertia real (using dynamic test)
The second locking function is activated when there is a sudden change in vehicle motion (vehicle-dependent locking function).
- Fasten the seat belt.
- Accelerate the vehicle to 20 km an hour then brake suddenly.
- If the seat belt does not lock when braking, the complete belt and buckle must be replaced.
| CAUTION For safety reasons, this test should be carried out in a section where there is no traffic and there is no danger to other road users. |
Visual inspection of the belt buckle
- Check the seat belt buckle for cracking and damage.
- In case of damage, replace the entire safety belt and its buckle.
Functional check of the belt buckle
Check of the belt buckle:
- Insert the seat belt tongue into the seat belt buckle until it clicks into place.
- Pull hard on a safety belt and ensure it remains locked in the buckle.
- Repeat the test at least 5 times.
- Replace the entire seat belt along with the buckle if the seat belt tongue is released even once during the 5 tests.
Check unblocking:
- Insert the seat belt tongue into the seat belt buckle until it clicks into place.
- Release the seat belt by pressing on the buckle button with one finger. When the belt webbing is slack, the tongue should come out of the buckle.
- Repeat the test at least 5 times.
- Replace the entire seat belt along with the buckle if the seat belt tongue is not released even once.
| CAUTION No lubricants must be used to eliminate noise or stiffness in the belt lock release button under any circumstances. |
Check guide fittings and tongue connector
After loading (seat belt worn in an accident), plastic covered fittings of the belt system show fine grooves, running parallel. Wear caused by frequent use may be recognized by a line-free smoothness.
- Check for twisting, damage and crack formation on the plastic.
- In case of the formation of channels and / or damage, replace the complete seat belt along with the buckle.
Check securing components and anchorage points
- Locking tongue deformed (stretched)
- Height regulation out of order
- Attachment points (seats, columns, vehicle floor) out of shape or threads damaged
- If damage is detected in any elements, replace the seat belt with the buckle.
- Replace the attachment points.
NOTICE
If the damage has not been caused by an accident but, e.g., by wear, only the respective part must be replaced.
Check function of all switches, electrical consumers, sockets, displays and other display elements
- The following components must be checked:
- Lighting, headlights, fog lights, indicator lights, hazard lights, rear lights, rear fog lights, reversing lights, brake lights, parking light circuit
- Interior lights and reading lights (automatic cut-out for front interior light), glove box light, ashtray light, luggage compartment lights (there are several lights), ignition key light
- Warning buzzer indicating that lights and/or radio have been left on
- All switches on console
- Driver Information System (DIS)
- Instrument cluster with all the displays, counters, lights and illumination
- Dual-tone horn
- Windscreen wiper/washer system, headlight washer system
- Cigarette lighter
- Exterior electric mirrors (heated, adjustable)
- Electric windows
- Electric sunroof (slide/tilt)
- Central locking, radio remote control, comfort lock
- Seat heating
- Radio, navigation system
 Lower engine noise insulation: removing
and fitting
Lower engine noise insulation: removing
and fitting
Special tools and workshop equipment required
Torque wrench 2-10 Nm - VAG 1783-
Lever - 3409-
Noise insulation, short
Removing
Unscrew bolts -2-.
Using the lever - 3409- , pres ...

See also:
Diesel engine 2.0 103 kW (140 bhp). Automatic
General engine data
Performance figures
Weights
Trailer weights
Engine oil filling capacity
...
