Seat Leon >> Removing and installing heat shield for centre tunnel
SEAT Leon Service and Repair Manual / General body repairs, exterior / Exterior equipment / Mouldings / trims / extensions / Removing and installing heat shield for
centre tunnel
Special tools and workshop equipment required
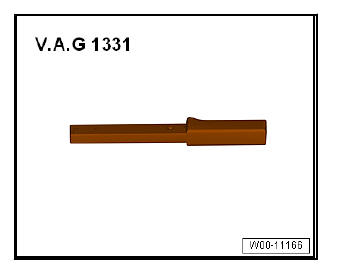
- Torque wrench - V.A.G 1331-
- Protective goggles and leather gloves
Removing
| DANGER! Always wear safety goggles and leather gloves. |
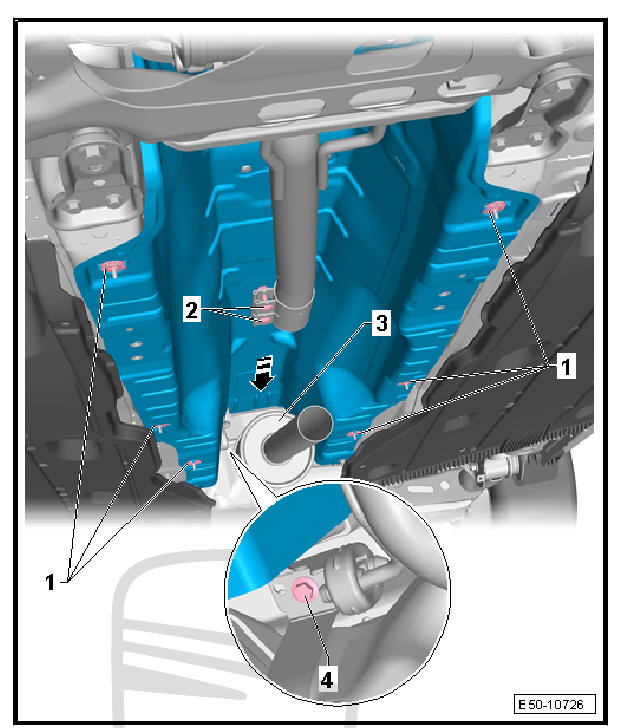
- Unscrew the nuts (tunnel side only) of the underbody protection, left and right side.
- The underbody protection is retained by the nuts on the outside.
Note For EU6 engines, the fastening clips for the wiring of the control unit for the exhaust flap - J883- must be removed.
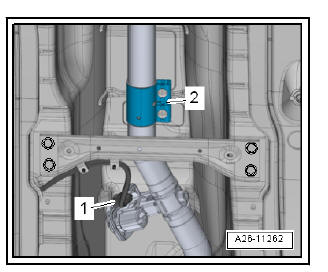
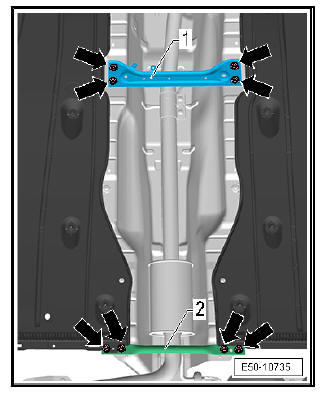
- Unscrew the nuts and bolts -arrow- and hold the front and rear -2- reinforcement strut of the tunnel -1-.
- Unscrew the bolts -4- of the silencer mount -3-.
| Caution There is a risk of damaging the decamping elements. |
- Remove the nuts -2- and separate the silencer -3- at the double clamp.
- Remove the securing clip from the gearbox cable (in the front area).
- Press out the securing washers -1-, which fasten the heat shield for the central tunnel, with the pressing lever - 80 200- .
- Move the heat shield for the centre tunnel to the rear -arrowover the subframe, making sure that it does not deform too much in the process.
fitting
Fit in reverse order from removal, remembering the following:
Note Replace the securing rings -2- with new ones and secure the heat shield to the centre tunnel -1-.
- Installation position of double clamp

Specified torques
| Overview | Tightening torque (in Nm) |
| Bolts for mounting the exhaust pipe | Exhaust pipes/ silencers; Assembly overview - silencers |
| Nuts of the double clamp | Exhaust pipes/ silencers; Assembly overview - silencers |
| Bolts of the reinforcement strut for the tunnel at the front | 20 |
| Bolts of the reinforcement strut for the tunnel at the front | 20 |
 Remove and install heat shield for luggage
compartment floor
Remove and install heat shield for luggage
compartment floor
Special tools and workshop equipment required
Torque wrench - V.A.G 1331-
Protective goggles and leather gloves
Removing
DANGER!
Always wear safety goggles and leather gloves ...
 Removing and installing heat shield for
propshaft
Removing and installing heat shield for
propshaft
Special tools and workshop equipment required
Torque wrench - V.A.G 1331-
Release lever - 80 200-
Protective goggles and leather gloves
Removing
DANGER!
Always wear s ...
See also:
Repairing trailing arm
Special tools and workshop
equipment required
Tube for wheel bearing -
3345-
attachment tool - 3346-
Tightening plate - VW 402-
Die - VW 412-
Pressure element -
T10496-
Remove ...
