Seat Leon >> Removing and installing front glass panel
SEAT Leon Service and Repair Manual / General body repairs, exterior / Sunroof / Panorama sliding roof / Removing and installing front glass panel
Removing
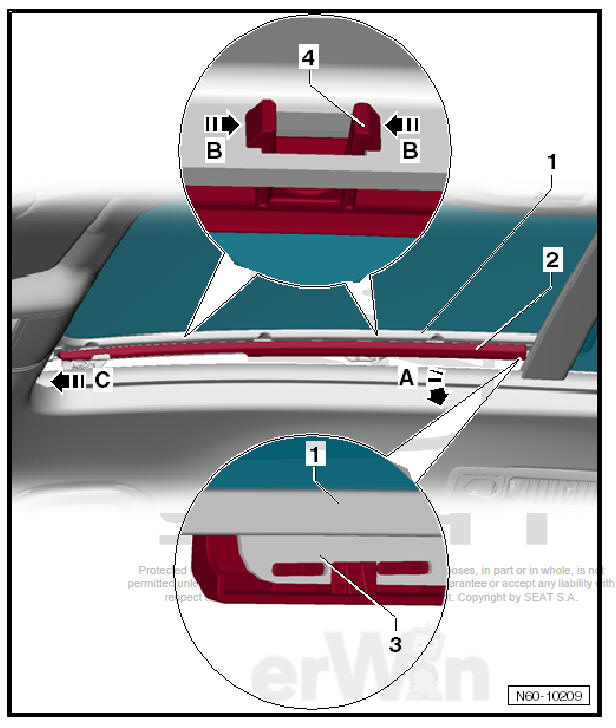
- Open glass panel -1- until trim -1- is accessible.
- Release locking lugs -4- by pressing -arrow B- on rear -3-.
- Pull trim -1- off downwards at rear end -arrow A-.
- Push trim forwards -arrow C- and remove.
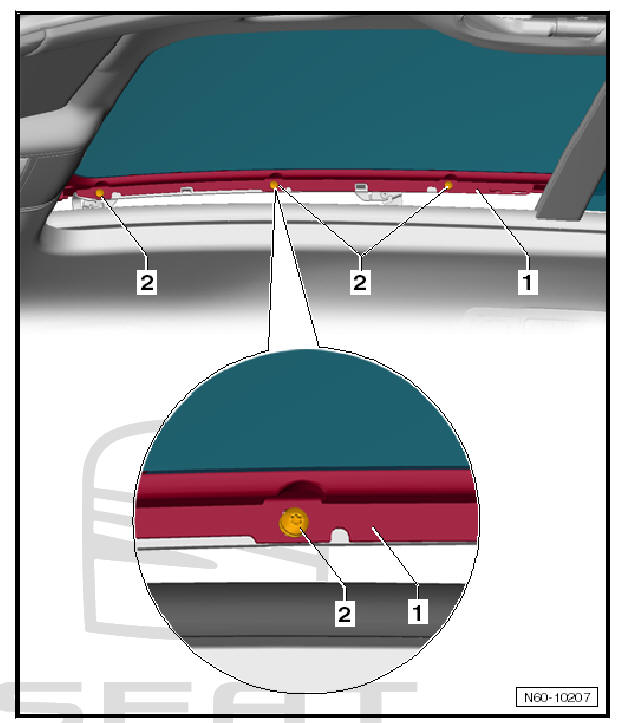
- Unscrew bolts -2- from glass panel -1- on left and right.
Note To unscrew bolts, use a magnetic tool so that bolts do not fall into mechanism of panoramic sliding roof.
- Lift out glass panel -1- upwards.
| Caution To avoid damaging wind deflector, do not move tilting mechanism when glass panel is removed. |
fitting
Note
- New bolts must always be used when installing glass panel.
- To screw in bolts, use a magnetic tool so that bolts do not fall into panoramic sliding roof guide.
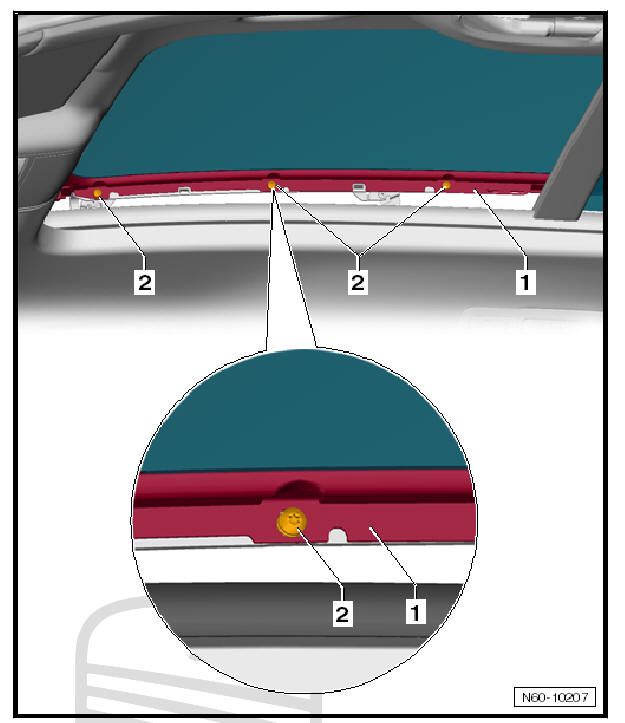
- Insert glass panel -1- from above and screw in screws -2- but do not tighten them firmly.
- Adjusting front glass panel .
- Tighten bolt -2- to specified torque 5 Nm.
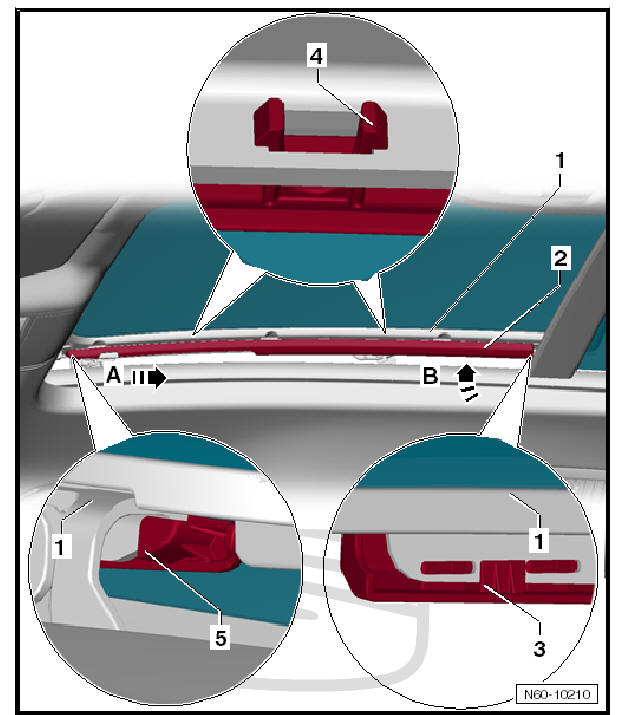
- Fit trim -2- into glass panel at front -1- -5-.
- Push trim -2- towards the rear -arrow A-.
- Push trim onto glass panel -arrow B- and clip locking lugs -4- in on the rear.
- On completion of all work, operate sliding roof motor to establish reference points
 Assembly overview - Cranks and tilt mechanism
- Wind deflector
Removing and fitting
- Bolt.
For securing wind deflector
5 off
2 Nm
- Sealing plug
- Mounting
- Support plate
1 on each side
- Bolt.
...
 Removing and installing rear glass panel
Removing
Note
To unscrew bolts, use a magnetic tool so that bolts do not fall into
panoramic sliding roof guide.
Operate front glass panel until it is in tilted-open position.
Undo front s ...
See also:
Removing and installing rear bumper
aerial for entry and start authorisation -
R136-
Removing
Switch off ignition and all electrical consumers.
Vehicles without access and start authorisation system
Remove ignition key, if fitted.
Vehicles with access and start authorisa ...
