Seat Leon >> Removing and installing door
SEAT Leon Service and Repair Manual / General body repairs, exterior / Front doors, door components, central locking / Door / Removing and installing door
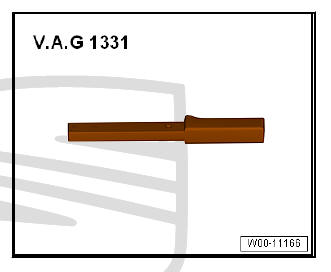
Special tools and workshop equipment required
- Torque wrench - V.A.G 1331-

Note The sequences below describe the processes for removal and installation for the left side of the vehicle. The corresponding sequences for the right side are similar with the exception that, where applicable, the scope of the process is written by yourself.
Removing
- Open the front door.
- Disconnect the multi-plug in the A-column.
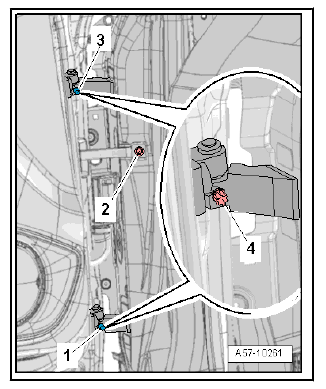
- Unscrew bolt -2- on door retainer.
- Detach the caps -1- and -3- from studs -4-.
- Release the fixing pin -4- of the hinge axis at the top, do not screw out.
- Release the fixing pin -4- of the hinge axis at the bottom, do not screw out.
- Lift the door upwards and remove from hinge shafts carefully.

Note To protect the components removed against damage, cover the resting surface with soft material.
fitting
Fit in reverse order from removal, remembering the following:
Note
- Threaded pins -4- must always be replaced.
- After fitting the door, do not make any adjustments.
- Place the door on the hinge shafts carefully.
- Tighten the threaded pins -4-.
 Removing and installing door seal (outer)
Removing and installing door outer seal, 4-door model
Removing
Pull door seal -1- off door -2- together with the clips -3-.
fitting
Check clips -3- for damage and renew if necessary.
P ...
 Adjusting door
Special tools and workshop equipment required
Torque wrench - V.A.G 1331-
Adjustment gauges - 3371-
Front door adjustment (hinges on pillar)
By adjusting the screws (on the pillars) ...
See also:
Lights in exterior mirror
Assembly overview - lights in exterior mirror
- Mirror mounting
Installing and removing
- Turn signal light bulb
Driver side exterior mirror
turn signal bulb -
L131-
Front ...
