Seat Leon >> Removing and installing lock carrier
Special tools and workshop equipment required
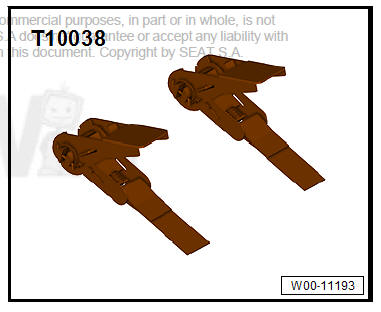
- Counterhold - T10038-
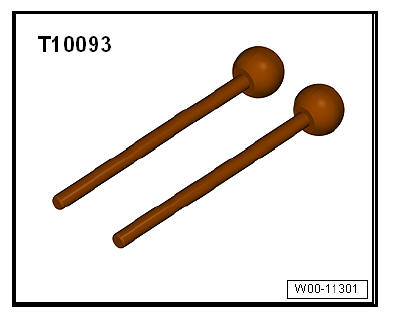
- Centre guide - T10093-
- Release lever - U30800-

- Torque wrench - V.A.G 1331-
- Release lever - 80 200-

Removing
| Caution The following items are not required for removal of the lock member:
|
- Remove bumper cover (front)
- Remove the lower soundproofing of the engine
- Remove the main headlight unit with the lower bracket
Continuation only for vehicles with ventilation control
- Remove ventilation control
Continuation only for vehicles with adaptive cruise control unit - J428-
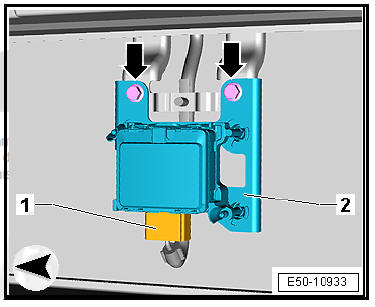
- Disconnect plug connector -1- and pull fastening off impact bar.
- Remove bolts -arrows-.
- Remove the adaptive cruise control unit - J428- -2- assembly.
Continued for all vehicles
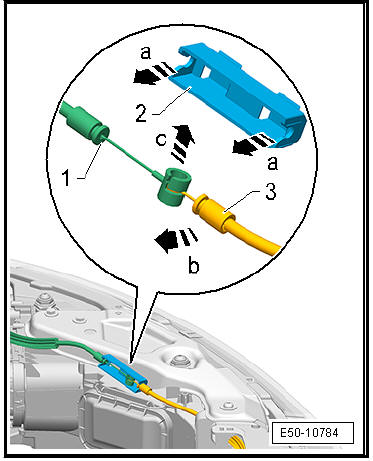
- If fitted, clip out the cover for the Bowden cable coupling.
- Clip out cable -1- and -3- in -the direction of arrow a- from the coupling sleeve -2-.
- Turn cable -3- 90º in the direction of arrow -b-.
- Clip cable -3- out of the socket of cable -1- by turning in the -direction of arrow c-.
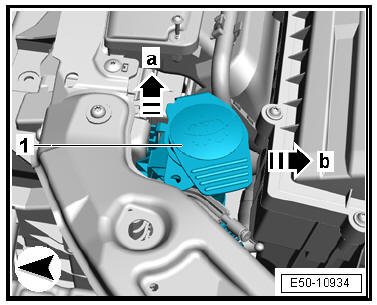
- Remove filler necks from washer fluid reservoir, to do this: slide necks in -direction of arrow a- and pull out in -direction of arrow b-.
- Loosen the hose clip -1-, and remove the air intake hose.
Note The configuration of the air supply ducts may vary depending on the engine version.
- Undo the screws -2- from both sides.
- Unclip the retaining clips of the air duct at lock carrier and detach.
- Clip out and disconnect the plug connector -3- of the bonnet contact - F266- switch.
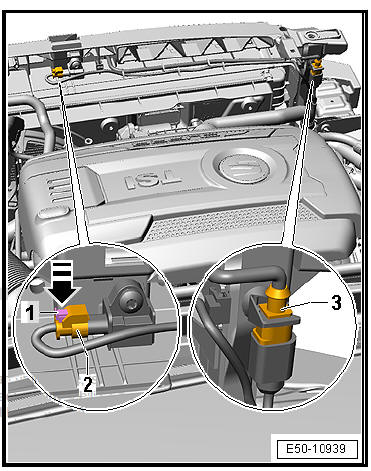
| DANGER! Consider the safety measures for pyrotechnic components. |
- Remove fuse -1-, press down in -the direction of the arrow and disconnect the connector of the -2- crash sensor.
- Move wiring harness clear on lock carrier.
- Unclip the connectors of the horn -1-.
- Free the clips -arrow- with the lever - 80 200- .
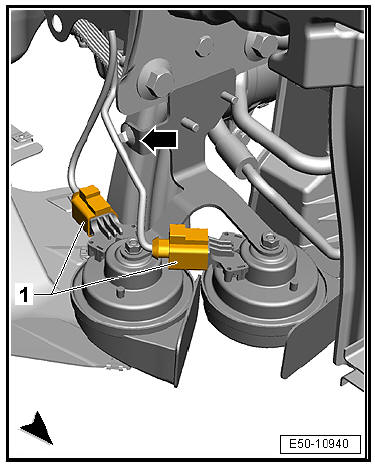
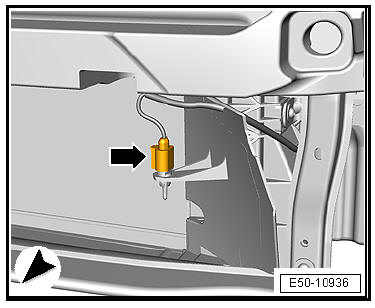
- Undo and remove the plug connector -arrow- of the ambient - G17- temperature sensor.
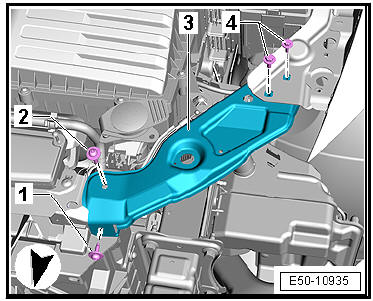
- Unscrew bolts -1-, -2- and -4-.
- Remove the brace of the lock carrier -3-.
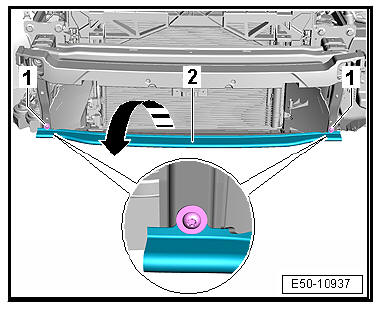
- Hold the bonnet tight with suitable workshop equipment.
- Unscrew the bolts -1- and remove the pedestrian protective strip -2- in -the direction of the arrow-.
- Remove the spread catcher -2- and remove the air ducts for radiators -1-, -3- and -4-.
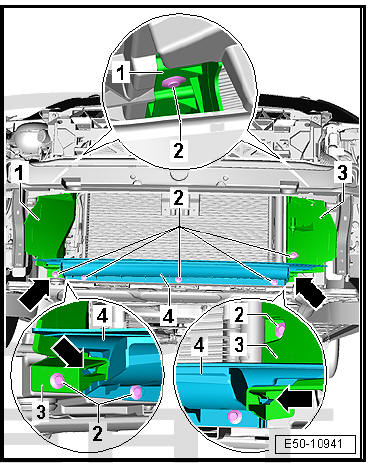
- Remove the left and right upper fixation of the radiator/intercooler/ condenser unit.
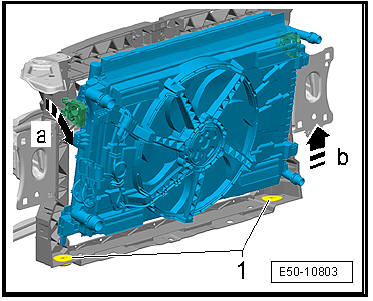
- Swivel the assembly out of the radiator / intermediate cooler / condenser in -direction of arrow a-.
- Raise the assembly, move it in -direction of arrow b- and unclip it from the lower brackets -1-.
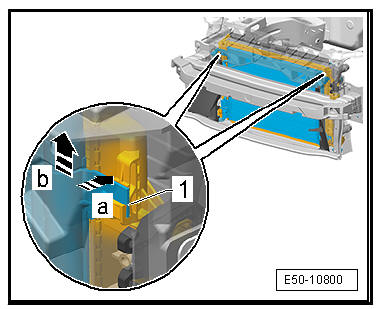
Separate the assembly radiator / intermediate cooler from the condenser -1-. To do this press from both sides -arrow a- against the retaining tab of the condenser -1-.
- Move the condenser in -direction of arrow b- to remove it from its brackets.
- Fix the assembly of radiator / intermediate cooler correctly in
the engine compartment. There are two options for this:
- Secure the assembly of radiator / intermediate cooler using the support tool - T10038- in such a manner that the lines are not exposed to tension.
- Place two support blocks under the assembly from radiator / intermediate cooler.
| Caution Risk of damaging the condenser lines on the air-conditioning unit. |
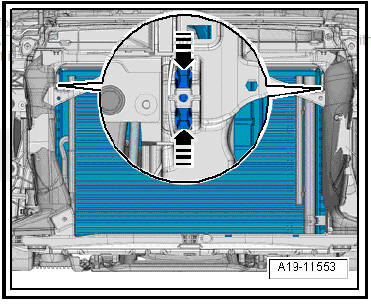
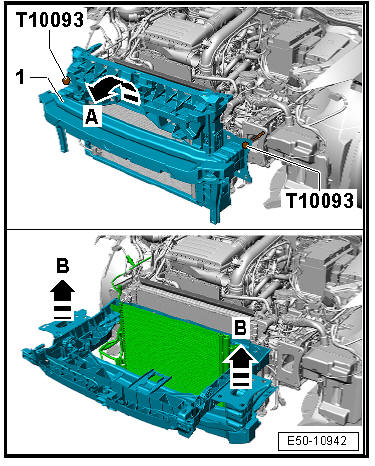
- Unscrew the bolts -2- and screw in the centring guide - T10093- on both sides at the ends.

- Pull out the centring guide - T10093- using a second technician.
- Fold out the cover of the lock carrier -1- in -the direction of the arrow A-. Ensure that, in the process, neither radiator nor condenser are damaged.
- Take out the cover of the lock carrier -arrow B- upwards as shown in the image.
fitting
Fit in reverse order from removal, remembering the following:
Note If damaged, renew clips.
- Check the spacings.
- Perform basic setting of headlights, if installed.
Continuation only for vehicles with adaptive cruise control unit - J428-
- Calibrate adaptive cruise control.
 Exploded view - lock carrier
Lock carrier cover
Removing and fitting
Expansion rivet
4 off
Intake ducting
Note
The intake air duct may vary depending
on the engine version.
Bolt.
2 off
To ...
 Moving to and back from service position
Special tools and workshop equipment required
Torque wrench - V.A.G 1331-
Centre guide - T10093-
Adapter - T10467-
CautionThe following is not necessary for positioning ...
See also:
Removing and installing lines for clutch
hydraulics
Special tools and workshop equipment required
Hose clamps, up to Ø 25 mm - 3094-
Removing
Remove complete air filter housing if it prevents access to the
lines for clutch mechanism.
...
