Seat Leon >> Front axle camber: correction
SEAT Leon Service and Repair Manual / Running gear, axles, steering / Wheels, tyres, vehicle geometry / Wheel alignment / Front axle camber: correction
Special tools and workshop equipment required
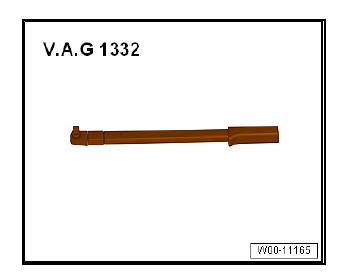
- Torque wrenches - V.A.G 1332-

Note
- Camber correction is necessary only after body repairs. Camber cannot be adjusted. It can be determined however, by moving the subframe slightly!
- Move subframe only to left or right, but never in or opposite to direction of normal travel!
- Remove noise insulation.
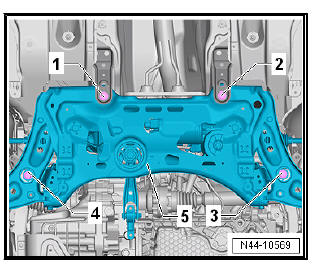
- Undo bolt -1- and screw a new one in loosely.
- Undo bolt -2- and screw a new one in loosely.
- Undo bolt -3- and screw a new one in loosely.
- Undo bolt -4- and screw a new one in loosely.

The camber adjustment range is limited by the tolerances of the holes in the subframe. If the specified value is not reached by shifting the subframe, this and the body must be inspected.
- Now camber may be adjusted to specification by moving subframe.
- Move subframe -5- sideways until camber is the same on both sides.
- Tighten subframe bolts -1-, -2-, -3- and -4-.
After shifting the subframe, clearance between the steering column universal joint and the cut-out in the bulkhead must be checked.
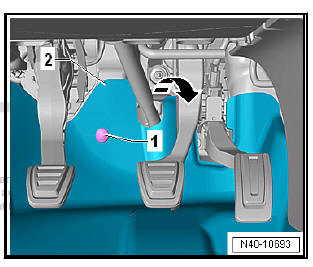
- Unscrew bolt -1- and fold footwell covering -2- in direction of arrow towards vehicle interior.

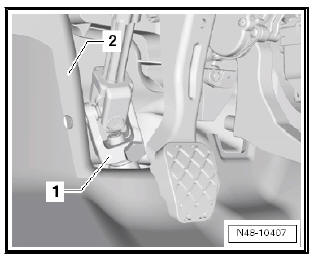
There must be a clearance of 5 mm all round between universal joint -1- and cut-out in bulkhead -2-.
Specified torques
- Bolts for noise insulation .

 Wheel alignment procedure
Overview - wheel alignment procedure
Note
The vehicle must always be in unladen condition when measuring
wheel alignment.
Operations should be carried out in the order shown!
- Drive vehicle o ...
 Adjusting camber at rear wheels
Adjusting camber on rear axle, torsion
beam axle
Camber cannot be adjusted.
If the measurements are outside the permitted tolerances, check
the axle beam for damage and renew if necessary.
Adju ...
See also:
Proper sitting position for front passenger
The front passenger must sit at least 25 cm away from the
dash panel so that the airbag can provide the greatest
possible protection in the event that it is triggered.
For your own safety and to re ...
