Seat Leon >> Renewing bonded rubber bush for lower suspension link
Renewing front bonded rubber bush for lower suspension link
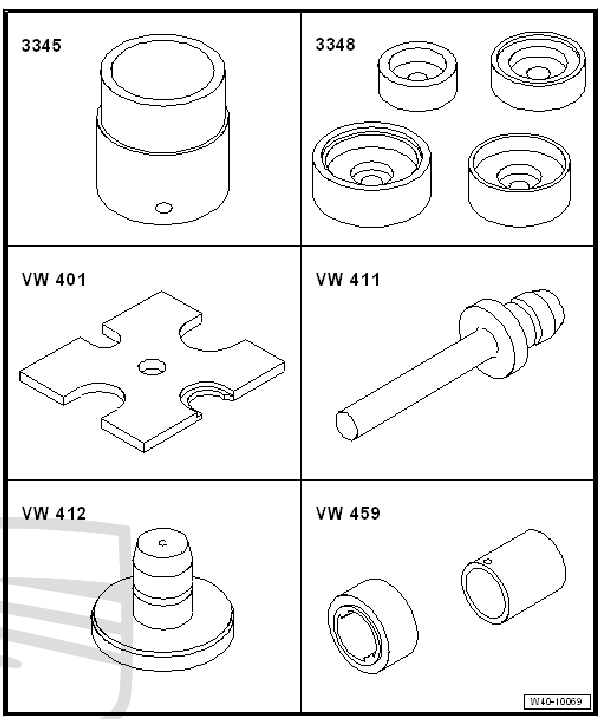
Special tools and workshop equipment required
- attachment tool - T10219-
- Tightening plate - VW 402-
- Die - VW 411-
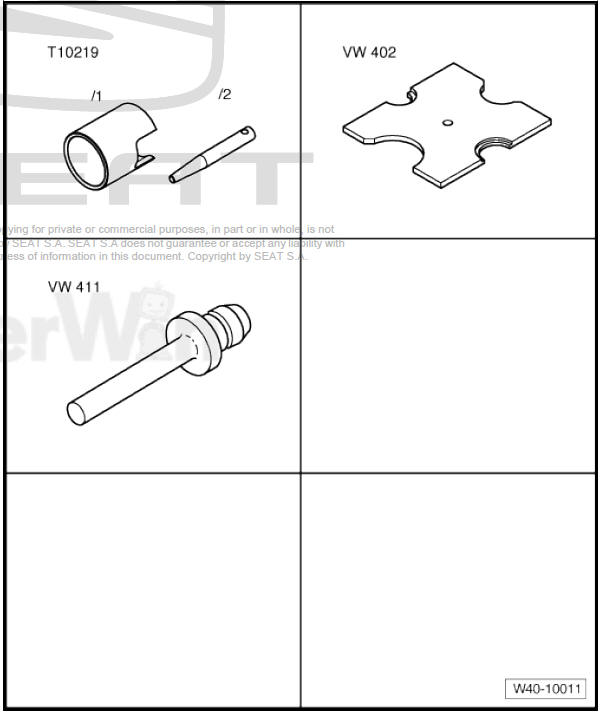
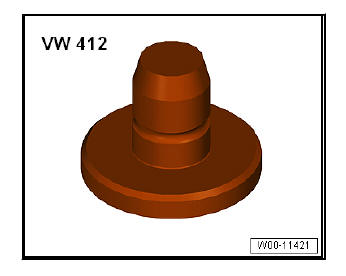
- Die - VW 412-
- Remove lower suspension link.
Pressing out bonded rubber bush
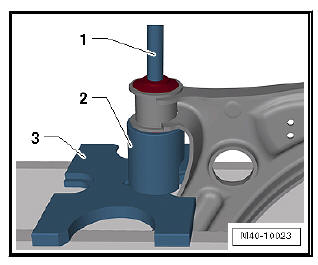
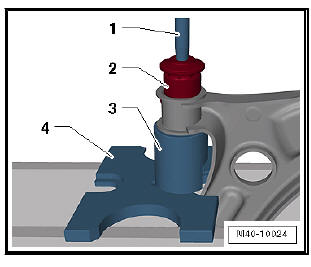
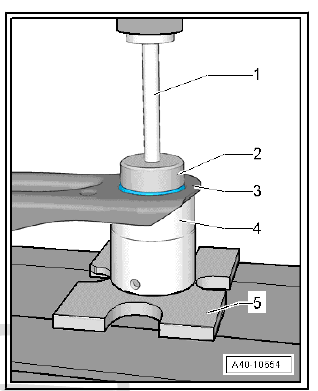
- Press out bonded rubber bush as shown.
- - Die - VW 411-
- - Tube - T10219/1- (the cut-out must face the suspension link)
- - Tightening plate - VW 402-
Insert the bonded rubber bush
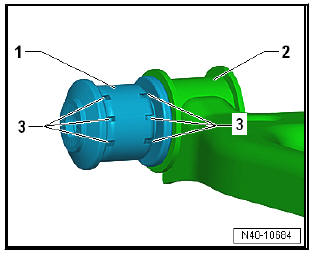
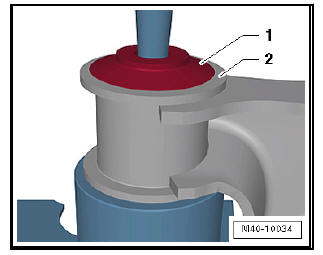
- Align bonded rubber bushes -1- to suspension link -2-.
The grooves -3- must face towards suspension link -2- as shown in illustration.
- Apply assembly lubricant - G 294 421 A1- to outside of bonded rubber bush.
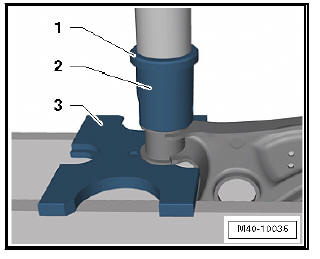
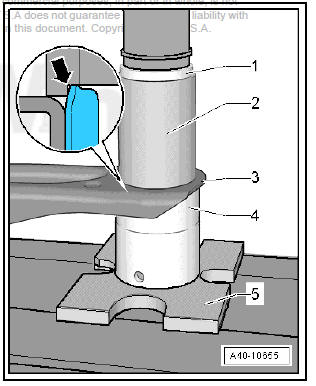
- Press in bonded rubber bush as illustrated.
- - Drift - T10219/2-
- - Bonded rubber bush
- - Tube - T10219/1- (the cut-out must face the suspension link)
- - Tightening plate - VW 402-
Note At start of pressing-in process, bonded rubber bush is temporarily slanted. During further procedure, the bonded rubber bush then straightens. It does not have to be pushed further.
- Press in bonded rubber bush until core of bush -1- and hole in suspension link -2- are flus
- Press bush back slightly in the suspension link.
- - Die - VW 412-
- - Pipe - T10219/1-
- - Tightening plate - VW 402-
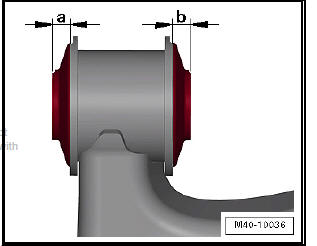
The dimensions -a- and -b- must be the same.
- Install lower suspension link
Renewing rear bonded rubber bush for lower suspension link
Special tools and workshop equipment required
- Tube for wheel bearing - 3345-
- attachment tool - 3348-
- Tightening plate - VW 401-
- Die - VW 411-
- Die - VW 412-
- Removal and installing tool - VW 459-
- Remove lower suspension link.
- Vehicles with manual gearbox or dual clutch gearbox 0CW
- Vehicles with dual clutch gearbox 0D9
Pressing out bonded rubber bush
- Press out bonded rubber bush as shown.
- - Die - VW 411-
- - attachment tool - 3348-
- - Wishbone
- - Tube for wheel bearing - 3345-
- - Tightening plate - VW 401-
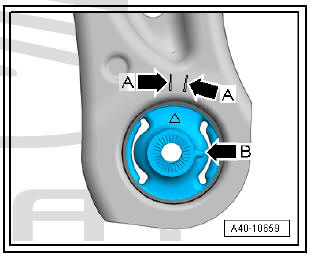
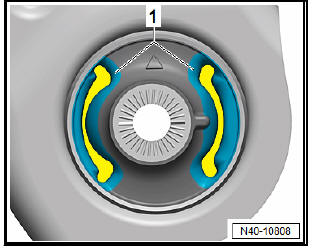
Installation position of bonded rubber bushes
- The embossed arrow points between the two markings -arrows A- in the wishbone.
- Lever -arrow B- must face centre of vehicle.
Insert the bonded rubber bush
- Press in bonded rubber bush as illustrated.
- - Die - VW 412-
- - Sleeve - VW 459/2- , inner shoulder of sleeve -arrow- faces downwards
- - Wishbone
- - Tube for wheel bearing - 3345-
- - Tightening plate - VW 401-
Note Press in bonded rubber bush until wheel bearing tube - 3345- makes contact with wishbone.
Grease bonded rubber bush:
The kidney-shaped area -1- of the rubber bush must be greased.
- To do this, apply grease from the upper side of the kidneyshaped area -1-.
- Use grease -N.052.150.00.- .
- The required quantity of grease for both sides is approx. 1 cm
-Dimension a-.
- Apply about half the grease quantity in each kidney-shaped area (approx. 0.5 cm).
- The grease must be applied to the upper side with a normal paint brush.
- The contact surfaces for the suspension link must not come into contact with the grease.
- Install lower suspension link

- Vehicles with manual gearbox or dual clutch gearbox 0CW
- Vehicles with dual clutch gearbox 0D9
 Removing and installing swivel joint
Special tools and workshop
equipment required
Ball joint puller - 3287 A-
Rotation angle spanner -
V.A.G 1756-
Insertable ring tool -
V.A.G 1332/10-
Special tools and workshop equipm ...
 Wheel bearing unit
Assembly overview - wheel bearing
- Cover plate
- Bolt
12 Nm
- Wheel bearing unit
Removing and installing
Cannot be repaired
- Bolt
Always renew after removing
L ...
See also:
Tow-starting
The use of jump leads is preferable to tow-starting.
We recommend that you do not tow-start your vehicle. Jump-starting
is preferable.
However, if your vehicle has to be tow-started:
– Engage th ...
