Seat Leon >> Additional brake lights
Assembly overview - high-level brake light
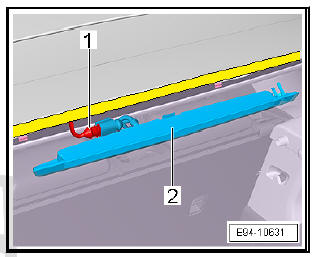
Assembly overview - high-level brake light on spoiler
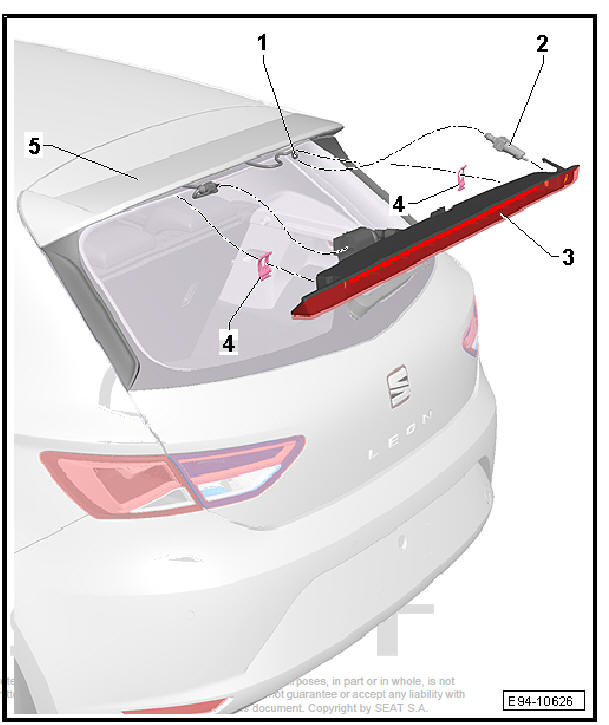
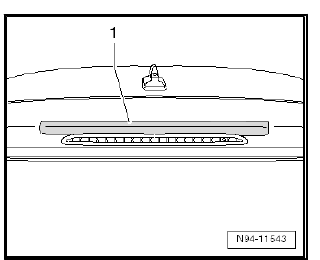
- - Light tube for the rear window
wiper fluid
- Version 1
- Version 2
- - Washer jet
- Removal and installation
- - Additional brake light bulb -
M25-
- Removal and installation
- - Retaining clips
- 2 Pieces
- - Spoiler
- Installing and removing
Removing and installing high-level brake light
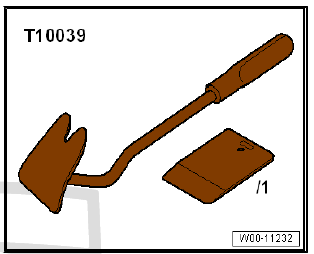
Note When removing and installing components that are in view (switches, covers, trim and so on), mask off areas in which tools ( assembly wedge - T10039/1- , screwdriver) are used to lever out those components using commercially available masking tape.
Special tools and workshop equipment required
- Wedge - T10039/1-
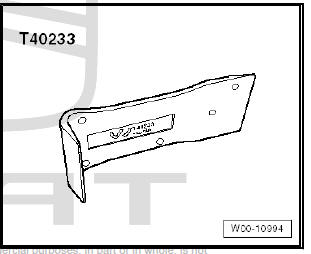
- Removal wedge mad of plastic - T40233-
Removing
Switch off ignition and all electrical consumers.
Vehicles without access and start authorisation system
- Remove ignition key, if fitted.
Vehicles with access and start authorisation system
- Store the ignition key outside the vehicle to prevent the ignition from being switched on unintentionally.
Continued for all vehicles
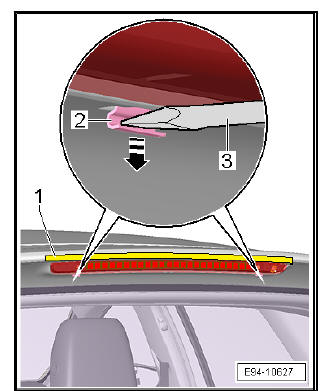
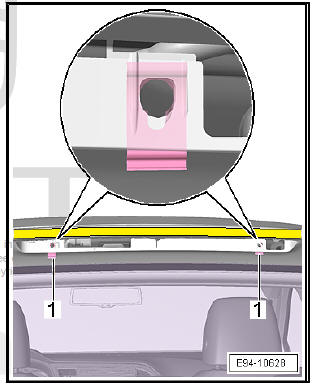
- Mask the area of the tailgate above the lamp for the additional brake light with a strip of regular adhesive tap -1-.
- Insert assembly wedge - T10039/1- -1- at top between bulb for additional brake light - M25- -2- and rear lid.
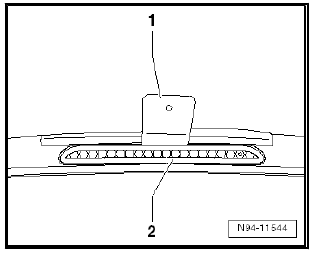
- Release catch of bulb for additional brake light - M25- by pushing assembly wedge in direction of front of vehicle.
- Take bulb for additional brake light - M25- out of rear lid, taking connected wiring lengths into account.
- Pull out hose lock -arrow- and pull off hose connection -1- from high-level brake light bulb - M25- .
- Release and pull connector -2- off and remove additional brake light bulb - M25- .
Installing
Installation is carried out in the reverse sequence; note the following:
Note On fitting the third brake light - M25- make sure that the seal is correctly positioned. The seal should not have kinks or be damaged in any way.
- Attach connector so that it latches into place.
- Starting at the lower edge, insert bulb for additional brake light into rear lid, making sure it engages securely.
- Check function of high-level brake light bulb - M25- .
Removing and installing high-level brake light on the spoiler
Note When removing and installing components that are in view (switches, covers, trim etc.), areas in which tools ( levers - U 30800- and screwdrivers) are used are to be masked off with commercially available adhesive tape.
Special tools and workshop equipment required
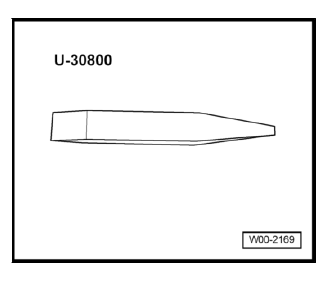
- Lever - U 30800-
Removing
- Switch off ignition and all electrical consumers.
Vehicles without access and start authorisation system
- Remove ignition key, if fitted.
Vehicles with access and start authorisation system
- Store the ignition key outside the vehicle to prevent the ignition from being switched on unintentionally.
Continued for all vehicles
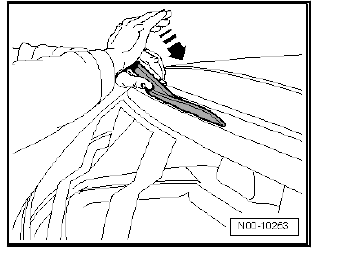
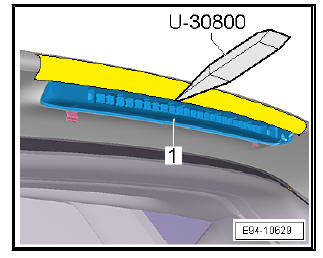
- Stick a strip of commercially available adhesive tape -1- in the spoiler area to the lamp of the high-level brake light - M25- .
- With the aid of a screwdriver -3- push the fasteners -2- in -the direction of the arrow-.
- Insert the lever - U 30800- from above between the lamp for the high-level brake light - M25- -1- and the spoiler.
- Remove the lamp for the high-level brake light - M25- of the spoiler whereby care is to be taken with the length of fluid hose to the screen wash nozzle and the connected wiring.
Version 1
- Release the retaining clips -arrows- and disconnect the screen wash nozzle -2- from the lamp for the high-level brake light - M25- -1-.
Version 2
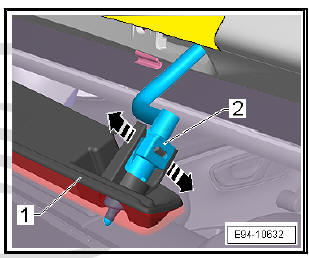
- Release the retaining clips -1- -arrows- and disconnect the fluid hose from the screen wash nozzle -2-.
Continue for all vehicles
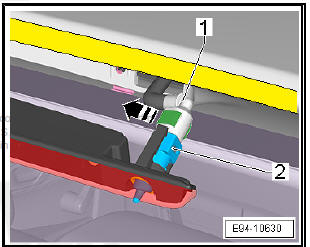
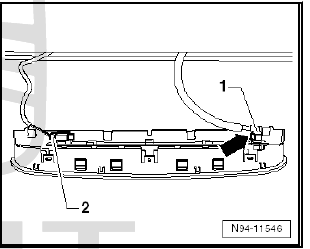
- Disconnect the electrical connector -1- of the lamp for the high-level brake light - M25- -2-.
Installing
Installation is carried out in the reverse sequence; note the following:
- Plug in connector.
- Snap the hose onto the screen wash nozzle.
Place the retaining clips -1- in installation position.
- Insert the lamp for the high-level brake light - M25- into the spoiler and snap into place.
- Push the retaining clips on until they close with the spoiler.
- Check function of high-level brake light bulb - M25- .
 Removing and installing turn signal bulb
Installing and removing turn signal
bulbs, Leon / Leon SC
Removing
Switch off ignition and all electrical consumers.
Vehicles without access and start authorisation system
Remove ignition ...
 Number plate light
Installing and removing number plate
light X4 / X5
Removing
Switch off ignition and all electrical consumers.
Vehicles without access and start authorisation system
Remove ignition key, i ...
See also:
Removing and installing inner door cover
Special tools and workshop equipment required
Release lever - 3409-
Removing
Removing interior trim of front door.
Move electrical wiring harness -4- clear.
With the wedge - 3409- det ...
