Seat Leon >> Removing and installing poly V-belt pulley
Removing and installing poly V-belt pulley without freewheel
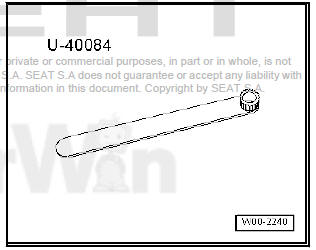
Special tools and workshop equipment required
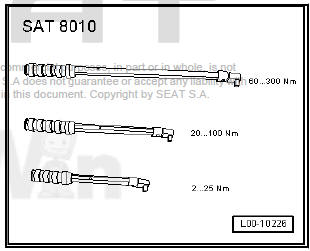
- Torque wrenches - SAT 8010-
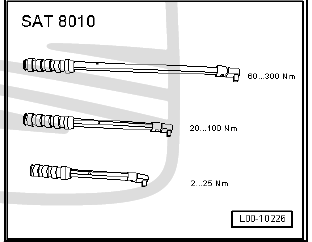
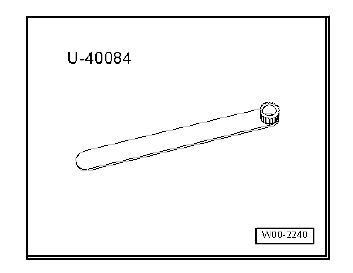
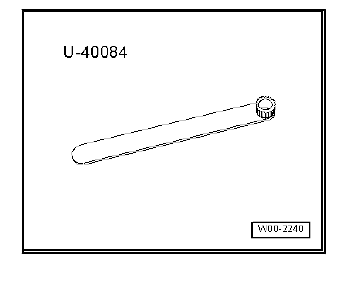
- Wrench - U 40084-
Removing
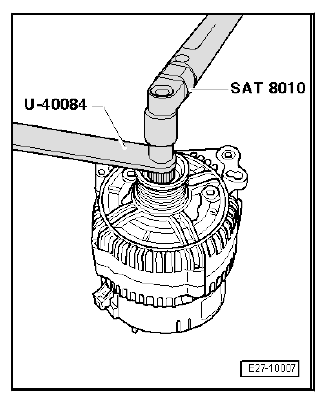
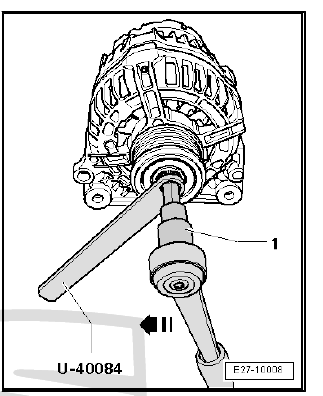
- Remove alternator.
- Place the alternator in a vice at the appropriate points.
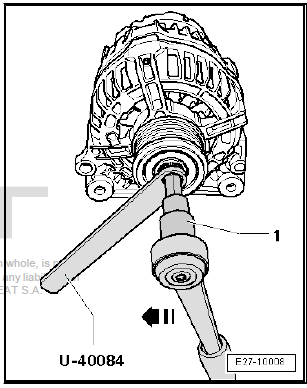
- Remove the poly-V pulley with the aid of the spanner - U 40084- .
Installing
Installation is carried out in the reverse sequence; note the following:
Caution
|
Removing and installing poly-V belt pulley with free wheel, manufacturer: Bosch
Special tools and workshop equipment required
- Torque wrenches - SAT 8010-
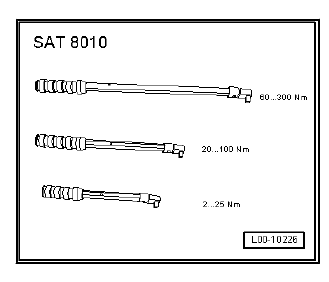
- Socket wrench XZN 1/2" M 10 long point - SAT 1006/2 10L-
- Polygonal adaptor - U 40084-
Removing
- Remove alternator.
- Place the alternator in a vice using the appropriate points.
- Remove the protective hood of the poly-V belt free wheel pulley.
Note The thread of the alternator shaft is a counter clockwise rotating thread. Therefore, when releasing, turn to the right and turn to the left, when tightening.
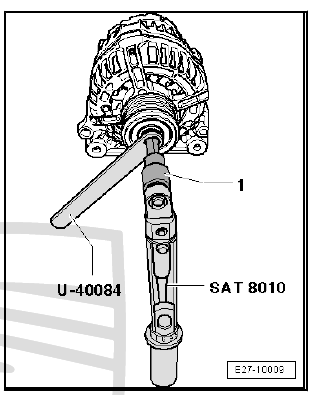
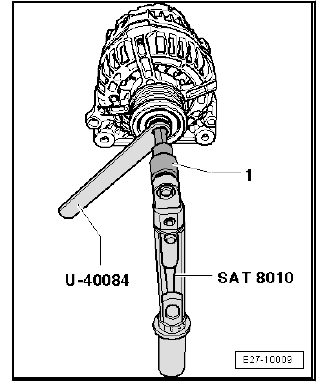
- Introduce the tool polygonal adaptor - U 40084- to the alternator pulley.
- Introduce the the socket wrench XZN 1/2" M10 long point - SAT 1006/2 10L- -1- on the alternator axle.
- Loosen the screw joints turning to the right (immobilising the axle with the polygonal spanner).
- Hold the poly-V belt free wheel pulley and turn the alternator axle until the pulley can be removed.
Installing
Installation is carried out in the reverse sequence; note the following:
- Bolt the poly-V belt with freewheel pulley onto the alternator axle (screw in by hand until the stop).
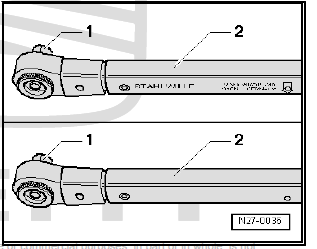
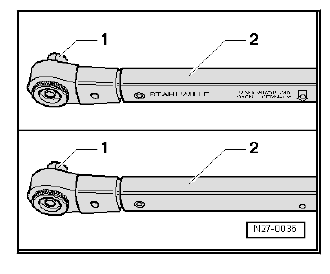
To install the poly-V belt freewheel pulley, the torque wrench - SAT 8010- must be adapted as follows:
- Release the socket -1- and remove it from the handle -2-.
- Turn the handle -2- of the torque wrench 180º and place the socket.
- Set turning direction of torque wrench to anti-clockwise on socket drive.
- Introduce the the socket wrench XZN 1/2" M10 long point - SAT 1006/2 10L- -1- on the alternator axle.
- Use the polygonal adapter - U 40084- tool to immobilise the axle.
- Tighten the Poly-V belt pulley without freewheel sprocket: In order to do this, turn the alternator shaft to the left using the torque wrench - SAT 8010- .
Removing and installing poly-V belt pulley with free wheel: manufacturer: Valeo
Special tools and workshop equipment required
- Torque wrenches - SAT 8010-
- Socket spanner TORX 1/2 T50 long point - SAT 1006/8 50L-
- Polygonal adaptor - U 40084-
Removing
- Remove alternator.
- Place the alternator in a vice using the appropriate points.
- Remove the protective hood of the poly-V belt free wheel pulley.
Note The thread of the alternator shaft is a counter clockwise rotating thread. Therefore, when releasing, turn to the right and turn to the left, when tightening.
- Insert the multi-point adapter - U 40084- into the Poly-V belt with the free running of the alternator using a ring spanner SW 17.
- Fit the TORX screwdriver insert - SAT 1006/8 50L- into the alternator's shaft.
- Loosen the screw joints turning to the right (and locking with the polygonal spanner).
- Hold the poly-V belt free wheel pulley and turn the alternator axle until the pulley can be removed.
Installing
Installation is carried out in the reverse sequence; note the following:
- Bolt the poly-V belt with freewheel pulley onto the alternator axle (screw in by hand until the stop).
To install the poly-V belt freewheel pulley, the torque wrench - SAT 8010- must be adapted as follows:
- Release the socket -1- and remove it from the handle -2-.
- Turn the handle -2- of the torque wrench 180º and place the socket.
- Set turning direction of torque wrench to anti-clockwise on socket drive.
- Fit the TORX screwdriver insert - SAT 1006/8 50L- into the alternator's shaft.
- Counterhold the multi-point adapter - SAT 40084- using the ring spanner SW 17.
- Tighten the Poly-V belt pulley without freewheel sprocket: In order to do this, turn the alternator shaft to the left using the torque wrench - SAT 8010- .
 Alternator: repairs
Assembly overview - Valeo alternator
- Alternator
- Voltage regulator
Removal and installation
Checking brushes
- Double bolt 2 Nm
- Cover
- Protective cap
- Hexagon bolt - ...
 Removing and installing voltage regulator
Voltage regulator: removing and installing
- manufacturer: Bosch .
Special tools and workshop equipment required
Torque screwdriver - V.A.G 1624-
Removing
Remove alternator
Carefully ...
See also:
Removing and installing refrigerant circuit
pressure sender - G805-
WARNINGDanger from refrigerant escaping under pressure!
Freezing of skin and other body parts.
If when loosening the G805 refrigerant escapes for more
than 1 second from the cool ...
