Seat Leon >> Removing and installing sill panel trim
SEAT Leon Service and Repair Manual / General body repairs, exterior / Exterior equipment / Mouldings / trims / extensions / Removing and installing sill panel trim
Removing and installing side member trim, X-PERIENCE version
Special tools and workshop equipment required
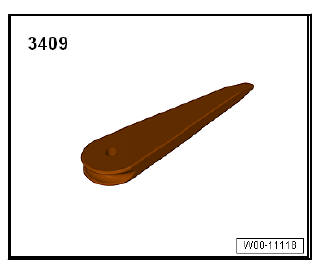
- Release lever - 3409-
- Adhesive strip remover - VAS 6349-
- Torque wrench - V.A.G 1331-
- Hot-air blower - VAG 1416-
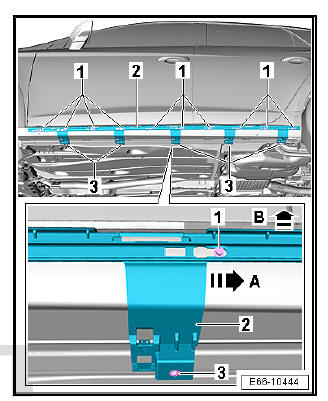
Removing
- Unscrew bolts -2-, -3- and -4-.
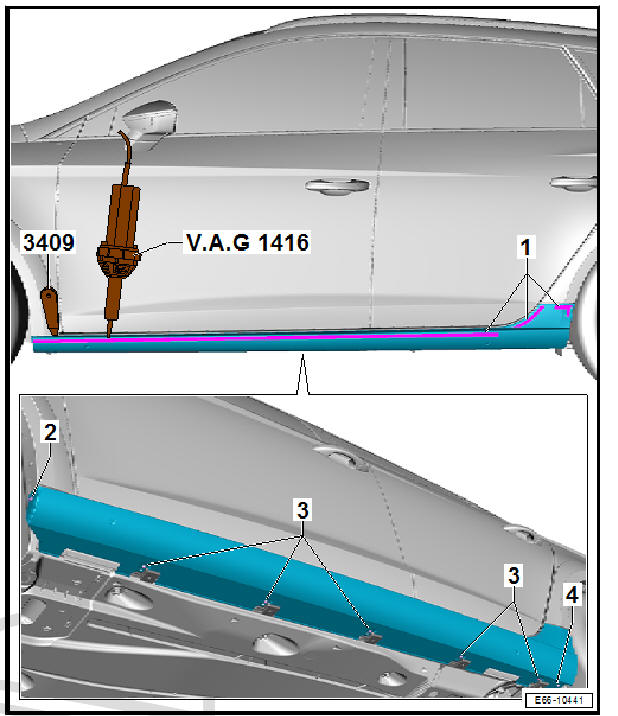
- Heat up the side member extension in the bonding surface area -1- before removal with a hot air blower - VAG 1416- .
- Carefully attach the lever - 3409- between side member and side member extension.
- Pull the side member extension from the tabs of the retaining strip in the lower and upper part.
- Take the side member extension away upwards from the retaining strip.
fitting
Preparing side member
- Remove possible adhesive residues on the side member with the tool - VAS 6349- .
- Clean the area of the side member where the side member extension is to be affixed with isopropyl alcohol or heptanol.
- Subsequently treat the side member mounting zone with silicone cleaner.
- Allow to dry well.
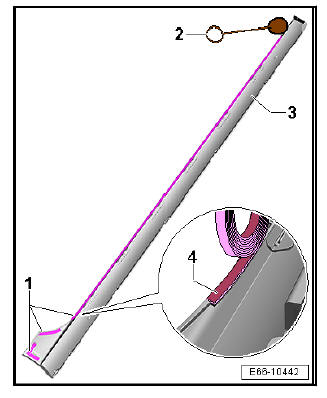
Preparing side member extension for installation
- Remove adhesive residues present -1- on the side member extension -3-.
- Clean the area of the side member extension tailgate where the doubled-sided adhesive tape is to be applied with isopropyl alcohol or heptanol.
- Then treat the area where the doubled-sided adhesive tape should be applied using silicone cleaner.
- Allow to dry well.
- Apply to the zone -1- an even coating of Primer - D .
181.650.A1- ; use the applicator - D 009 500 25- .
Flashing-off time, approx. 10 minutes.
- Stick the new double-sided adhesive tape -4- to the surface of the side member extension.
Fitting notes
Observe the fitting instructions
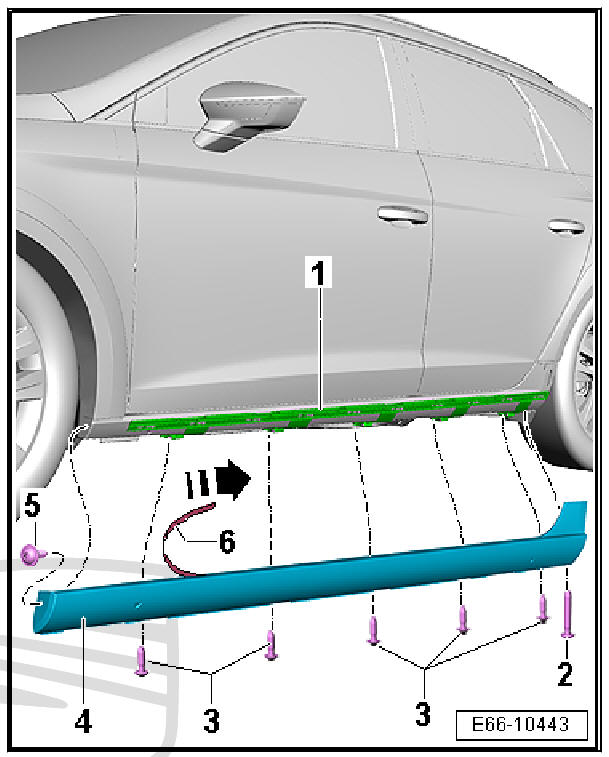
- Attach side member extension -4- to retaining strip -1-.
- Align side member extension -4- in longitudinal direction of vehicle.
- Insert bolt -5-.
- Align side member extension -4- with vehicle.
- Screw bolts -2- and -3- in the lower part of the bracket.
- Check position of side member extension -4-.
- Pull protective foils -6- of double-sided adhesive tape on side member extension -4- off upwards and backwards.
- Press on side member extension -4- forcefully and evenly in bonding area.
- Tighten the bolt -5-.
Removing and installing retaining strip, X-PERIENCE version
Special tools and workshop equipment required
- Torque wrench - V.A.G 1331-
- Cordless power driver
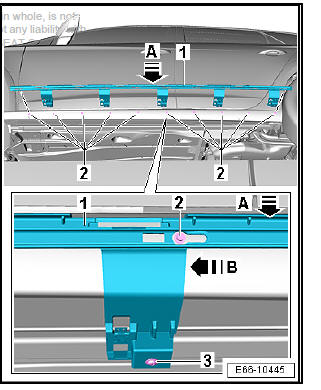
Removing
- Removing side member extension.
- Slacken off bolts -3-.
- Loosen bolts -1-, but they do not need to be unscrewed.
- Push out the retaining strip -2- backwards to the limit stop -arrow A- and take out in -the direction of the arrow B-.
fitting
- Screw in self-tapping screws -2- using cordless screwdriver at maximum speed, until the screws bite.
- Remove cordless drill/driver immediately.
- Tighten bolts -2- to least possible torque.
- Attach the retaining clip -1- evenly -arrow A- with the openings above all securing bolts -2-, until the retaining strip lies against the side member.
- To ensure that all securing bolts remain in the openings when sliding on, fit retaining strip with aid of a second mechanic.
- Push retaining strip -1- back to the limit stop -arrow B-.
- Installing side member extension
 Exploded view - side member trim
- Bolt.
10 off
1.5 Nm
- Clips
5 off
- Support plate
5 off
Secured to underbody
with spreader clip.
- Retaining strip
- Double-sided adhesive
tape
- ...
 Removing and installing wheel arch
trims
Removing and installing wheel arch
trims
Removing and installing front wheel
arch trims
Special tools and workshop equipment required
Release lever - 3409-
Adhesive strip remover - VAS 6349-
Torque wrench - V.A.G 1331-
...
See also:
Locking and unlocking the vehicle
The remote control key can be used to lock and unlock the
vehicle from a distance.
Fig. 63 Assignment of
buttons on the remote
control key
Fig. 64 Range of the
Using the button fig. 63 ...
