Seat Leon >> Removing and installing rear door window
Special tools and workshop equipment required
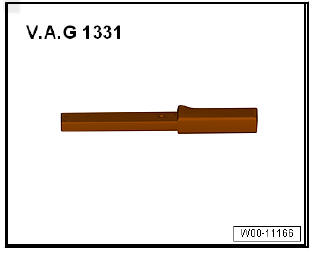
- Torque wrench - V.A.G 1331-
Wedge - 3409-
- Removing
- Installation

Note The sequences below describe the processes for removal and installation for the left side of the vehicle. The corresponding sequences for the right side are similar with the exception that, where applicable, the scope of the process is written by yourself.
Removing
- Open the rear door.
- Move door window to "open" position.
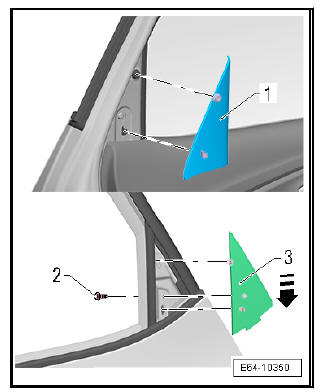
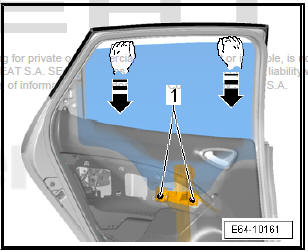
- Remove the trim -1- using the lever - 3409- .
Note The bolts -2- of the left door are unscrewed to the right and with the right door, to the left.
- Unscrew the bolt -2-.
- Remove the trim-3-.
- Install the exterior window shaft seal .
- Remove interior trim of back door.
- Remove the interior protection cover
- Using the lever - 3409- remove the bushing -2-.
- Insert the plug connector of the window lifter switch.
- Switch on ignition.
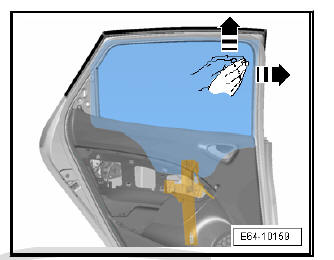
- Move the door window until you can access the bolts and spreader grommets -1- of the window clamps.
- Switch off the ignition and clip out and remove the connector of the window riser switch.
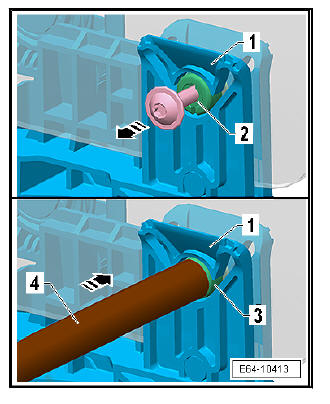
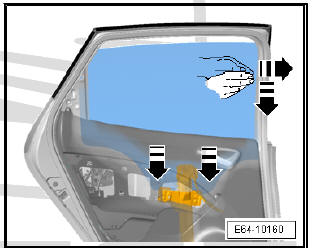
- Apply lubricant to bolts and expansion anchors -1-.

- Screw in a 5 mm screw (about 70 mm long) into the expanding bolt two by maximum -2- rotations.
- Using a suitable tool, remove the screw in the direction of the -arrow- and pull the expanding bolt -2- out of the expansion anchor by moving back and forth -3-.
Note Keep one hand on the back of the window to prevent the expansion anchor -3- from falling into the door frame.
- Use a punch -4- ø 12 and a nylon hammer to remove the expansion anchor -3-.
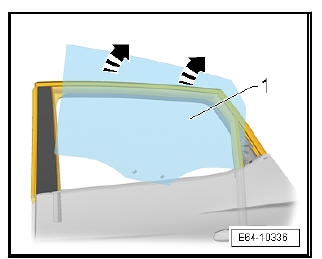
- Pull door window -1- upwards at an angle -arrows- to vehicle exterior out of window slot.
fitting
Note
- When carrying out the installation on the door window, the expanding grommets and expanding bolts must be replaced.
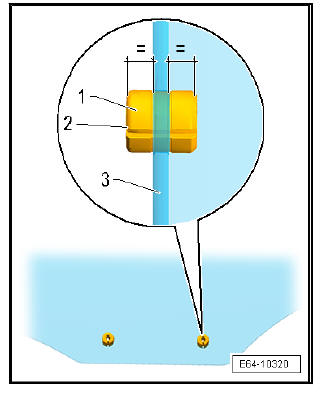
- Before inserting the expanding grommet -1- and the expanding bolt -2-, make sure that the window -3- is not damaged.
- When the window is removed -3- position the expanding grommets -1- and centre in the middle.
- The distance between the ends of the expanding grommets -1- and the side window must be the same -3-.
- Engage the expanding bolts -2- flush with the expanding grommets -1-.
- Insert window -2- in -arrow direction- into the tracks -1- .
- Make sure that the window is located correctly in its mount in the door.
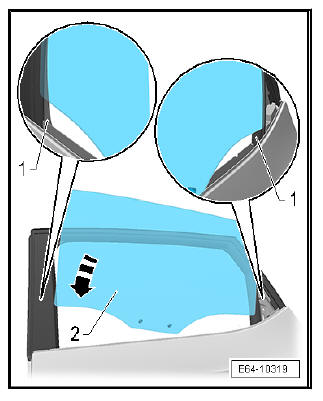
- Press the window against the upper edge of the door frame -arrows-.
- Pull the window to the clamping pieces and fit it on the door frame -arrows-.
- Press firmly on the window and make sure the clamping pieces are reached and there is complete contact with the door frame -arrows-.
Fit in reverse order from removal, remembering the following.
| Caution Before mounting the door trims, the function of the manipulated components must be checked. |
Adjusting rear door window
Synchronisation and storage of window course
| WARNING In the process of removal and fitting of the door glass, both front and back, the movement should be adapted and stored in the memory. |
Note To synchronise and store the window course, it is necessary for the automatic opening and closing functions for the window to operate properly.
- Move the window upwards last until it stops using the up / down switch.
- As soon as the window is in the uppermost position, actuate up switch again for 5 seconds.
- Then move the window downwards until it stops using the switch.
- As soon as the window is in the bottommost position, actuate down switch again for 5 seconds.
- Check the mode of operation of the automatic raising or lowering operation of the window.
Automatic raising and lowering: commissioning
Note After disconnecting and connecting the battery, the mechanic deactivates the automatic raising and lowering of the windows.
To renew the activation of this function after the battery is connected, the following procedure is carried out:
- Close the vehicle from the outside via the drivers door. Make sure that all doors and windows are closed completely.
- Unlock the vehicle and re-lock via the driver's door and, at the same time, leave the key in the lock position for at least one second.
The automatic raising/lowing of the windows is re-activated in this manner.
Errors in the electrical mechanism are shown by the flashing warning lights of all doors.
After the ignition is turned on, all warning lights of door trims flash for 15 seconds.
 Removing and installing front door window
Special tools and workshop equipment required
Release lever - 3409-
Removing
Note
The sequences below describe the processes for removal and
installation for the left side of the vehicle. ...
 Exterior equipment
Exterior equipment, main components
- Roof railing
- Spoiler
- Rear wheel housing
- Outer rear view mirrors
- Front wheel housing liner
- Strips and emblems
...
See also:
Assembly overview - towing bracket
socket
Assembly overview - Socket for trailer hitch, Leon / Leon SC
- Control unit for trailer detection
- J345- .
Removal and installation.
- Bracket/bearing/support
For fastening the ...
