Seat Leon >> Removing and installing brake fluid reservoir
Removing and installing brake fluid reservoir, left-hand drive vehicle
Special tools and workshop equipment required
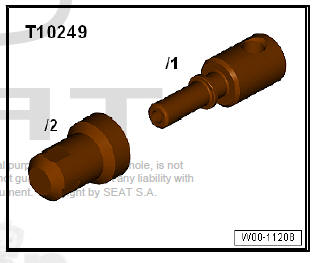
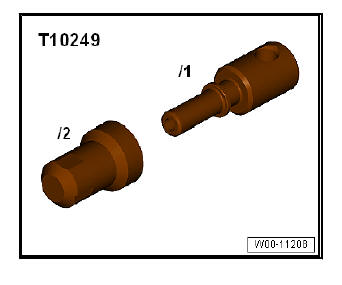
- Sealing tool - T10249-
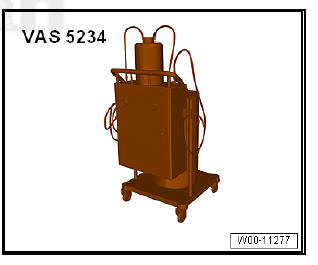
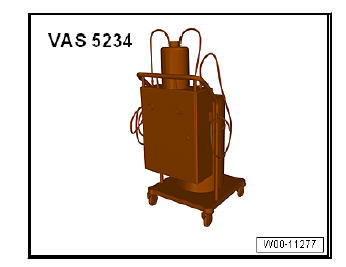
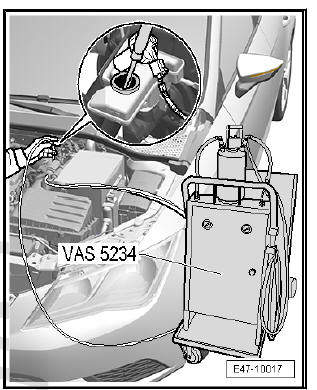
- Brake filling and bleeding equipment - VAS 5234-
Removing:
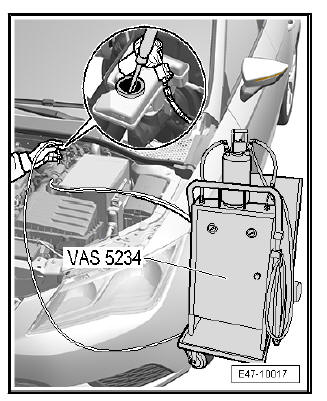
- Draw off as much brake fluid as possible from brake fluid reservoir using brake filling and bleeding equipment - VAS 5234- and adapter - VAS 5234/1- .
- To protect against escaping brake fluid, place a number of lintfree cloths in area beneath brake master cylinder.
Vehicles with diesel engines
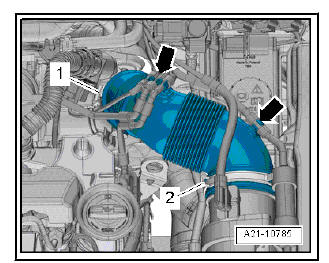
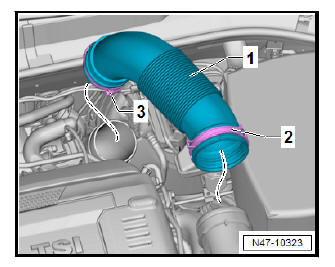
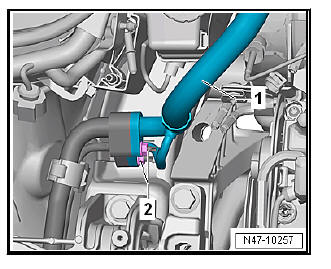
- Free vacuum hose -arrows-.
- Loosen hose clips -1 and 2-, remove ventilation pipe.
Vehicles with 1.8-l and 2.0-l petrol engines
- Loosen hose clips -2 and 3-, remove ventilation pipe.
Vehicles with manual gearboxes
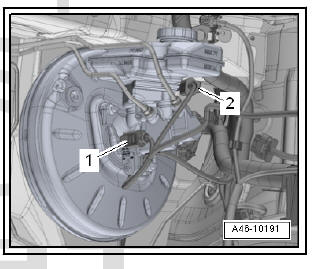
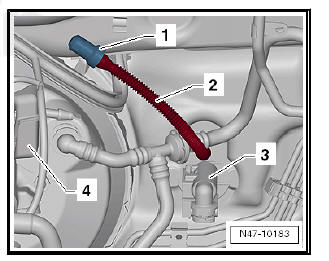
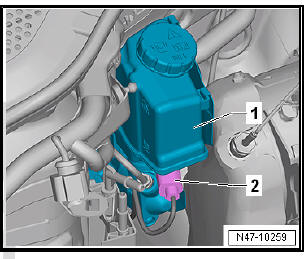
- Pull return hose -2- for clutch sender cylinder -3- off brake fluid reservoir -4-.
- Seal return hose -2- for clutch sender -3- with sealing tool - T10249- - 1-.
- Tie return hose -2- in place above.
Continued for all vehicles

- Unplug electrical connector for brake fluid level warning contact - -F34-- -2-.
- Remove lock pin -1- and pull brake fluid reservoir -2- off the sealing plugs.

Note Push brake line slightly to one side.
Installation:
Carry out installation in the reverse sequence, noting the following:
- Lightly lubricate seals with brake fluid before installing brake fluid reservoir.
- Fit brake fluid reservoir.
| Caution Make sure that the brake fluid reservoir engages in the retainers and is seated securely. |
- Bleed brake system .
Vehicles with manual gearboxes
- Bleed clutch control mechanism .
| Caution Before performing the first test drive, make sure that the brakes are operating correctly. |
Removing and installing brake fluid reservoir, right-hand drive vehicle
Special tools and workshop equipment required
- Sealing tool - T10249-
- Brake filling and bleeding equipment - VAS 5234-
Removing:
- Draw off as much brake fluid as possible from brake fluid reservoir using brake filling and bleeding equipment - VAS 5234- and adapter - VAS 5234/1- .
- To protect against escaping brake fluid, place a number of lintfree cloths in area beneath brake master cylinder.
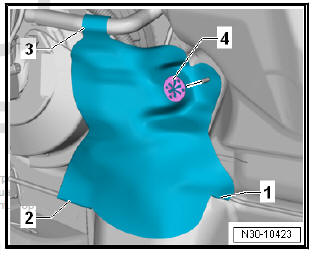
- If present, remove heat shield.
- To do so, remove clamping washer -4- from bulkhead.
- Open snaps -1- to -3- on heat shield.
- Pull return hose -2- for clutch sender cylinder -3- off brake fluid reservoir -4-.
- Seal return hose -2- for clutch sender -3- with sealing tool - T10249- - 1-.
- Tie return hose -2- in place above.
- Remove heat shield -1- if present.
- To do this, unscrew bolt -3-.
- Pull heat shield -1- upwards out of retainers -arrows- on brake fluid reservoir -2-.
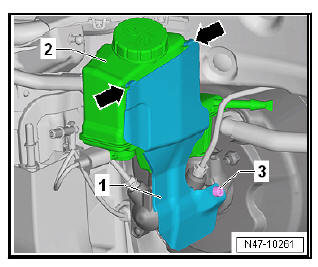
- Release electrical connector -2- for brake fluid level warning contact - F34- and pull it off brake fluid reservoir -1-.
- Pull out lock nut -3- in -direction of arrow-.
- Pull brake fluid reservoir -1- upwards off brake master cylinder -2-

- When doing this, gently press refrigerant line -1- upwards.
Installation:
Carry out installation in the reverse sequence, noting the following:
- Lightly lubricate seals with brake fluid before installing brake fluid reservoir.
- Fit brake fluid reservoir.
| Caution Make sure that the brake fluid reservoir engages in the retainers and is seated securely. |
- Bleed brake system .
Vehicles with manual gearboxes
- Bleed clutch control mechanism .
| Caution Before performing the first test drive, make sure that the brakes are operating correctly. |
 Removing and installing brake master
cylinder
Removing and installing brake master
cylinder
Removing and installing brake master
cylinder, LHD
Special tools and workshop equipment required
Torque wrenches - V.A.G 1331-
Brake filling and bleeding equipment - VAS 5234-
Remov ...
 Vacuum system
...
See also:
Removing and fitting the condenser
Removing and fitting the condenser
Special tools and workshop equipment required
Air conditioner service station
Engine bung set - VAS 6122-
Removal:
Turn off the ignition and all elec ...
