Seat Leon >> Assembly overview - rear brakes
SEAT Leon Service and Repair Manual / Brake system / Brakes - mechanism / Rear brakes / Assembly overview - rear brakes
Rear brake - exploded view, brakes CI 38 for live axle and manual parking brake
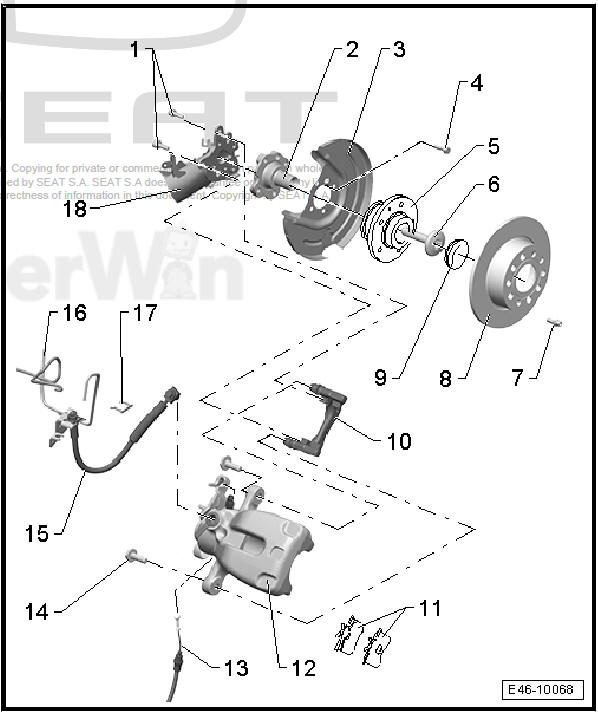
- - Brake carrier bolt
- 90 Nm + 90º
- Renew
- - Wheel bearing housing
- Removing and installing
- - Splash plate for brakes
- Removing and installing
- - Bolt
- Renew
- 30 Nm + 90º
- - Wheel hub with wheel bearing
- Removing and installing
- - Bolt XZN
- Tightening torque
- - Bolt
- 4.5 Nm
- - Brake disc
- Do not separate the brake disks from the wheel hubs by force. If necessary, use an oxide solvent; otherwise the brake disks may be damaged.
- If worn, renew on both sides of axle
- Wear limit
- Remove brake caliper and brake carrier prior to removing.
- Removing and installing
- - Cover plate
- Pressing off and pressing on
- - Brake back plate
- Screw to wheel bearing housing
- With guide pins
- Removing and installing
- - Brake pads
- With spring.
- Wear limit
- Checking pad thickness
- Removing and installing
- Always replace by axles
- - Brake calliper
- Do not undo the brake line when replacing brake pads
- Removing and installing
- Repairing
- Adjust handbrake after repairing or renewing it
- - Hand brake cable
- Removing and installing
- Adjusting handbrake
- - Bolt, 35 Nm
- Self-locking
- When loosening and tightening, lock the guide pin
- Replace after each removal
- - Brake hose
- With banjo union and banjo bolt
- on the brake caliper, 35 Nm
- on the brake pipe, 14 Nm
- - Brake pipe
- - Elastic hook
- - Rear axle
- Removing and installing
Exploded view - rear brake, brakes PC 38 and CII 41 for multi-link suspension and manual brake
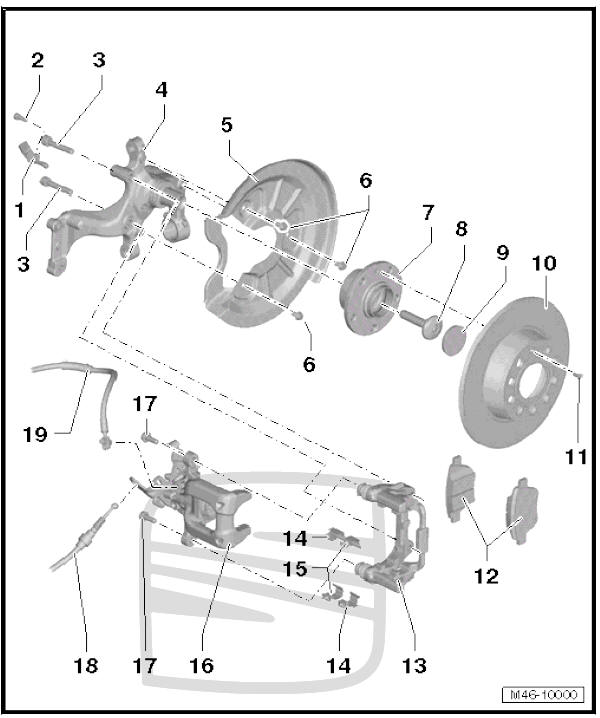
- - Rear speed sensor
- Before inserting sensor, clean the inner surface of the bore and coat with high-temperature paste
- Removing and installing
- - Bolt
- 8 Nm
- - Brake carrier bolt
- 90 Nm + 90º
- Renew
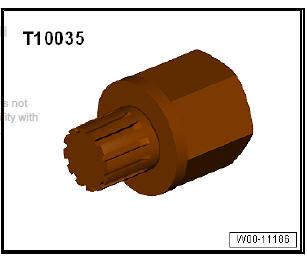
- Unscrew using the screw bit - T10035-
- - Rear axle
- Removing and installing
- - Splash plate for brakes
- Removing and installing
- - Bolt
- 12 Nm
- M 6 x 12
- 4 off
- - Wheel hub with wheel bearing
- Removing and installing
- - Bolt XZN
- Tightening torque
- - Cover plate
- Pressing off and pressing on
- - Brake disc
- Do not separate the brake disks from the wheel hubs by force. If necessary, use an oxide solvent; otherwise the brake disks may be damaged.
- If worn, renew on both sides of axle
- Wear limit
- Remove brake caliper and brake carrier prior to removing.
- Removing and installing
- - Bolt
- 4 Nm
- - Brake pads
- Wear limit
- Checking pad thickness
- Removing and installing
- Always replace by axles
- - Brake back plate
- Screw to wheel bearing housing
- With guide pins
- Removing and installing
- - Pad retainer
- Always replace when brake pads are replaced
- The anti-rattle springs are different to each other and can only be installed diagonally to each other.
- - Pad retainer
- Always replace when brake pads are replaced
- The anti-rattle springs are different to each other and can only be installed diagonally to each other.
- - Brake calliper
- Do not undo the brake line when replacing brake pads
- Removing and installing
- Repairing
- Adjust handbrake after repairing or renewing it
- - Bolt
- 35 Nm
- Self-locking
- When loosening and tightening, lock the guide pin
- Replace after each removal
- - Brake cable
- Removing and installing
- Adjusting handbrake
- - Brake hose
- With banjo union and banjo bolt
- on the brake caliper, 35 Nm
- on the brake pipe, 14 Nm
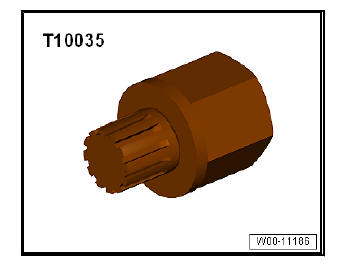
Tool insert - T10035-
Assembly overview - rear wheel brake, brakes FNc-M38 for electronic parking brakes
Note
- Use the brake filling and bleeding equipment - VAS 5234- to draw off brake fluid from the brake fluid reservoir.
- Before removing a brake caliper or disconnecting a brake hose, fit brake pedal depressor - V.A.G 1869/2- (when doing this, release pressure in system).
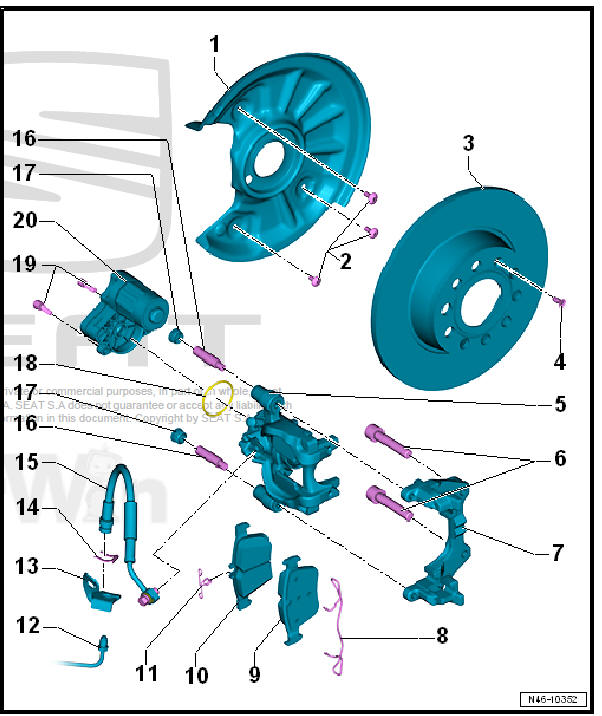
- - Splash plate for brakes
- Removing and installing
- - Torx bolt
- 12 Nm
- - Brake disc
- Do not separate the brake disks from the wheel hubs by force. If necessary, use an oxide solvent; otherwise the brake disks may be damaged.
- If worn, renew on both sides of axle
- Wear limit
- Removing and installing
- - Torx bolt
- 8 Nm
- - Brake calliper
- Do not undo the brake line when replacing brake pads
- Removing and installing
- Repairing
- After repairing or removal, perform "Basic setting" using - Vehicle diagnostic tester.
- - Internal splined bolt
- Install and remove with - T10035- plug insert.
- Replace after disassembly
- 90 Nm + 90º
- - Brake back plate
- - Retaining spring
- - Outer brake pad
- Wear limit
- Checking pad thickness
- Always replace by axles
- Removing and installing
- - Inner brake pad
- With spring.
- Wear limit
- Checking pad thickness
- Always replace by axles
- Removing and installing
- - Spring
- Only fitted on inner brake pad
- Check fitting position
- - Brake pipe
- 14 Nm
- - Support
- - Retaining spring for brake hose to bracket
- - Brake hose with banjo union with banjo bolt
- Connection to brake caliper, 35 Nm
- On brake line, 14 Nm
- - Guide pin
- 35 Nm
- - Hoods
- For guide pin.
- - Seal
- For parking brake motor
- Renew
- - Hexagon socket head bolt
- 8 Nm
- - Parking brake motor.
- Removing and installing
Tool insert - T10035-
 Rear brakes
...
 Removing and installing brake pads/linings
Removing and installing brake pads, vehicles
with manual parking brake
Note
Use brake filling and bleeding equipment - VAS 5234- to extract
brake fluid from brake fluid reservoir.
Special tools a ...
See also:
Removing and installing refrigerant circuit
pressure sender - G805-
WARNINGDanger from refrigerant escaping under pressure!
Freezing of skin and other body parts.
If when loosening the G805 refrigerant escapes for more
than 1 second from the cool ...
