Seat Leon >> Removing and installing brake pads/linings
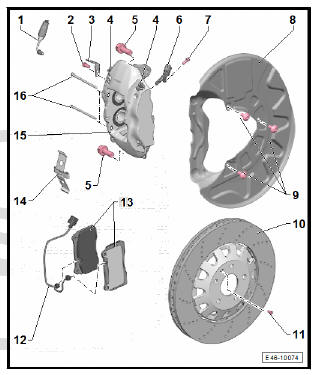
Removing and installing brake pads, brake caliper FS III
Note Use brake filling and bleeding equipment - VAS 5234- to extract brake fluid from brake fluid reservoir.
Special tools and workshop equipment required
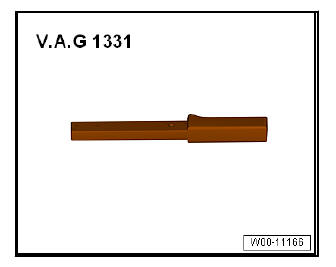
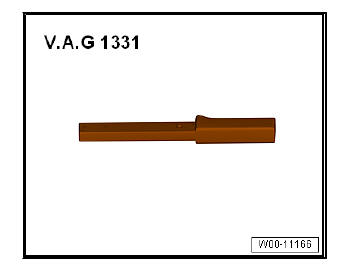
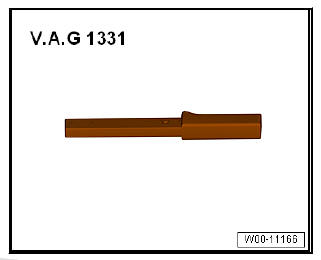
- Torque wrenches - V.A.G 1331-
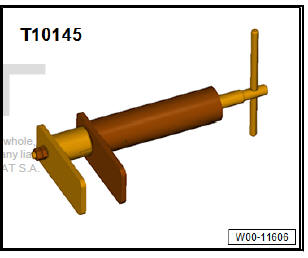
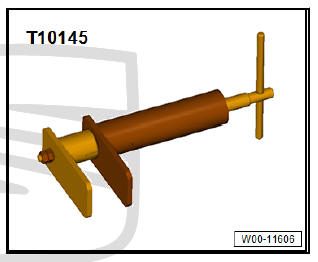
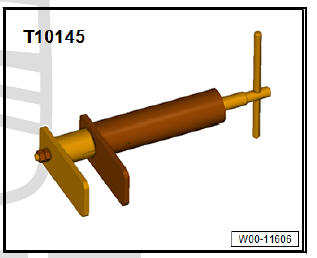
- Piston resetting appliance - T10145-
Removing:
Note If you are going to use the brake pads again, mark them when you remove them. Put them back in the same positions, otherwise, the braking effect will not be even.
- Remove wheels.
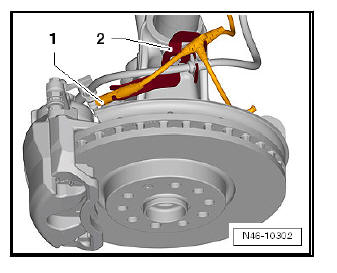
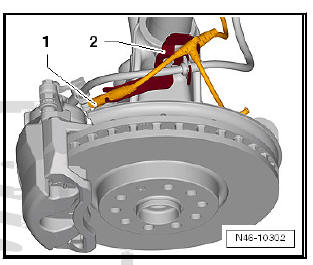
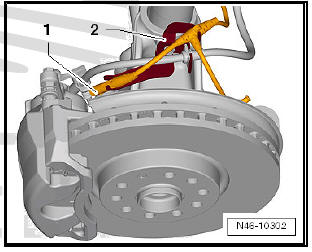
- Disconnect connector -1- for brake pad wear indicator.
Note The plug connection of the brake pad wear indicator is located on the right side of the vehicle.
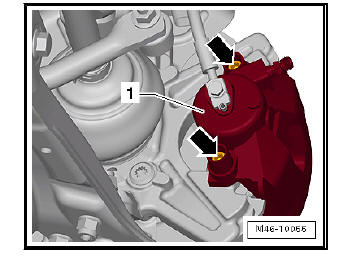
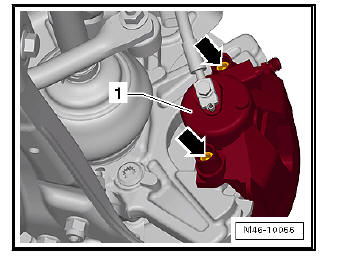
- Remove the protective caps -arrows-.
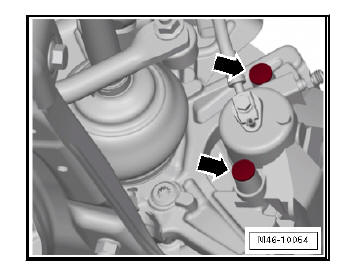
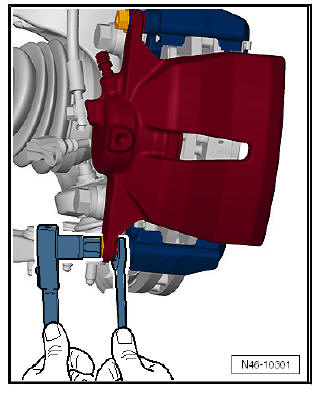
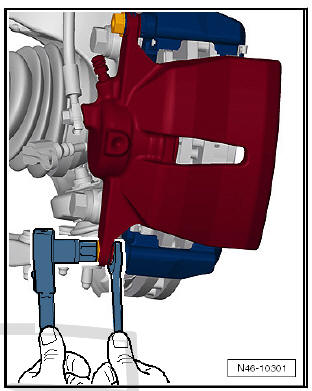
- Loosen both guide pins -arrows- of the brake caliper -1- and take out.
- Remove brake calliper -1- and secure with wire so that weight of brake calliper does not strain or damage brake hose.
- Remove brake pads from brake calliper.
Cleanliness:
| WARNING Never clean the brake system with compressed air; harmful dust particles will be released. Only use methylated spirits to clean the brake calliper. |
- Thoroughly clean the brake plate in the areas of contact with the brake pads and remove corrosion.
- Clean the brake calliper.
Installation:
| Caution Before pressing piston back into cylinder with piston resetting tool, draw off brake fluid from brake fluid reservoir. Otherwise, if brake fluid has been refilled, this might leak and cause damage. |
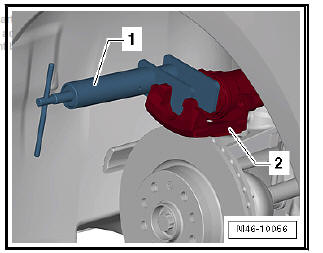
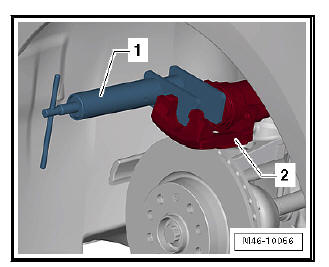
- Insert piston resetting tool - T10145- -1- into brake calliper -2- and push back brake piston.
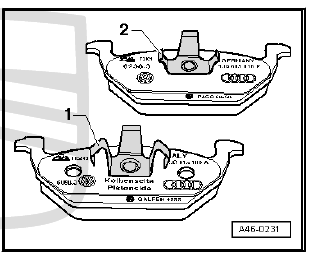
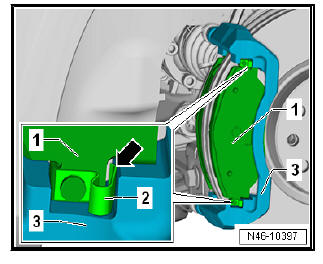
- Insert inner brake pad (piston side) -1- and outer brake pad -2- into brake calliper with retaining springs.
- Inner brake pad (piston side) with large 3-finger clip -1-.
- Outer brake pad with small 3-finger clip -2- (coloured black).
- First, place brake caliper -2- together with brake pads -3- on bottom -arrow A- of the brake carrier -1-.
- Pin -arrow B- of brake calliper -1- must be positioned behind backplate guide -1-!
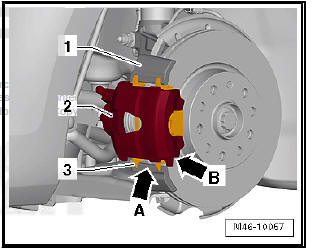
- Bolt brake calliper -1- with both guide pins -arrows- to backplate.
- Fit cover caps.
- Connect brake pad wear indicator connector -1-.
Note The plug connection of the brake pad wear indicator is located on the right side of the vehicle.
- Fit the wheels.
Note After changing pads, check the brake fluid level.
| WARNING After installing the brake pads, depress pedal firmly several times with the vehicle stationary, so that the brake pads are properly seated in their normal operating position. Make sure that the brakes work properly before the vehicle is driven on the road. |
Removing and installing, brake pads, brake calliper FN III
Note Use brake filling and bleeding equipment - VAS 5234- to extract brake fluid from brake fluid reservoir.
Special tools and workshop equipment required
- Torque wrenches - V.A.G 1331-
- Thrust piece - T10145-
Removing:
Note If you are going to use the brake pads again, mark them when you remove them. Put them back in the same positions, otherwise, the braking effect will not be even.
- Remove wheels.
- Disconnect connector -1- for brake pad wear indicator.

Note The plug connection of the brake pad wear indicator is located on the right side of the vehicle.
- Unscrew both securing bolts from brake calliper; to do this, counterhold on guide pin.
- Remove brake calliper -1- and secure with wire so that weight of brake calliper does not strain or damage brake hose.
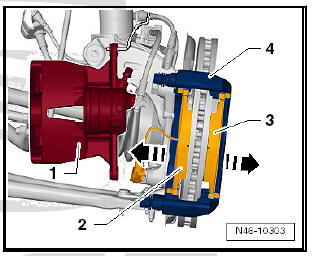
- Remove brake pads -2 and 3- from brake support plate -4-.
Cleanliness:
| WARNING Never clean the brake system with compressed air; harmful dust particles will be released. Only use methylated spirits to clean the brake calliper. |
- Thoroughly clean the brake plate in the areas of contact with the brake pads and remove corrosion.
- Clean the brake calliper.
Installation:
| Caution Before pressing piston back into cylinder with piston resetting tool, draw off brake fluid from brake fluid reservoir. Otherwise, if brake fluid has been refilled, this might leak and cause damage. |
- Insert piston resetting tool - T10145- -1- into brake calliper -2- and push back brake piston.
- Lightly grease brake pad guide surface on the brake carrier with lithium grease G 052150 A2 .
- Place the brake pads -1- together with retaining springs -2- in the recess of the brake support plate -3-.
Note Check when fitting the brake pads that all retaining springs -2- are properly -arrow-.
- Carefully place the brake calliper on the brake support plate.
| Caution Use new bolts. |
- Secure brake calliper to brake support plate with new self-locking bolts, counterholding with the guide bolts.
- Connect brake pad wear indicator connector -1-.
Note The plug connection of the brake pad wear indicator is located on the right side of the vehicle.
- Fit the wheels.
Note After changing pads, check the brake fluid level.
| WARNING After installing the brake pads, depress pedal firmly several times with the vehicle stationary, so that the brake pads are properly seated in their normal operating position. Make sure that the brakes work properly before the vehicle is driven on the road. |
Removing and installing brake pads, Brembo brake calliper
Note Use brake filling and bleeding equipment - VAS 5234- to extract brake fluid from brake fluid reservoir.
Special tools and workshop equipment required
- Torque wrenches - V.A.G 1331-
- Thrust piece - T10145-
Removing:
Note If you are going to use the brake pads again, mark them when you remove them. Put them back in the same positions, otherwise, the braking effect will not be even.
- Raise vehicle.
- Remove wheels.
Note The pad wear indicator wire is only installed at the right brake calliper.
- Unclip pad wear indicator wire -12- from bracket.
Note Do not loosen bolts -5-.
- Unplug electrical connector from pad wear indicator wire.
- Press brake pistons at brake pads slightly back into brake caliper using a suitable tool.
Note Take care not to scratch or damage brake caliper.
- Pull pad wear indicator wire -12- out of retaining clip -14-.
- Pull one brake pad retaining pin -16- out of brake caliper. While doing so, press down retaining clip -14-.
- Pull second brake pad retaining pin -16- out of brake caliper.
- Take brake pads out of brake caliper.
Cleanliness:
| WARNING Never clean the brake system with compressed air; harmful dust particles will be released. Only use methylated spirits to clean the brake calliper. |
- Thoroughly clean the brake plate in the areas of contact with the brake pads and remove corrosion.
- Clean the brake calliper.
Installation:
| Caution Before pressing piston back into cylinder with piston resetting tool, draw off brake fluid from brake fluid reservoir. Otherwise, if brake fluid has been refilled, this might leak and cause damage. Brake fluid is toxic and should never be sucked by mouth using a flexible tube. |
Before installing the new brake pads, the brake pistons have to be pulled back using the piston resetting tool - T10145- .
- Lightly grease brake pad guide surface on the brake carrier with lithium grease G 052150 A2 .
- If provided, peel adhesive foil off back of brake pads.
- Insert brake pads into brake caliper.
| Caution Observe the correct installation position of the brake pads. The arrow on the back of the brake pads must point in the direction of forward rotation of the brake disc. |
Note The brake pad wear indicator wire is installed in both brake pads of the right brake calliper.
- Slide one brake pad retaining pin -16- through brake caliper and brake pads from inside to outside.
- Insert retaining spring -14- underneath retaining pin -16-.
- Slide second retaining pin through brake caliper and brake pads from inside to outside. While doing so, press down retaining spring -14-.
| WARNING Both brake pad retaining pins must be pressed through the brake caliper and the brake pads as far as the stop so that the spring is seated at the retaining pin in the brake caliper. |
- Insert pad wear indicator wire -12- in retaining spring -14-.
- Connect pad wear indicator wire.
- Insert pad wear indicator wire in bracket.
- Fit the wheels.
Note After changing pads, check the brake fluid level.
| WARNING After installing the brake pads, depress pedal firmly several times with the vehicle stationary, so that the brake pads are properly seated in their normal operating position. Make sure that the brakes work properly before the vehicle is driven on the road. |
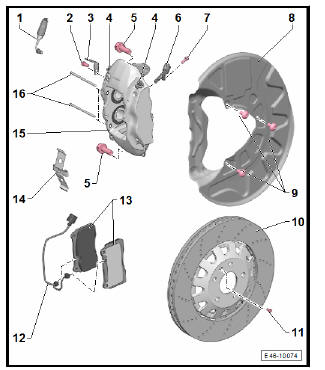
 Assembly overview - front brakes
Exploded view - front brake caliper FS III
- Bolt
70 Nm + 90º
Renew
4 off
- Wheel bearing housing
With integrated brake
carrier.
- Front speed sensor to part
B ...
 Removing and installing brake calliper
Removing and installing brake caliper,
FS III brake caliper
Note
Use brake filling and bleeding equipment - VAS 5234- to extract
brake fluid from brake fluid reservoir.
Before removing brake ...
See also:
Frontal collisions and the laws of physic
In the event of a frontal collision, a large amount of kinetic
energy is generated.
Fig. 6 Passengers of a
vehicle heading for a brick
wall. They are not wearing
seat belts.
Fig. 7 The vehic ...
