Seat Leon >> Removing and installing spring
Removing and installing spring, torsion beam axle
Special tools and workshop equipment required
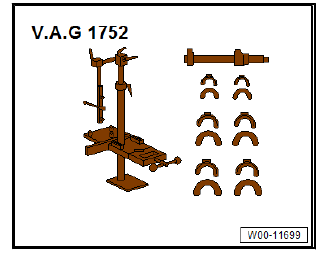
- Spring tensor - V.A.G 1752/1-
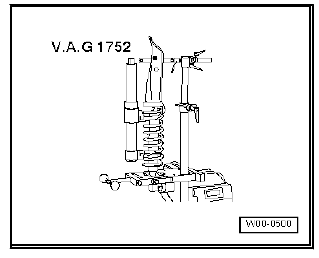
- Spring retainer - V.A.G 1752/3A-

- Adapter - V.A.G 1752/9- , not illustrated
Removing
- Remove rear wheel on affected side.
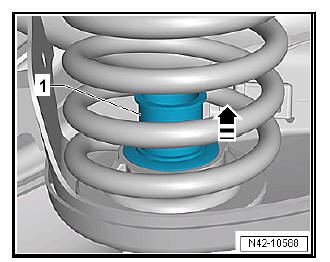
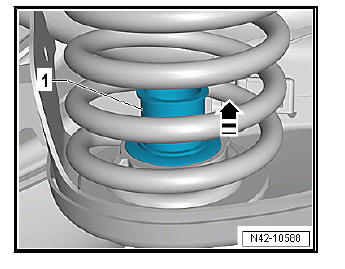
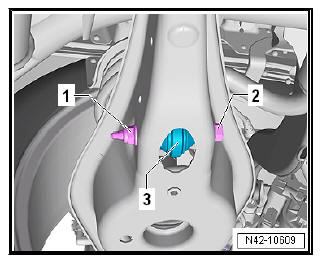
- Pull out clip -1- as far as it will go in direction of -arrow-.
- Attach spring compressor -1-.
- - Spring tensor - V.A.G 1752/1-
- - Spring retainer - V.A.G 1752/3A-
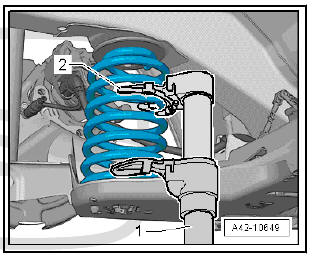
| WARNING Ensure that coil spring is correctly seated in spring retainers - V.A.G 1752/3A- -2-. |
- Compress coil springs until they can be removed.
Note Use a spanner or a reversible ratchet handle to compress spring compressor.
Installing
Carry out installation in the reverse sequence, noting the following:
- Check that the lower plate is not damaged.
- If necessary, replace the lower spring plate.
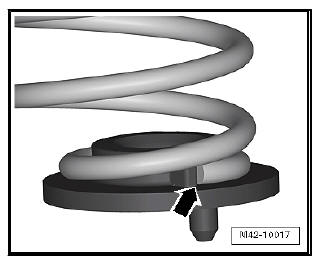
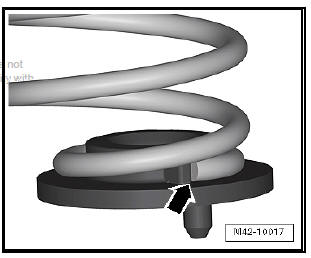
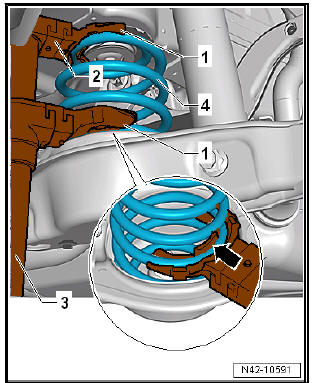
- Place lower plate onto bottom of coil spring.
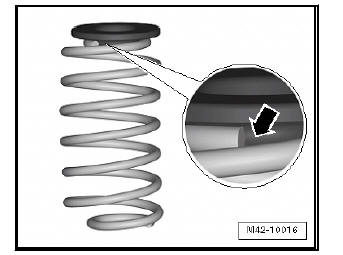
End of spring -arrow- must lie against stop on bottom spring seat.
- Mount spring together with spring plate.
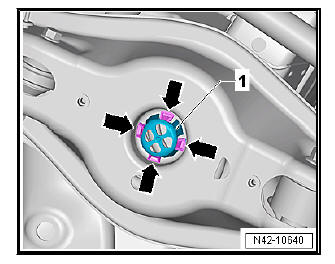
- The bottom spring seat has a pin.
- Insert this pin into hole in torsion beam axle.
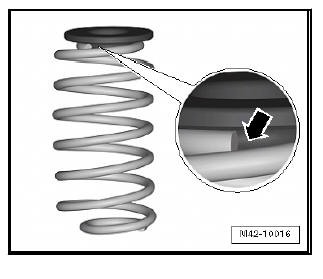
- Insert upper spring seat into upper end of spring.
- Bead of spring seat -arrow- must lie against coil spring correctly.
- Release tension on spring while locating upper spring seat on lug on body.
- Remove spring tensioner .
- Push in clip -1- against the-direction of arrow-to the stop.
Removing and installing spring, multilink suspension
Special tools and workshop equipment required
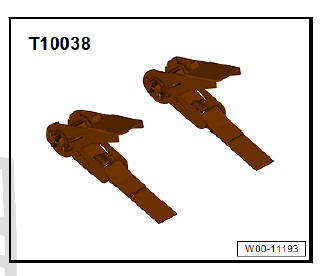
- Support tool - T10038-
- Torque wrenches - V.A.G 1332-
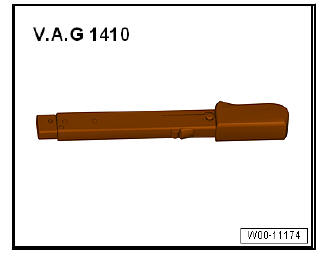
- Torque wrenches - V.A.G 1410-
- Suspension strut clamp - V.A.G 1752-
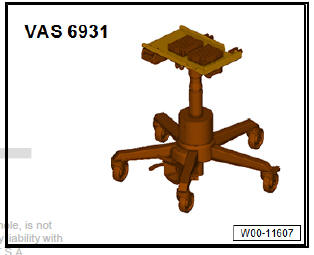
- Engine and gearbox jack - VAS 6931- or - V.A.G 1383 A-
Removing
- Remove rear wheel on affected side.
- Use tensioning straps - T10038- to strap vehicle to support beams of lifting platform on both sides.
- - Support tool - T10038-
| WARNING If the vehicle is not strapped down, there is a great danger that the vehicle will slip off the lifting platform! |
Vehicles with vehicle level senders
- Remove bolts -1-.
- Remove retainer for rear left vehicle level sender -2-.
Continuation for all models:
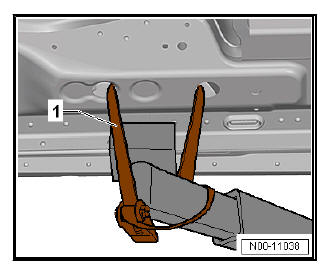
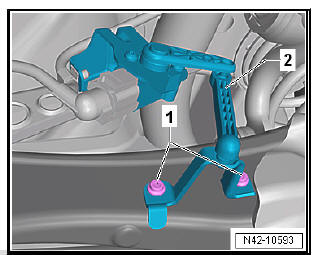
- Press lugs -arrows- of assembly aid -1- inwards.
- Remove assembly aid -1- upwards.
- Position engine and gearbox jack - VAS 6931- or - V.A.G 1383 A- under the transverse link and push it slightly upwards.
- Insert spring compressor -3-.
- - Spring retainer - V.A.G 1752/3A-
- - Adapter - V.A.G 1752/9-
- - Spring tensor - V.A.G 1752/1-
- - Spring
| WARNING Ensure that coil spring is correctly seated in spring retainer - V.A.G 1752/3A- -arrow- (accident risk). |
Note Use a spanner or a reversible ratchet handle to compress spring compressor.
- Clamp coil spring.
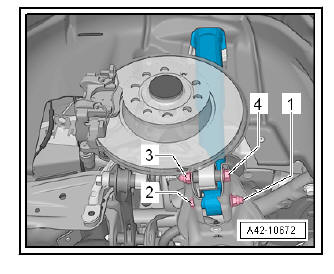
- Undo nut -1- and pull out bolt -2- for coupling rod -3-.
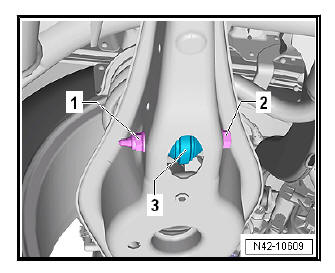
- Unscrew nut -1- and pull out bolt -2- securing shock absorber.
- Unscrew nut -3- and pull out bolt -4- securing wheel bearing housing.
| WARNING Hold spring compressor - V.A.G 1752/1- with the compressed spring (risk of accident). |
- Lower engine and gearbox jack - VAS 6931- or - V.A.G 1383 A- underneath the transverse link below, until the spring compressor - V.A.G 1752/1- can be removed with compressed spring.
Installing
Installation is carried out in the reverse order. During this step, observe the following:
- Check that the lower plate is not damaged.
- If necessary, replace the lower spring plate.
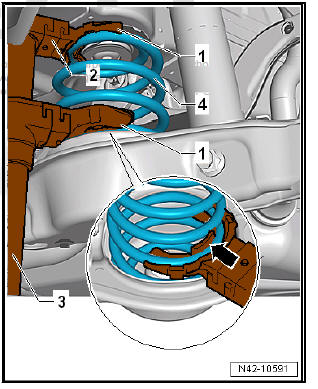
- Place lower plate onto bottom of coil spring.
End of spring -arrow- must lie against stop on bottom spring seat.
- Mount spring together with spring plate.
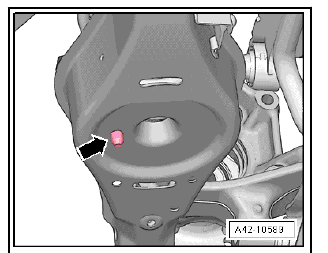
- The bottom spring seat has a pin.
- Insert this pin in holes in lower transverse link -arrow-.
- Insert upper spring seat into upper end of spring.
- Bead of spring seat -arrow- must lie against coil spring correctly.
| WARNING Hold spring compressor - V.A.G 1752/1- with the compressed spring (risk of accident). |
- Push engine and gearbox jack - VAS 6931- or - V.A.G 1383 A- under the transverse link upwards.
- Insert bolt -4- for wheel bearing housing, and screw on nut -3-.
- Insert bolt -2- for shock absorber, and screw on nut -1-.

- Insert bolt -2- for coupling rod -3-, and screw on nut -1-.
- Release tension on spring -4- while locating upper spring seat on lug on body.
- Remove spring compressor -3-.
- - Spring retainer - V.A.G 1752/3A-
- - Adapter - V.A.G 1752/9-
- - Spring compressor - V.A.G 1752/1-
- - Spring
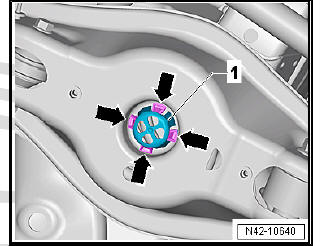
- Insert assembly aid -1- and press downwards.
- Lugs -arrows- must engage.
- On vehicles with vehicle level sender, carry out basic settings for wheel damper electronics - Vehicle diagnostic tester.
 Repairing shock absorber
- Shock absorber
Removing and installing
Defective shock absorbers
must always be degassed
and drained before
disposal
Checking shock absorber
following removal
- Gua ...

See also:
Assembly overview - steering box
Assembly overview - steering box, left-hand drive
CautionThe following work must not be performed while
the universal
joint is separated from the steering rack:
Not adhering to these ...
