Seat Leon >> Assembly overview - anti-roll bar
SEAT Leon Service and Repair Manual / Running gear, axles, steering / Rear suspension / Anti-roll bar / Assembly overview - anti-roll bar
Assembly overview - anti-roll bar, multi-link suspension, front-wheel drive
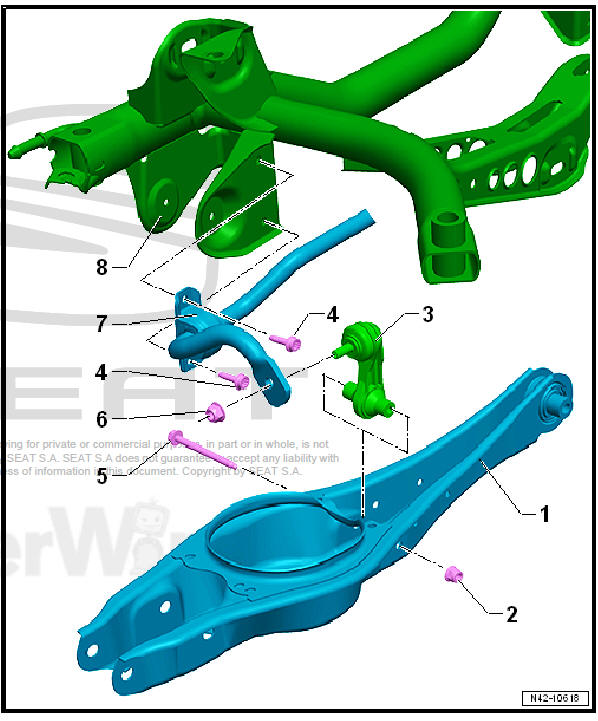
- - Lower transverse arm
- - Nut
- Always renew after removing
- 20 Nm +180º
- - Connecting rod
- Removing and installing
- - Bolt
- Tighten evenly
- Always renew after removing
- 20 Nm +90º
- - Bolt
- Always renew after removing
- - Nut
- When tightening, counterhold at multi-point socket of coupling rod
- 55 Nm
- - Anti-roll bar
- With rubber bushes
- Removing and installing
- - Sub-frame
Assembly overview - anti-roll bar, multi-link suspension, four-wheel drive
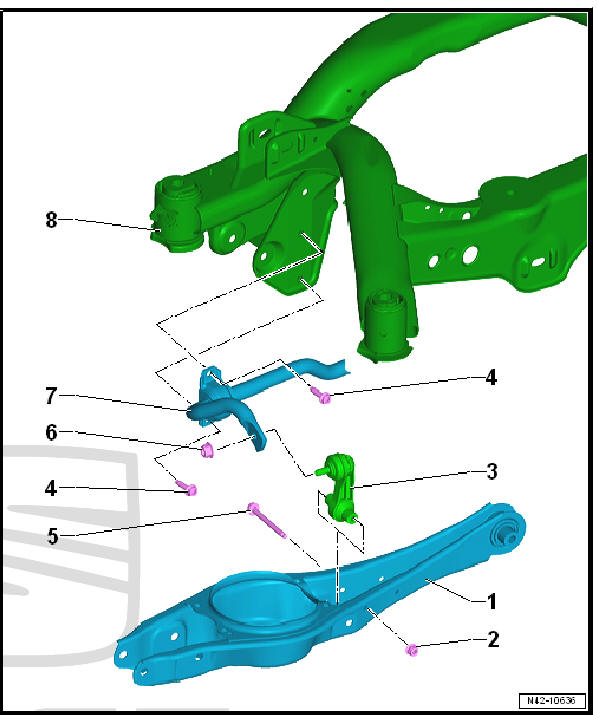
- - Lower transverse arm
- - Nut
- Always renew after removing
- 20 Nm +180º
- - Connecting rod
- Removing and installing
- - Bolt
- Tighten evenly
- Always renew after removing
- 20 Nm +90º
- - Bolt
- Always renew after removing
- - Nut
- When tightening, counterhold at multi-point socket of coupling rod
- 55 Nm
- - Anti-roll bar
- With rubber bushes
- Removing and installing
- - Sub-frame
 Anti-roll bar
...
 Removing and installing anti-roll bar
Special tools and workshop equipment required
Torque wrenches - V.A.G 1331-
Removing
Remove rear wheels.
Note
The following steps are described for the left side of the vehicle.
Th ...
See also:
Removing and installing glass panel
Removing glass panel (with functional
control motor)
Removing
Open the panoramic window by moving it about 150 mm to the
back.
From the outside, remove the screws -arrow- on both sides ...
