Seat Leon >> Suspension strut - Repair
SEAT Leon Service and Repair Manual / Running gear, axles, steering / Front suspension / Suspension strut, upper suspension
link / Suspension strut - Repair
Special tools and workshop equipment required
- Torque wrenches - V.A.G 1332-
- Spring tensor - V.A.G 1752/1-
- Spring retainer - V.A.G 1752/4-
- Shock absorber set - T10001-
- Commercially available ratchet
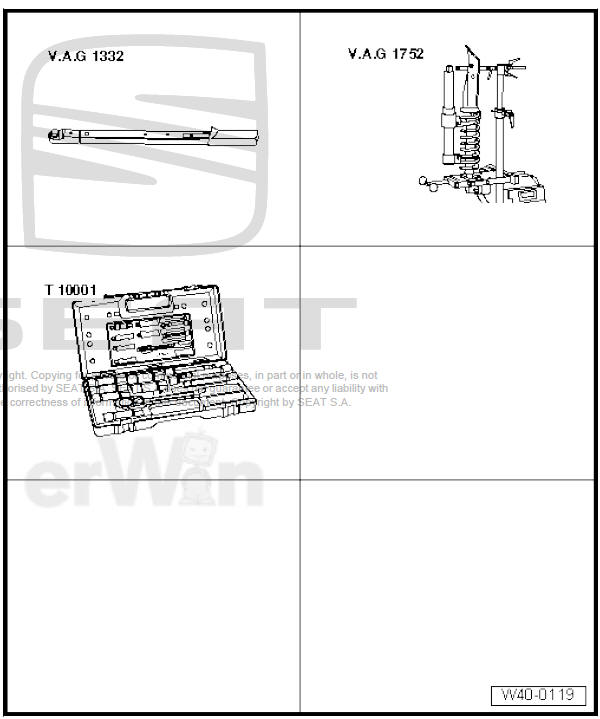
- Insertable ring tool - V.A.G 1332/7-
Operation process
- Remove coil spring strut
Removing spring
- Clamp suspension strut support clamp - V.A.G 1752/20- -4- in a vice.
- Clamp suspension strut in suspension strut support clamp - V.A.G 1752/20- -4-.
- Pre-tension coil spring with spring compressor - V.A.G 1752/1- until deep groove ball thrust bearing is free at top.
- - Torque wrenches - V.A.G 1332-
- - Socket spanner - T10001/8-
- - Spring tensor - V.A.G 1752/1-
- - Strut support clamp - V.A.G 1752/20-
- - Spring retainer - V.A.G 1752/4-
- - Socket spanner - T10001/5-
- - Ratchet handle - T10001/11-
| WARNING First compress spring far enough to ensure that upper spring plate is free. |
- Ensure that coil spring is correctly seated in spring retainer - V.A.G 1752/4- -arrow-.
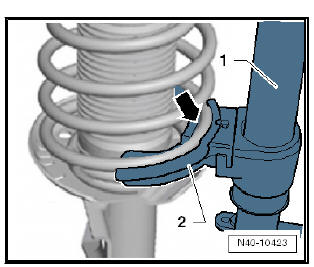
Installing spring
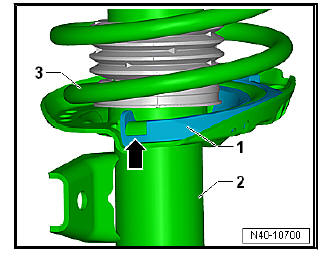
- Insert spring seat -1- into shock absorber -2-.
- Fit coil spring -3- with spring compressor - V.A.G 1752/1- onto lower spring seat.
The end of the coil spring must lie against the stop -arrow-.
- Assemble all other parts and use new nut on piston rod.
- Slacken off spring compressor - V.A.G 1752/1- and detach from coil spring.
- Remove suspension strut from suspension strut support clamp - V.A.G 1752/20- .
- Install suspension strut.
 Removing and installing suspension strut
Special tools and workshop
equipment required
Torque wrenches - V.A.G
1332-
Spreader - 3424-
Engine elevator - V.A.G
1383 A-
Mounting - T10149-
Special tools and workshop equipment ...
 Lower suspension link, swivel joint
Assembly overview - lower suspension link, swivel joint
- Wheel bearing housing
Different versions possible.
Removing and installing
- Nut
Always renew after removing
60 Nm
...
See also:
Particulate filter: checking
Special tools and workshop equipment required
Vehicle diagnosis tester
Work sequence
NOTICE
If no indications are displayed on the screen during these operations:
- operating instructions ve ...
