Seat Leon >> Control unit for the onboard network - J519- : removal and fitting
Control unit for the onboard network - J519- : removal and fitting
Removing
- Switch off ignition and all electrical consumers.
Vehicles without access and start authorisation system
- Remove ignition key, if fitted.
Vehicles with access and start authorisation system
- Store the ignition key outside the vehicle to prevent the ignition from being switched on unintentionally.
Continued for all vehicles
- Remove driver's side footwell cover.
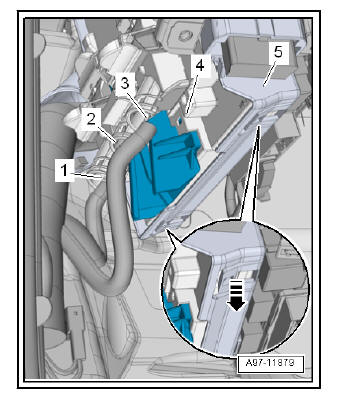
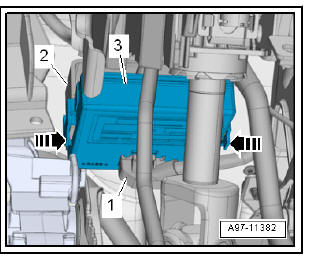
- Unplug connectors -1-, -2- and -3-.
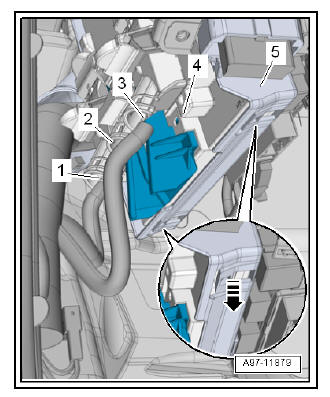
- Unplug electrical connector by pressing catch -1- and moving retaining clip in direction of -arrow-; then detach connector.
- Release retaining springs -arrow-, swivel -onboard supply control unit- out of bracket -5- and remove downwards.
Installing
Installation takes place in reverse order.
Removing and installing bracket for onboard supply control unit - J519-
Removing
- With the ignition switched off, disconnect battery earth cable.
- Removing dash panel insert .
- Cut through cable tie -arrow-.
- Disengage fuse holder C and push to side .
- Remove front parking aid warning buzzer - H22-.
- Removing and installing onboard supply control unit - J519-
- Unscrew screws -2-, -3- and -6- .
- Push bracket -1- as far forward as possible out of the central well, until the centring dowels -4 and 5- hang out.
- Cut through cable ties -arrows-.
- Move electrical wiring harness clear at mounting.
- Take out bracket towards passenger compartment.
Installing
Installation takes place in reverse order.

Removing and installing data bus diagnostic interface - J533-
Removing
- Depending on the configuration, remove the knee airbag on driver's side .
- Remove footwell vent on driver's side .
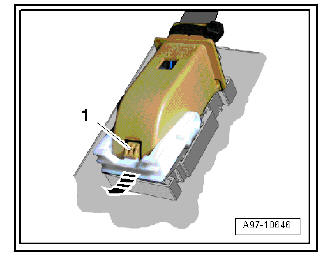
- Unplug electrical connector -1- using a small screwdriver.
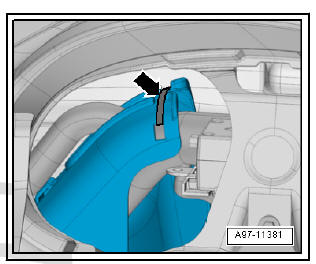
- Release catches -arrows- and pull data bus diagnostic interface - J533- -item 3- downwards off bracket -2-.
Note The exact assignment should be gleaned from the latest current flow diagram .
Installing
Installation takes place in reverse order.
 Overview of fitting locations - control units
- Parking aid control unit -
J446-
Removal and installation
- Remove and install the control
unit holder for the parking
assist - J446-
Removal and installation
- Moun ...
 Connectors
Unplugging door separating connector
(left-side)
Removing
Note
The removal and installation procedure is the same on both sides.
Open the door.
Release catch in direction of -arrow A- and de ...
See also:
Control switches
The controls allow separate adjustment of air conditioning settings for
the left and right.
Fig. 110 On the dash panel: 2C Climatronic controls
The air conditioning system only works when the en ...
