Seat Leon >> Roof strips / roof rails
Exploded view - roof rail

- - Roof railing
- 1 + 1 each
- With mounting point seals and bonded sealing material on the contact areas of the roof
Caution
Every time the roof railing is removed, check the mounting point seals and the bonded sealing material and renew where necessary.
- - Compensating elements
- 4 + 4 each
- These elements consist of a screwed on base and a height-adjustable sleeve.
- - Roof railing reinforcement
- - Nut
- 3 + 3 each
- 10 Nm
- - Bolt.
- 1 + 1 each
- 10 Nm
Removing and installing roof rail
Special tools and workshop equipment required
- Set of ring spanners - SAT 8015-

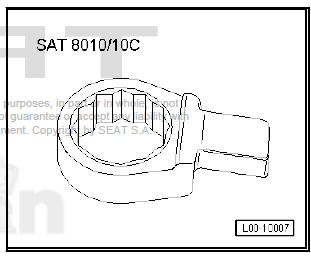
- Ring spanner size 10 - SAT 8010/10C -
Removing
Note The sequences below describe the processes for removal and installation for the left side of the vehicle. The corresponding sequences for the right side are similar with the exception that, where applicable, the scope of the process is written by yourself.
- Removing roof trim
| DANGER! Consider the safety measures for pyrotechnic components . |
- Make sufficient space in this zone to facilitate removal and subsequent tightening of the bolt-1-. For this purpose, remove the bolt -3- and move the airbag igniter -2-in -the direction of the arrow-.
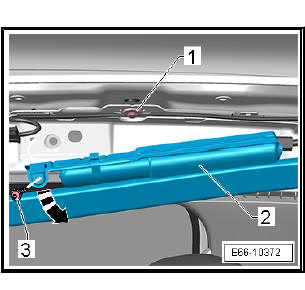
- Loosen nut -2-.
- Remove screws -1-.
| Caution Risk of damage to paintwork |
- Remove the roof railing.
fitting
Fit in reverse order from removal, remembering the following:
| Caution Every time the roof railing is removed, check the mounting point seals and the bonded sealing material and renew where necessary. |
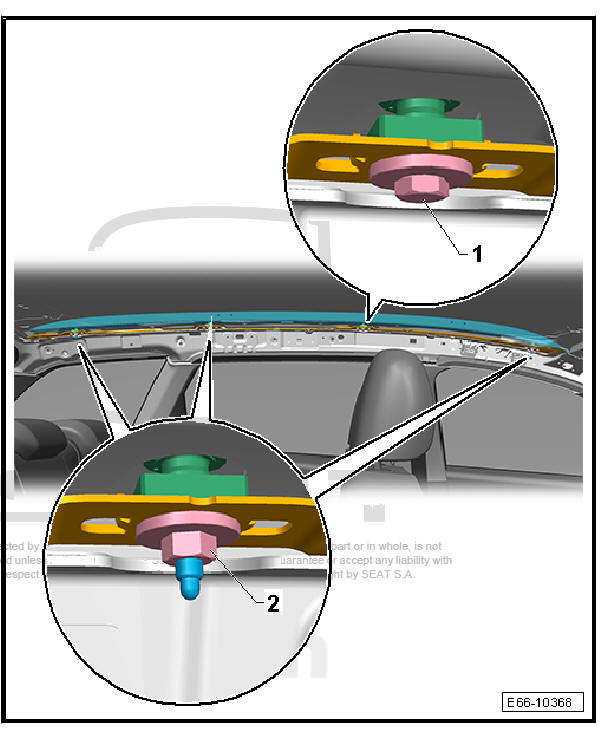
- Check that the height-adjustable sleeves -2- project by -a-= 1.6 mm above the surface of the roof. Should these sleeves not conform to the specified size, adjust them according to the following specification.
Setting the compensation elements
- Insert the hexagon key (Allen key) -1- into the height-adjustable sleeve -2- of a compensation element.
- Turn the key in the direction of the -lower arrow - until the height adjustable sleeve -2- moves upwards -upper arrow- and touches the roof -3-.
Note The height-adjustable sleeve -2- must project by -a-= 1.6 mm above the surface of the roof.

- If necessary, repeat the procedure on the other compensation elements.
Continue the assembly
- Place the roof rail -1- onto the first compensating element slightly inclined anticlockwise.

| Caution Risk of damage to paintwork |
- Insert the roof railing bolt into the first compensation element set.
- Turn the roof railing until you can insert the bolt on the opposite side into the last compensation element set.
- Screw the bolt in lightly - do not tighten with the specified tightening torque yet.
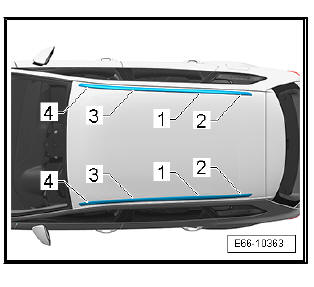
- Tighten the bolts with the specified tightening torque in the specified sequence.
- Install roof trim .
 Removing and installing underbody trim
Special tools and workshop equipment required
Torque wrench 2-10 Nm - VAG 1783-
Note
During removal and installation, take note of small amounts of differences
depending on the engine.
...
 Exterior mirror
Exploded view - exterior mirror
- Cover
- Exterior mirror glass
- Exterior mirror base
- Nut
1x
20+- 2.5 Nm
- Electric connector
- Front door
Left-side
- Exterio ...
See also:
Exploded view - selector mechanism
Note
Lubricate bearing positions and sliding surfaces.
For grease allocation.
- Selector shaft with cover
- Oil seal
Must be renewed after
fitting
- Shoe
- Gate relay ...
