Seat Leon >> Removing and installing spoiler
Special tools and workshop equipment required
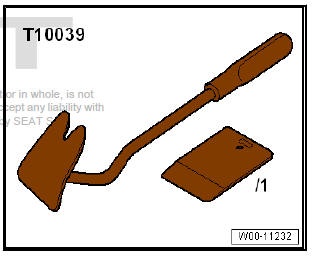
- Wedge - T10039/1-
- Release lever - U 30800-
- Pull handle - VAG 1351/1- (x2)
- Dual component window sealant - VAS 5237-
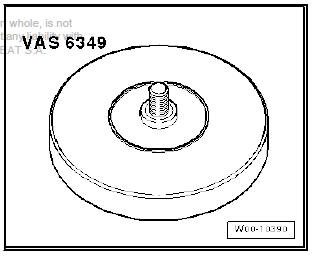
- Adhesive strip remover - VAS 6349-
Removing
- Remove the protective side strips
- Remove additional brake light
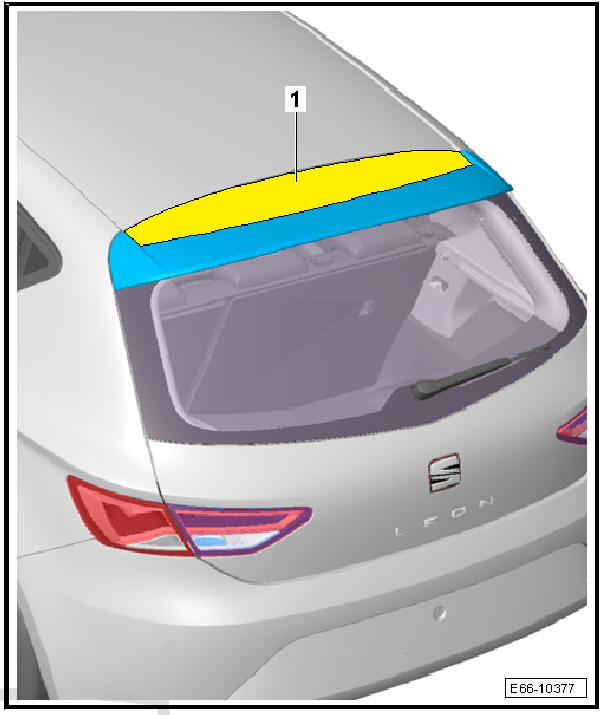
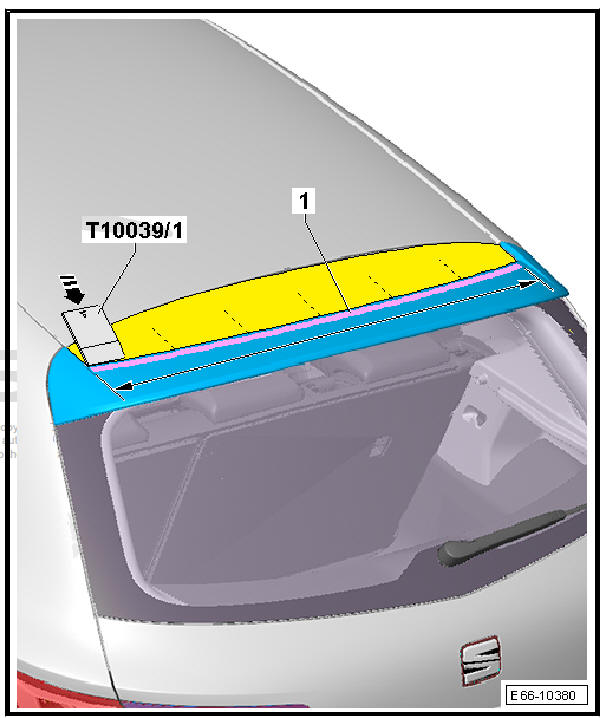
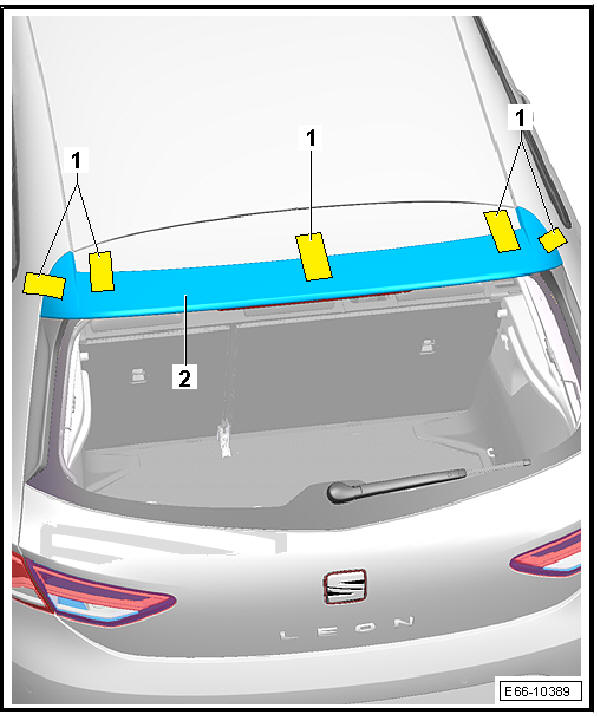
- Protect the upper sector of the rear lid with masking tape-1-.
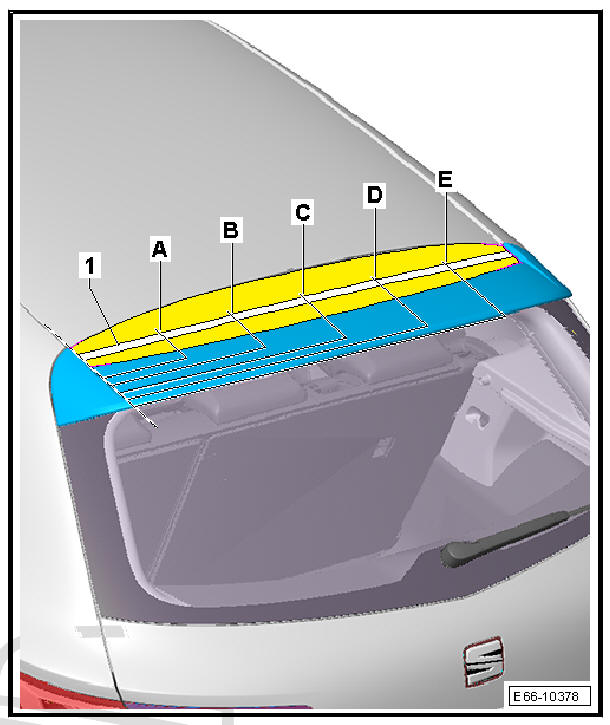
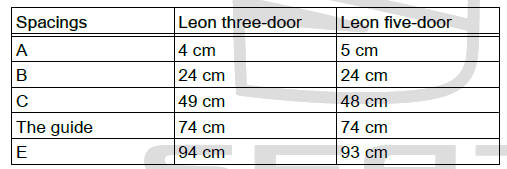
- Apply the measuring tape -1- and mark the following places with a pencil:
- Insert the cutting cord into the top section of the rear lid as shown in the illustration and cut the adhesive sealant (PUR) in -the direction of the arrow-.
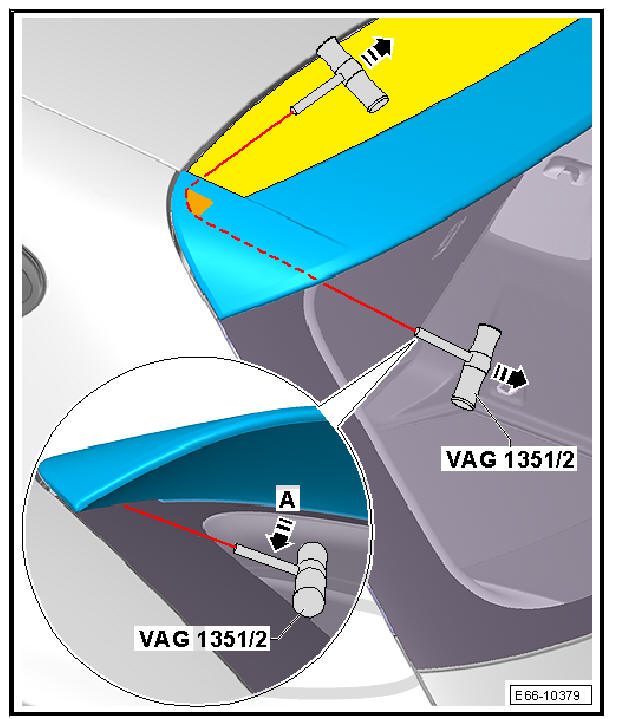
Note
In order not to damage the lower part of the spoiler it is necessary when cutting the adhesive sealant (PUR) that the cutting cord is parallel to the surface of the rear window -arrow A.
- Carry out the same procedure on both sides.
- Insert the wedge - T10039/1- between the spoiler and rear lid from above and completely loosen the double sided adhesive tape -1-.
- Loosen the retaining clips with the lever - U 30800- at the previously marked positions. -1-.
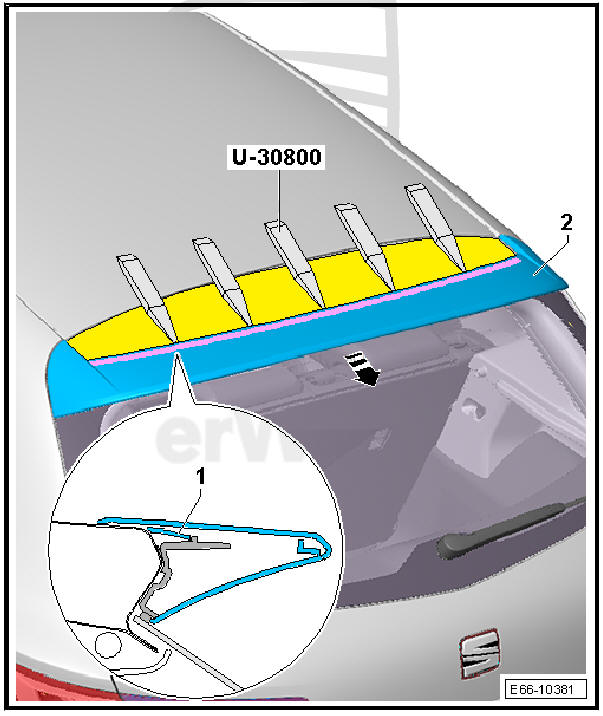
- Remove the spoiler -2- in direction of -arrow-.
fitting
Preparation of the rear lid for mounting the spoiler
- Remove possible residual adhesive on the rear lid with the tool - VAS 6349- .
- Clean the area of the rear lid where the spoiler is to be affixed with isopropyl alcohol or heptanol.
- Subsequently treat the spoiler mounting zone with silicone cleaner.
- Allow to dry well.
- Shortly before bonding the spoiler, cut the bead of adhesive sealant (PUR) bonded to the rear lid back to a height of just 1 mm.
Note The remaining material is required as a base for the new adhesive sealing material (PUR).
Prepare the spoiler for installation.
- Remove from the spoiler -1- all residual adhesive -2- and -3-.
- Clean the bonding zone with isopropyl alcohol or heptanol.
- Subsequently use silicone cleaner on the affected area.
- Allow to dry well.
- Apply to the zone -2- an even coating of primer (window/paint) - D 009 200 02- ; use the applicator - D 009 500 25- -4-.
- Apply to the zone -3- an even coating of primer - D .
181.650.A1- ; use the applicator - D 009 500 25- -5-.
Flashing-off time, approx. 10 minutes.
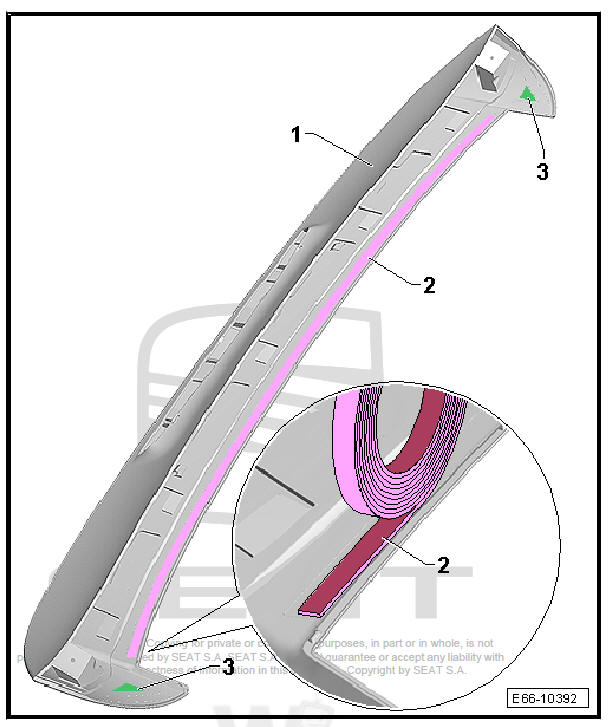
- Apply the new double-sided adhesive tape -2- .
- Use the gun - VAS 5237- to apply a spot of two component adhesive - D 004 660 M2- to the designated zone -3-.
- Mount the spoiler in its retainers; you will hear it latch into place.
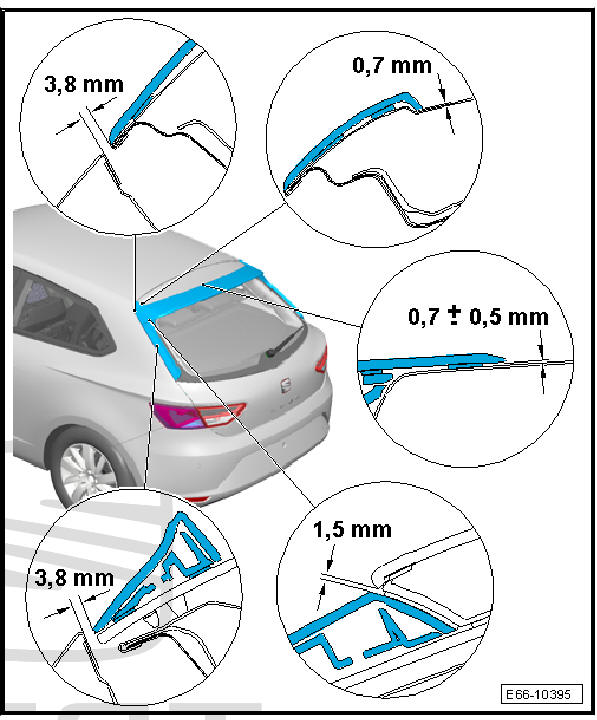
- Flush adjustment at the panel gaps:
Leon three-door
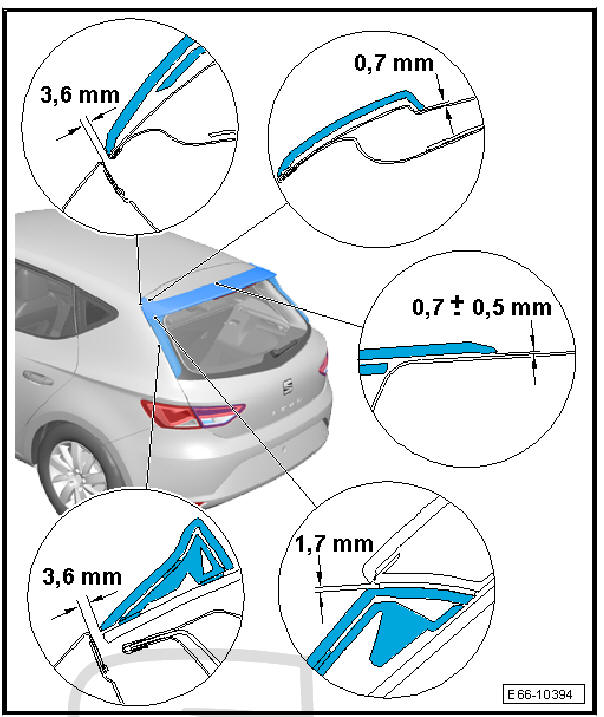
Leon five-door
- Push against the centre section with the pressure tool - T20098- and against the sides of the bonding zones to ensure correct bonding.
- Cut several lengths of adhesive tape and affix them as shown in the illustration.
- Install additional brake light.
- Install the protective side strip
 Lateral protection moulding: replacement
Special tools and workshop equipment required
Adjustment gauges - 3371-
Pull handle - VAG 1351/1- (x2)
Dual component window sealant - VAS 5237-
Removing
Note
The side trim ...
 Renew the spoiler mounting
Special tools and workshop
equipment required
Electric cutter - SAT
1561A-
Cable holder knob - VAG
1351/1-
Knife 181 - VAS 1561/18-
Adhesive strip remover - VAS 6349-
Removin ...
See also:
Warning lamp for airbag and belt tension device system
This warning lamp monitors the airbag and belt tension
device system.
The warning lamp monitors all airbags and belt tension devices in the
vehicle, including control units and wiring connections.
...
