Seat Leon >> Lateral protection moulding: replacement
SEAT Leon Service and Repair Manual / General body repairs, exterior / Exterior equipment / Spoiler / Lateral protection moulding: replacement
Special tools and workshop equipment required
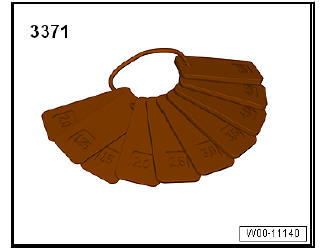
- Adjustment gauges - 3371-
- Pull handle - VAG 1351/1- (x2)
- Dual component window sealant - VAS 5237-
Removing
Note The side trim cannot be removed without damage.
- Open the rear lid halfway and hold in this position.
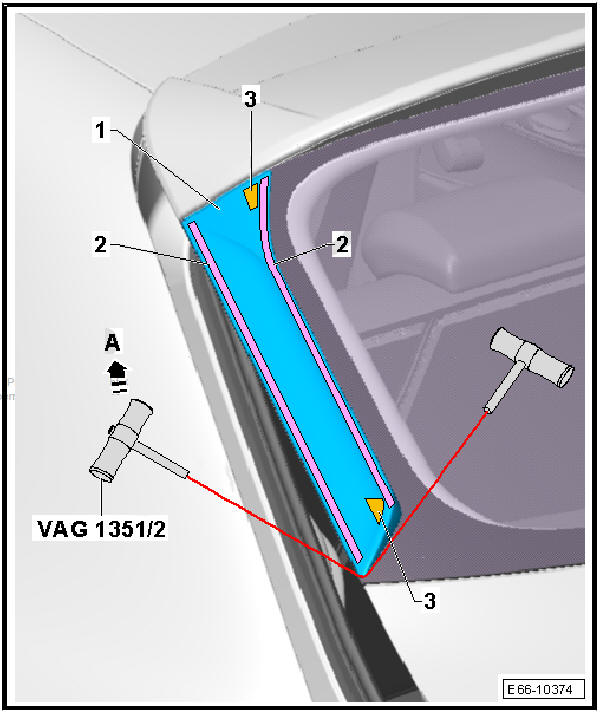
- Insert the cutting cord into the protective side strip -1-from below as illustrated and cut through the double-sided adhesive tape -2- and the adhesive sealant (PUR) -3-.
- Remove the protective side strip -1-.
fitting
Note
- Use only the adhesive remover - D 002 000 A2- .
- Ensure that bonding surfaces are free of dust and grease.
- The side trim must be bonded in place immediately after being cleaned.
- Remove protective film just before the installation. Working temperature approx. 21 ºC
- Rear window is installed.
- The rear lid must be adjusted.
- Roof spoiler is installed
- Clean bonding surface thoroughly with adhesive remover - D 002 000 A2- immediately prior to bonding.
- Position the protective side strip ready for installation and mark its outline -1- with a pen.
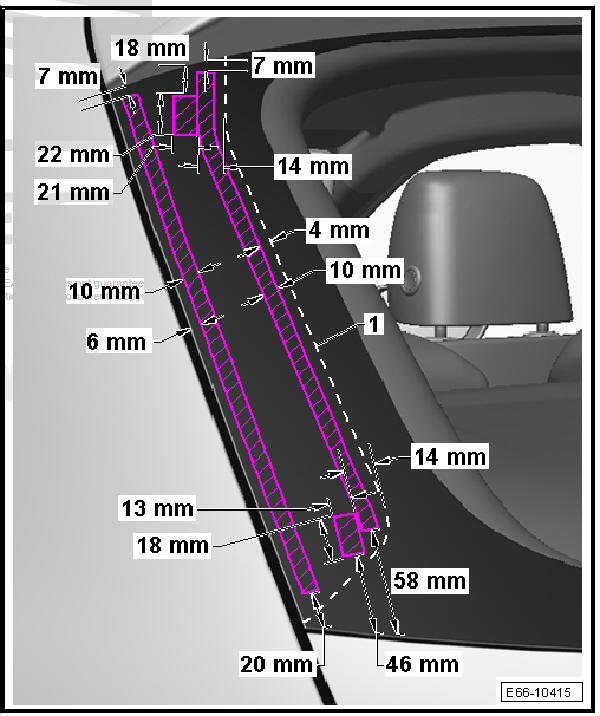
- Using a pen, mark the areas where the primer is to be applied, as shown in the illustration.
Dimensions of Leon 3 door
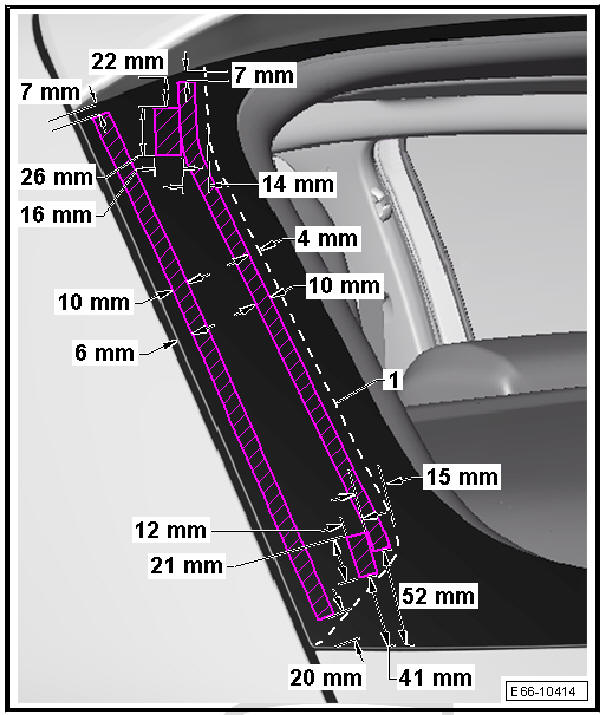
Dimensions of Leon 5 door
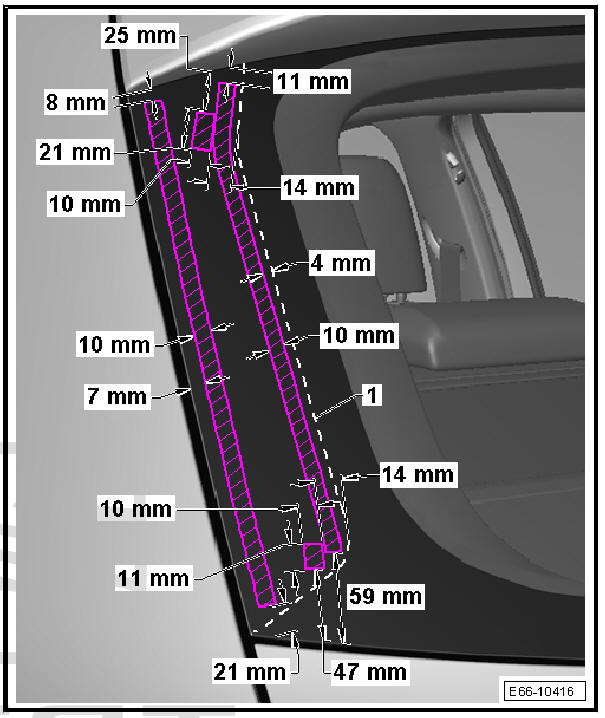
Dimensions of Leon ST
- Then rub edge of window dry using a lint-free cloth.
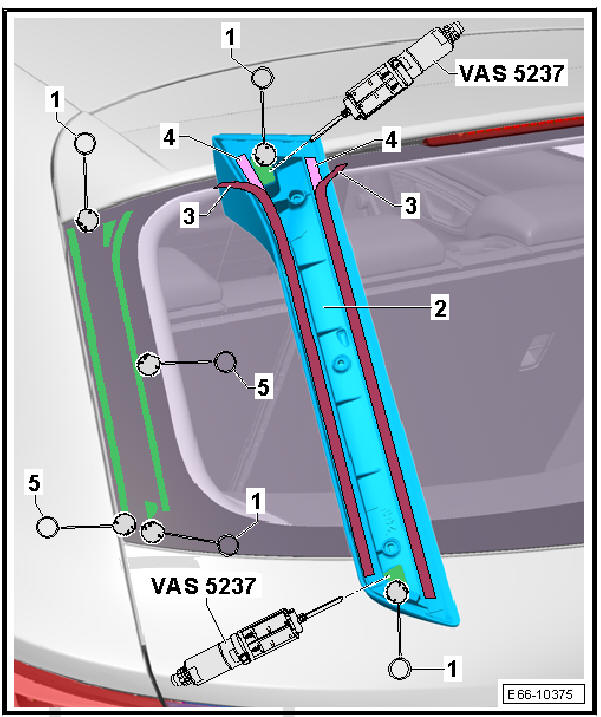
- Apply the primer - D 177 500 A2- with the applicator -5- evenly and with one stroke to the rear window, as shown in the illustration.
- Apply the primer primer (glass/paint) - D 009 200 02- with the
applicator -1- to the rear window and the protective side strip
as shown in the illustration.
Flashing-off time, approx. 10 minutes.
- Use the gun - VAS 5237- to apply a spot of two component adhesive - D 004 660 M2- to the specified zone.
- Remove the protective films -3- from the adhesive tapes -4-.
- Position the profile -arrow B- of the protective side strip -1- flush to the perimeter of the window -arrow A-.
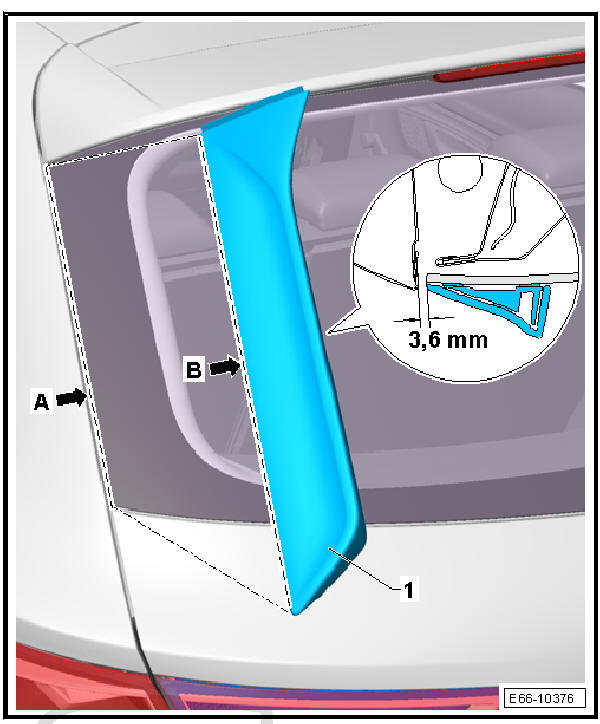
- Push with the hand against the complete surface of the protective side strip.
- Visually inspect the secure attachment, the flush joints and the correct panel gap of the protective side strips.
- Remove the protective film from the protective side strip.
 Spoiler
Exploded view - spoiler
- Rail
- Spoiler mounting
- Spoiler trim
Removing and fitting
- Light tube for the rear window
wiper fluid
- Spray jet
Remove and install
- ...
 Removing and installing spoiler
Special tools and workshop equipment required
Wedge - T10039/1-
Release lever - U 30800-
Pull handle - VAG 1351/1- (x2)
Dual component window sealant - VAS 5237-
Ad ...
See also:
Removing and installing refrigerant line
with internal heat exchanger
Special tools and workshop equipment required
Air conditioner service station
Engine bung set - VAS 6122-
Removal:
Turn off the ignition and all electricity consumers.
Vehicles witho ...
