Seat Leon >> Adjusting rear lid
Special tools and workshop equipment required
- Torque wrench - V.A.G 1331-
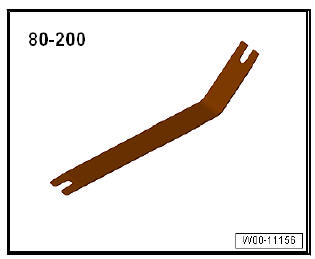
- Release lever - 80 200-
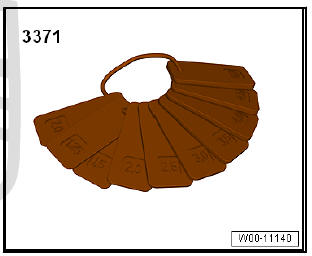
- Adjustment gauges - 3371-
Note
- For the basic setting of the rear lid, the vehicle should be on the ground and the weight resting on all four wheels.
- The tailgate lock is attached directly onto the tailgate with bolts. There are no over-sized openings, and therefore it can not be adjusted.
- The adjustment stops, as for other vehicles, can not be used to adjust the tailgate. They are only for stabilising or damping the tailgate.
- To adjust the tailgate correctly, adjust the length, width and depth.
- For an exact tailgate adjustment, check, when closed, that all the spacings are within the specified tolerance Check the spacings.
- The tailgate must fit into the slip plate without the use of excessive force.
Tailgate: set depth .
Tailgate: longitudinal and lateral adjustment.
Strike plate: adjusting.
Adjusting buffer: Adjusting.
Tailgate: depth adjustment
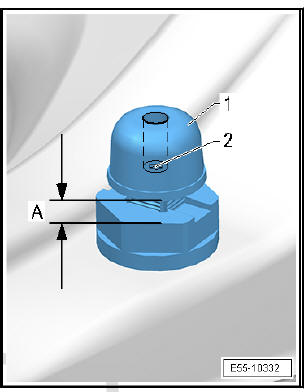
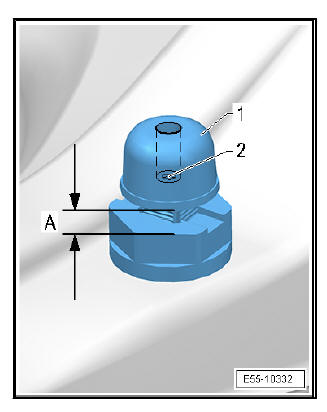
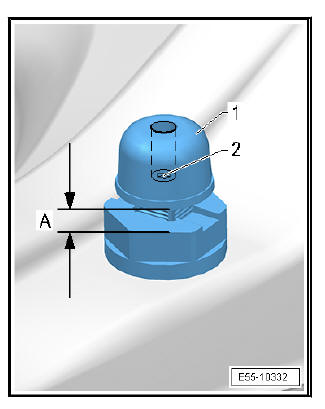
Before adjusting the bottom position of the tailgate, insert the adjustment stops to the limit, as follows:
- Loosen lock bolt -2-, but do not screw out.
- Push back the stop -1- until the dimension -A- has been reduced as far as possible.
- Remove the gas shock absorbers.
Note
- The tailgate depth adjustment is made from adjustment slots in the tailgate hinges. Slackening nuts -arrows- can rectify tailgate door position.
- On completion of assembly or adjustment work, the hinges and hexagonal nuts should be protected against rust.
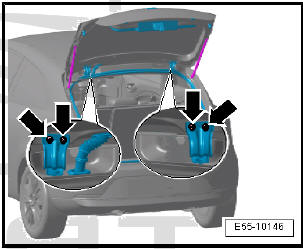
- Loosen the bolts -arrows- of the hinges, but do not screw out.
Adjusting .
For adjusting or for checking the tolerances, use the measurement tool - 3371- .
- Adjust the tailgate so that the side profiles on the side panels are flush with the tailgate.
- Close the tailgate and check the spacings between the edge of the tailgate spoiler and the roof and adjust.
Note For a precise adjustment of the tailgate, ensure that, when it is closed, the tolerances are all equal and do not extend on any side
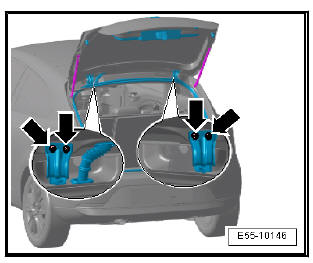
- After adjustment has been completed, tighten the hexagonal nuts -arrows - to 20 Nm.
Note On completion of assembly or adjustment work, the hinges and hexagonal nuts should be protected against rust.
- Fit the gas shock absorbers.
- Adjust strike plate.
- Check the adjustment stops.
Tailgate: longitudinal and lateral adjustment
- Open the tailgate.
Before adjusting the lateral and longitudinal position of the tailgate, insert the adjustment stops to the limit, as follows:
- Loosen lock bolt -2-, but do not screw out.
- Push back the stop -1- until the dimension -A- has been reduced as far as possible.
- Remove the fastenings on the rear tray from the tailgate and take out the storage tray.
- Remove the gas shock absorbers.
- Remove B-pillar cover.
- Remove upper C-pillar cover.
- Roof grips in the interior.
Note Wear clean gloves in order to prevent dirt getting onto the roof trim during the removal.
- Using the lever - 80 200- , undo the clips that are used to fix the roof trim onto the rear cross piece of the roof.
- Carefully lower the roof trim at the rear side until you can see the hinge screws.
Note The tailgate lengthways and horizontal adjustment is made from the oversized adjustment slots in the tailgate hinges. Slackening nuts -1- can rectify tailgate door position.
- Loosen the bolts -1- of the hinges, but do not screw out. Adjusting.
- With the aid of a 2nd mechanic, align the tailgate with the external contours and set the gap.
- Tighten the hexagonal nuts on the hinges.
- Close the tailgate and check the spacings; adjust if necessary.
Note For a precise adjustment of the tailgate, ensure that, when it is closed, the tolerances are all equal and do not extend on any side
- Use the tightening torque of the screws
Note On completion of assembly or adjustment work, the hinges and hexagonal nuts should be protected against rust.
- Fit the gas shock absorbers.
- Adjust strike plate.
- Check the adjustment stops.
Adjust the tailgate striker plate
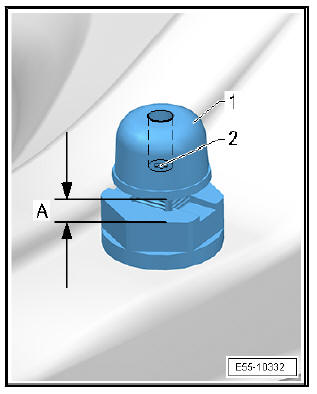
Before adjusting, insert the adjustment stops to the limit, as follows:
- Loosen lock bolt -2-, but do not screw out.
- Push back the stop -1- until the dimension -A- has been reduced as far as possible.
- Remove luggage compartment closure trim.
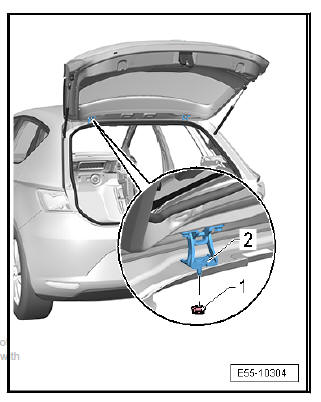
- Loosen the bolts -2-, but do not screw out.
- Fit the slip plate -1- as far back as possible -arrow- and tighten the bolts -2- by hand.
- Close the tailgate and fit flush with the bodywork profile.
Note The lock of the rear lid must engage in the main latching position (second latching position).
- Open the rear lid and set the screws -2-.
- Check the adjustment stops.
- Check all clearances for precise adjustments of the tailgate.
Adjusting buffers
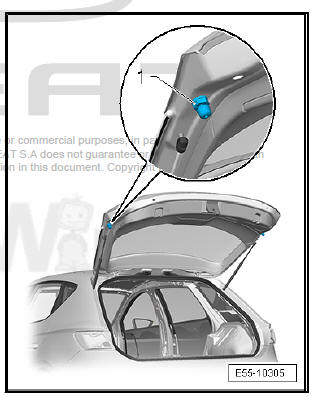
Note The sequences described in the following apply for the adjustment buffer -1- on both sides.
- Open the tailgate.
- Loosen lock bolt -2-, but do not screw out.
- Pull out stop -1- to dimension -a- = 12.5 mm.
- Close the tailgate by pressing gently in the centre, but only until the first fixing.
- Open the tailgate again.
- Screw the lock bolt -2- to its limit.
- Press and pull on the side edges of the tailgate, under the window, to check that it closes tightly and is flush with the bodywork.
Note With the rear lid correctly adjusted and closed, the adjusting buffers must rest lightly against the body.
- Adjust again if necessary.
Tailgate lock; removing and fitting
Special tools and workshop equipment required
- Torque wrench - V.A.G 1331-
Removing
- Open the tailgate.
- Remove lower tailgate trim.
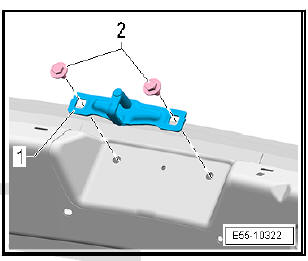
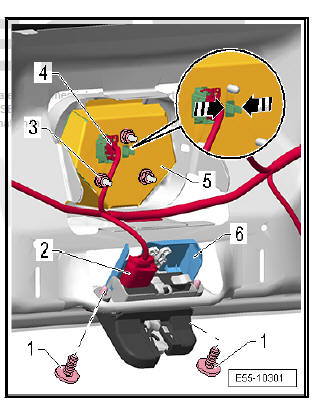
- Detach connector -2-.
- Remove the bolts -1- (model ST, nuts) and remove the rear lid lock -6-.
fitting
Fit in reverse order from removal, remembering the following:
Specified torques
- Apply the tightening torque on the bolts, 3 and 5 doors.
- Use the tightening torque on the bolts, model ST.
 Removing and installing rear lid
Special tools and workshop equipment required
Torque wrench - V.A.G 1331-
Adjustment gauges - 3371-
Removing
With the tailgate closed, remove the middle brake light in the
tailg ...
 Removing and installing actuator
Special tools and workshop equipment required
Torque wrench - V.A.G 1331-
Removing
Open the tailgate.
Remove lower tailgate trim.
Detach connector -4-.
Loosen nut -3-.
Turn the re ...
See also:
Assembly overview - brake servo/brake
master cylinder
Assembly overview - brake servo/brake
master cylinder, LHD
Note
The master brake cylinder and the servo brake can be replaced
independently.
- Nut
Replace after each removal
23 Nm
...
