Seat Leon >> Assembly overview - front brake caliper
SEAT Leon Service and Repair Manual / Brake system / Brakes - hydraulics / Front brake callipers / Assembly overview - front brake caliper
Exploded view - brake calliper FS III
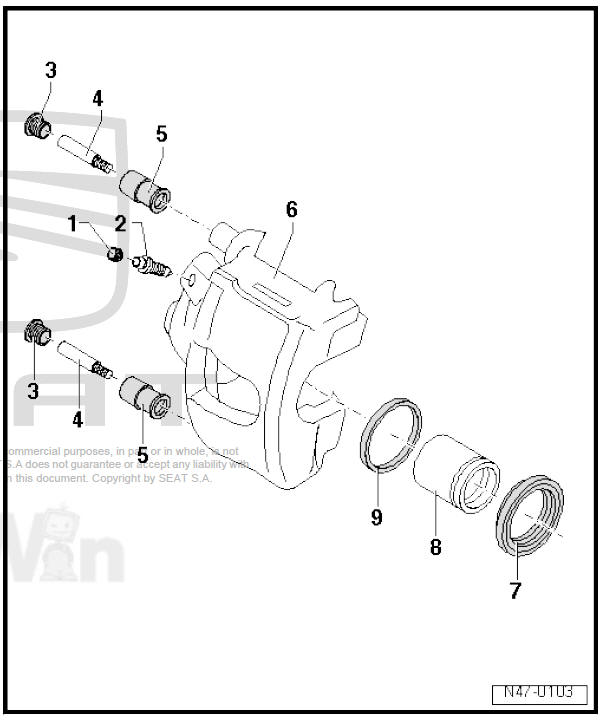
- - Protective cap
- Fit onto bleeder valve.
- - Bleeder screw
- Before inserting, lightly grease the thread with assembly paste G 052 150 A2.
- 10 Nm
- - Protective cap
- Insert into sleeve bearing.
- - Guide pin
- 30 Nm
- - Mounting bush
- Insert into brake caliper.
- - Brake calliper
- - Protective cap
- Fit with the outer sealing lip on the piston
- Take care not to damage when inserting piston.
- - Brake caliper piston
- Removing and installing
- Apply a fine film of assembly paste G 052 150 A2 accordingly
- - Seal
- Take care not to damage when inserting piston.
Exploded view: brake caliper FN III
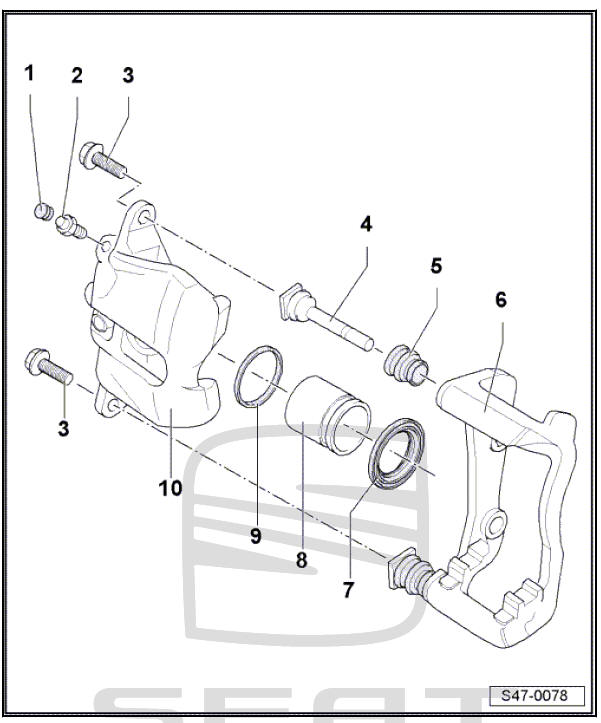
- - Protective cap
- Fit onto bleeder valve.
- - Bleeder screw
- Before inserting, lightly grease the thread with assembly paste G 052 150 A2.
- 10 Nm
- - Hexagonal bolt
- Always renew after removing
- 35 Nm
- - Guide pin
- - Protective cap
- Insert into brake carrier and guide pin groove; grease groove beforehand, use repair kit grease pack.
- - Brake back plate
- Supplied as replacement part, assembled with guide pin and protective caps, and with sufficient grease on guide pins.
- Fit the repair unit if protective hoods or guide bolts are damaged. Use the bag of grease attached to grease the guide bolts
- - Protective cap
- Fit with the outer sealing lip on the piston
- Take care not to damage when inserting piston.
- - Brake caliper piston
- Removing and installing
- Apply a fine film of assembly paste G 052 150 A2 accordingly
- - Seal
- Take care not to damage when inserting piston.
- - Brake calliper
Brembo brake caliper - Assembly overview
Note No provision is made for repairs to Brembo brake caliper.

 Removing and installing brake calliper
piston
Removing and installing brake calliper
piston
Special tools and workshop equipment required
Wedge - 3409-
Thrust piece - T10145-
Note
When carrying out repairs, install all parts supplied in repair
kit.
Use only methylate ...
See also:
Tweeter H2 / Woofer H7: installing and
removing
Installing and removing tweeter H2 /
woofer H7, vehicles with horns on the
right longitudinal chassis beam
Removing
Switch off ignition and all electrical consumers.
Vehicles without access ...
