Seat Leon >> Fitting control unit to hydraulic unit
Special tools and workshop equipment required
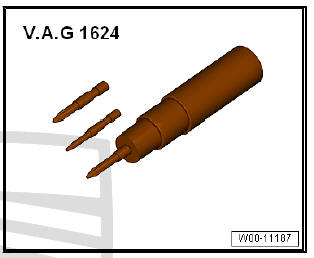
- Torque screwdriver - VAG 1624-
- ESD workplace - VAS 6613-

- Torx socket T25
- Clean sealing surface on hydraulic unit -2- using plastic scraper -1-.
The contact pins -3- must not be damaged or bent.
Note
- Use the cleaning agent provided (do not use any aggressive cleaning products).
- Check sealing surface for damage (visual inspection).
| WARNING The sealing surface on the hydraulic unit must be clean and smooth. The hydraulic unit must be renewed if the sealing surface or the contact lugs are damaged. The seal on the control unit cannot be replaced. The seal on the control unit must not be lifted or pulled out. |
| Caution Make sure that no moisture or dirt gets inside the control unit. Do not blow out the control unit or hydraulic unit with compressed air. Severe shocks or jolts can damage the control unit. The control unit must not be re-installed if it has been damaged in any way. The hydraulic unit must not be re-used if the contact pins in the hydraulic unit are damaged or bent. The electrical components of the printed circuit can be damaged by static loading. Before working on electric components, touch an earthed object, ESD workplace - VAS 6613- . Do not directly touch connector contacts or electronic components. |
- Set the hydraulic unit down on the ESD work station - VAS 6613- .
- Carefully position control unit from above on hydraulic unit with valve coils hanging down.
Note
- Take care to keep the valve coils straight.
- Use new bolts.
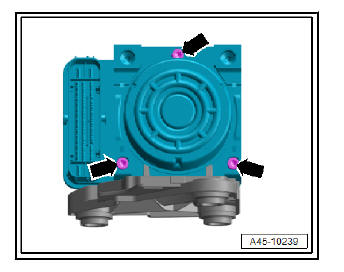
- Tighten the hydraulic unit and the control unit alternately in 2 stages with the appropriate torque using the new Torx bolts -arrows-.
- Tighten hydraulic unit and control unit alternately in 2 stages to specified torque using new Torx bolts provided.
After screwing on, check:
- That all bolts make contact,
- That control unit and hydraulic unit make contact all-round.
- Install the hydraulic unit for ABS - N55- together with the control unit for ABS - J104- .
- Bleed brake system .
- With the ignition switched off, connect the vehicle diagnostic unit - Arrow-.
- Switch ignition on

Note Event memory interrogated, displayed faults rectified and event memory erased.
- Note Event memory interrogated, displayed faults rectified and event memory erased.
After replacing the control unit and bleeding the brake system, all ESP warning lamps must switch off.
| Caution Before performing the first test drive, make sure that the brakes are operating correctly. A new control unit may be mounted on an existing hydraulic unit max. three times to guarantee impermeability of the elastic seal. A control unit which has been in operation while the vehicle is being driven must not be fitted a second time. |
 Separating control unit from hydraulic
unit
Separating control unit from hydraulic
unit
Special tools and workshop equipment required
Torque screwdriver - VAG 1624-
ESD workplace - VAS 6613-
Torx socket T25
CautionThe ABS control unit - J104- and the ABS
...
 Sensors
...
See also:
Suspension strut - Repair
Special tools and workshop
equipment required
Torque wrenches - V.A.G
1332-
Spring tensor - V.A.G
1752/1-
Spring retainer - V.A.G
1752/4-
Shock absorber set -
T10001-
Commercially ...
