Seat Leon >> Removing and installing headlight
Headlights: removing and installing, left headlight
Note Removal and installation are described for the left side. Removal and installation on the right side are carried out laterally reversed in the same way.
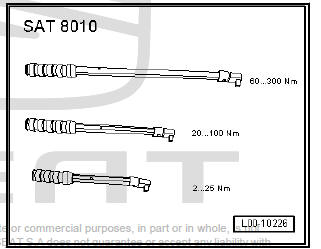
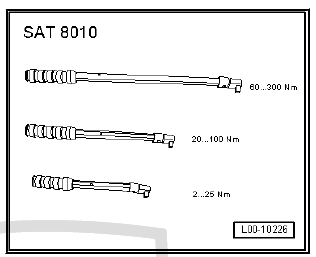
Special tools and workshop equipment required
- Torque spanner set - SAT 8010-
- Lever - 3409-

Removing
- Switch off ignition and all electrical consumers.
Vehicles without access and start authorisation system
- Remove ignition key, if fitted.
Vehicles with access and start authorisation system
- Store the ignition key outside the vehicle to prevent the ignition from being switched on unintentionally.
Continued for all vehicles
- Lift the front bonnet. Use the rod to keep it open.
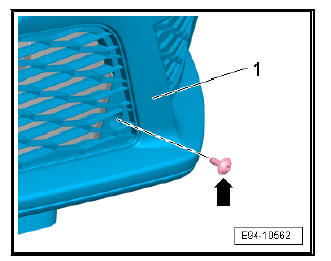
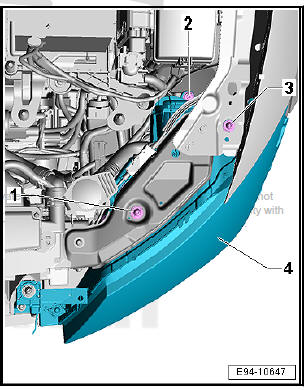
- Remove cover of the lock carrier -2-; for this purpose use a flange screwdriver; turn the rivet heads -1- by 90º to the left and then pull them out with the lever - 3409- .
- Remove the cover of the lock carrier -2-.
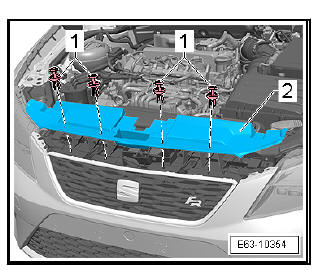
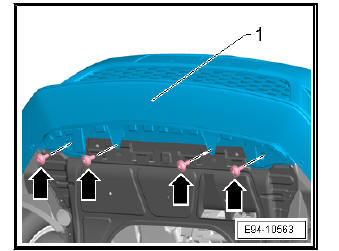
- Remove the securing bolts -1- securing the bumper trim -2-.

- Remove bolts -1-.
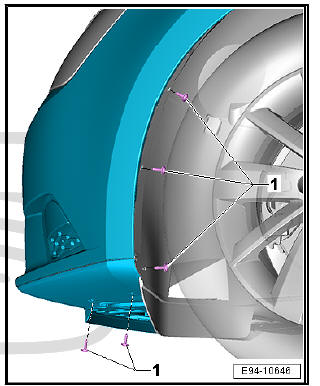
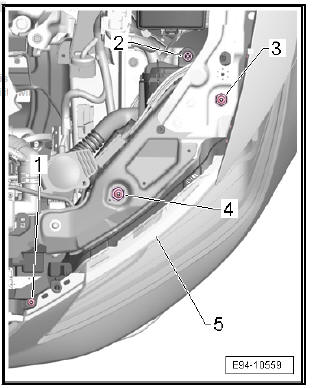
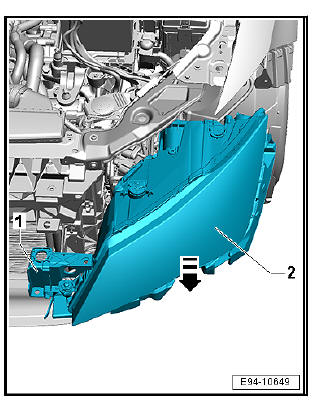
- Unscrew the fixing screws -arrow- between the bumper lining -2- and wing -1-.
- Unscrew the fixing screws -arrow- between the bumper lining -1- and crossbeam.
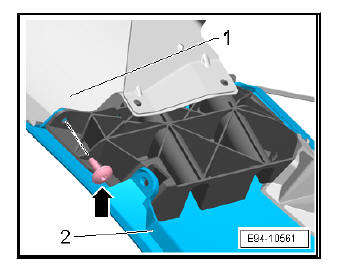
- Remove the fixing screws -arrow- of the spoiler -1-.
- Unscrew screws -2-, -3- and -4-.
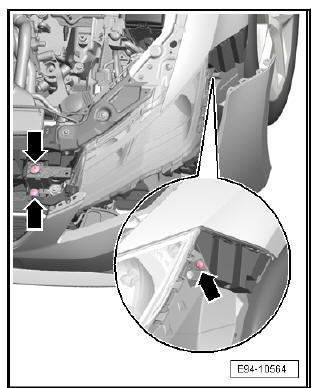
- Remove the bumper trim, first hang this out at the corner and then push forwards.
- Remove the fixing screws -arrows- between the headlight lamps and the body.
- Disconnect the unit from the headlight track -1- and headlight -2- .
- Disconnect the headlight plug connection.
- Remove the unit comprising headlight lamp -1- and headlight -2-.

Installing
Install in reverse order for the removal. During this step, observe the following:
Specified torques
Headlights: removing and installing, right headlight
Note The removal and installation procedure is the same on both sides.
Headlights: removing and installing, both headlights
Special tools and workshop equipment required
- Torque spanner set - SAT 8010-
Removing
- Remove bumper cover (front) .
- Remove bolts -1-, -2- and -3- from both headlights.
- Remove securing bolts -1-, -2- and -3- of the sliding rails used to fix the headlights to the chassis from both headlights.

- Separate the two component groups headlight sliding rail -1- and headlights -2- from each other on both sides.
- Unplug the electric fog lamp plug connector.
- Remove headlights.
Installing
Install in reverse order for the removal. During this step, observe the following:
Specified torques
Headlights: removing and installing, headlight track
Note Removal and installation are described for the left side. Removal and installation on the right side are carried out laterally reversed in the same way.
Removing
- Remove headlight.
- Unscrew the fixing screws -arrow- between the headlight lamp -1- and headlight -2-.

Installing
Install in reverse order for the removal. During this step, observe the following:
Specified torques
 Assembly overview - headlight
Assembly overview - headlight, halogen headlight
- Headlamps
Removal and installation
Correcting installation
position of headlight
Headlights: Adjust
Headlights: checking
adju ...
 Adjust headlights
Adjusting headlights, headlight with halogen
bulb
In principle, the following conditions for adjustment and verification
are valid for all countries. But legal guidelines and prescriptions
of each ...
See also:
Setting the digital clock*
The digital clock is located in the instrument panel display.
– Turn the setting knob fig. 32 5 anti-clockwise to
the stop to set the hour. If the knob is turned briefly anti-clockwise
the ...
