Seat Leon >> Adaptive cruise control
Components of Adaptive Cruise Control
Fitting location overview - adaptive cruise control
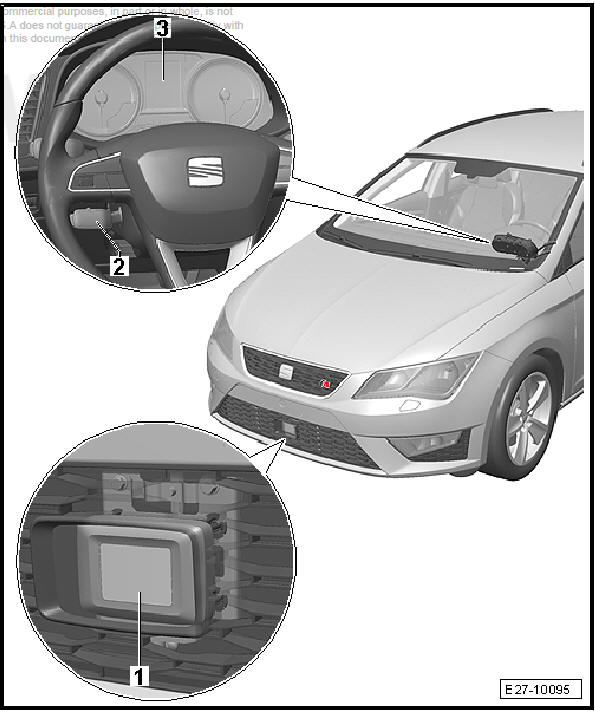
- - Adaptive cruise control unit
- J428-
- Assembly overview
- - ACC button - E357-
- Combined component with steering column switch module. Cannot be renewed individually.
- Switch module: remove and install
- - Instrument cluster - KX2-
- With control unit in dash panel insert - J285-
- Removal and installation
Removing and installing the automatic distance control unit
Special tools and workshop equipment required
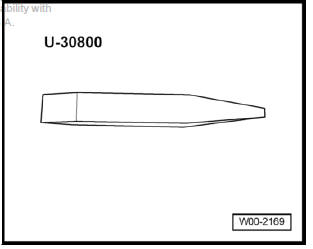
- Lever - U30800-
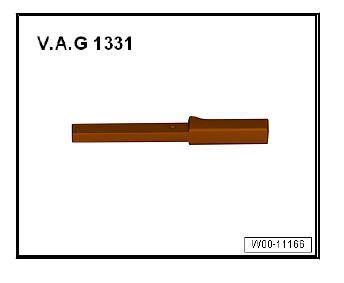
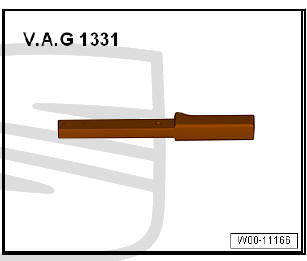
- Torque wrenches - VAG 1331-
Note For greater clarity the bumper grille is not depicted in the illustration.
Removing
- Switch off ignition and all electrical consumers.
Vehicles without access and start authorisation system
- Remove ignition key, if fitted.
Vehicles with access and start authorisation system
- Store the ignition key outside the vehicle to prevent the ignition from being switched on unintentionally.
Continued for all vehicles
- Removing trim for radar sensor.
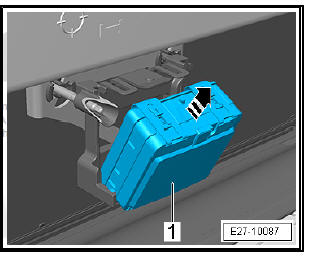
- Pull out the plug -2-.
- Prise out the securing tabs -1- with the aid of the lever - U30800- in order to free the centre nipple.
- Turn the adaptive cruise control unit - J428- -3- in the -direction of the arrow-.
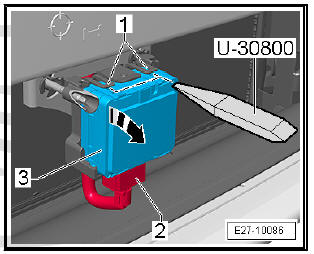
- Remove the adaptive cruise control unit - J428- -1- in the -direction of the arrow-.
Installing
Installation is carried out in the reverse sequence; note the following:
- Calibrate adaptive cruise control
Radar holder for the adaptive cruise control unit - J428- : remove and install
Special tools and workshop equipment required
- Calliper square - VAS 6335-
Note
- For greater clarity the bumper grille is not depicted in the illustration.
- Completely remove the adaptive cruise control unit assembly - J428- .
Removing
- Switch off ignition and all electrical consumers.
Vehicles without access and start authorisation system
- Remove ignition key, if fitted.
Vehicles with access and start authorisation system
- Store the ignition key outside the vehicle to prevent the ignition from being switched on unintentionally.
Continued for all vehicles
- Removing trim for radar sensor
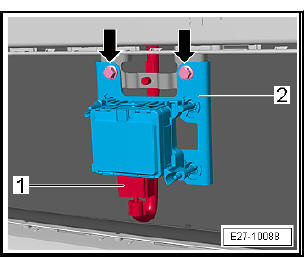
- Pull out the plug -1-.
- Unscrew bolts -arrows-.
- Lay the adaptive cruise control unit assembly - J428- -2- on a workbench.
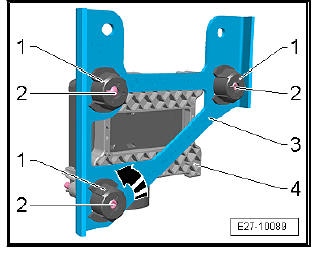
- Release the fasteners -1- in the -direction of the arrow-.
- Remove the fasteners -1- from the studs -2-.
- Remove the radar holder -3- from the assembly -4- adapter/ adaptive cruise control unit - J428- .
Installing
Installation is carried out in the reverse sequence; note the following:
Note
- Replace the fasteners -1-.
- The studs -1- on the adapter are pre-set. If necessary, adjust the setting.
Removing and installing trim for radar sensor
Special tools and workshop equipment required
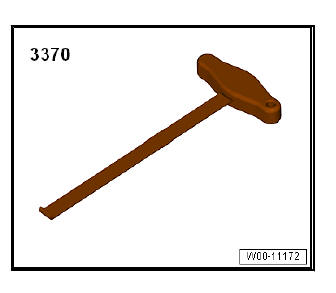
- Lever for the front-end - 3370-
Removing
- Switch off ignition and all electrical consumers.
Vehicles without access and start authorisation system
- Remove ignition key, if fitted.
Vehicles with access and start authorisation system
- Store the ignition key outside the vehicle to prevent the ignition from being switched on unintentionally.
Continued for all vehicles
- Insert the lever for the front end - 3370- in the side recess and pull not too strongly in the -direction of the arrow-.
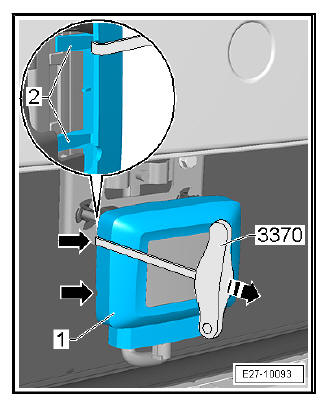
Note For greater clarity the bumper grille is not depicted in the illustration.
- Remove with the fixing lugs -2- on both sides.
Installing
Installation takes place in reverse order.
Settings of the studs on the adapter
Special tools and workshop equipment required
- Gauges for measuring spacing - VAS 6335-
In order to measure the adjustment dimension and be able to carry out adjustment the assembly adaptive cruise control unit assembly consisting of the following components - J428- must be fitted:
- Fasteners
- Radar holder
- Studs
- Adapters
- Adaptive cruise control unit - J428-
- Lay the adaptive cruise control unit assembly - J428- down on a soft and clean surface.
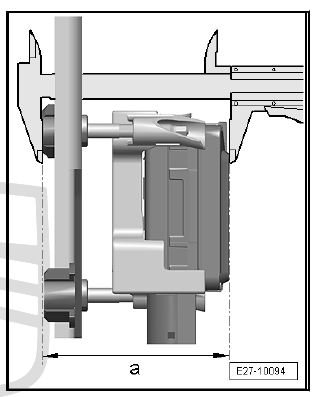
- With a sliding calliper measure - VAS 6335- the setting dimension
-a- on all studs and adjust if necessary.
- Setting dimension -a-= 68.2 mm
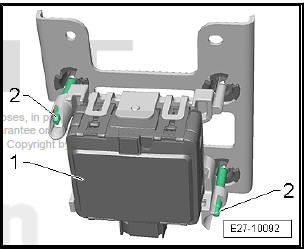
- Adjuster screws -2- of the adaptive cruise control unit - J428- -1-.
Remove and install adapter
Special tools and workshop equipment required
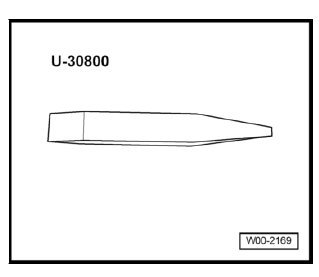
- Lever - U30800-
- Torque wrenches - VAG 1331-
- Calliper square - VAS 6335-
Removing
- Switch off ignition and all electrical consumers.
Vehicles without access and start authorisation system
- Remove ignition key, if fitted.
Vehicles with access and start authorisation system
- Store the ignition key outside the vehicle to prevent the ignition from being switched on unintentionally.
Continued for all vehicles
- Disconnect ignition and all electrical loads, and remove ignition key.
- Remove the radar holder for the adaptive cruise control unit - J428- .
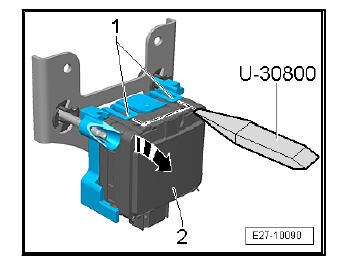
- Prise out the securing tabs -1- with the aid of the lever - U30800- and move the adaptive cruise control unit - J428- -2- in -the direction of the arrow-.
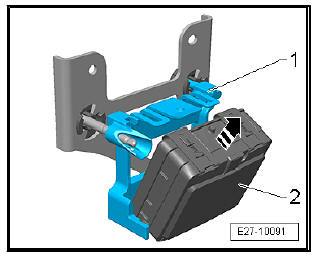
- Remove the adaptive cruise control unit - J428- -2- from the adapter -1- in -the direction of the arrow-.
Installing
Installation is carried out in the reverse sequence; note the following:
Note
- Replace the fasteners .
- The studs on the adapter are pre-set. If necessary, adjust the setting.
Assembly overview - adaptive cruise control unit - J428-
Note For greater clarity the bumper grille is not depicted in the illustration.
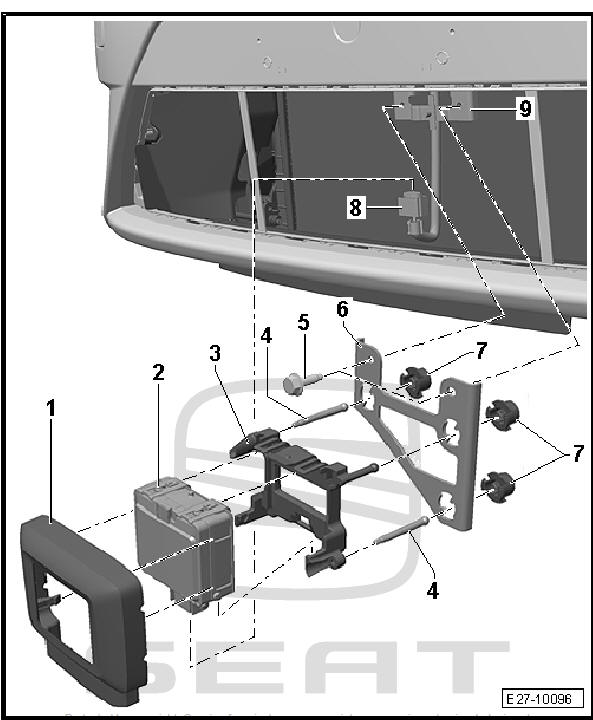
- - Cover
- Removal and installation
- - Adaptive cruise control unit
- J428-
- Removal and installation
- Calibrating
- - Adapter
- Removal and installation
- Measure adjustment and adjust if necessary
- - Threaded pins
- 2 units.
- If adjustment is completed, stud setting must not be changed anymore.
- Measure adjustment and adjust if necessary
- - Screw
- 2 units.
- 8 Nm
- - Radar holder
- Removal and installation
- - Mounting clips
- 3 units.
- Renew
- - Electric connector
- - Front bumper bracket
- On the front cross member
Calibrating adaptive cruise control
Requirements
- The adaptive cruise control unit - J428- needs to be calibrated
if the following conditions apply:
- Adaptive cruise control unit - J428- has been removed and then reinstalled or it has been renewed.
- Bumping into adaptive cruise control unit - J428- due to incautious installation of front bumper carrier.
- Damage to the front bumper carrier as a result of a front-end collision or similar.
- The front bumper carrier has been removed and then reinstalled or it has been renewed.
- Rear axle toe has been adjusted.
Note
- Excessive horizontal adjustment of the adaptive cruise control unit - J428- results in permanent deactivation of the functions ACC/front scan system. This is displayed in the dash panel insert - KX2- by the following message: ACC / Front Assist not available.
- Limited sensor functionality due to soiling or weather conditions such as heavy rain, snowfall, sensor icing etc. results in a temporary non-availability of the functions ACC/front scan system. This is displayed in the dash panel insert - KX2- by the following message: ACC / Front Assist: Sensor without view.
- Calibrate adaptive cruise control.
 Start-Stop System
General description - start/stop system
- Alternator
Removal and installation
- Onboard supply control unit
- J519-
Removal and installation
- Instrument cluster
Remov ...
See also:
Removing and installing headlight
Headlights: removing and installing, left
headlight
Note
Removal and installation are described for the left side. Removal
and installation on the right side are carried out laterally reversed
in ...

