Seat Leon >> Removing and installing bumper cover
Rear bumper trim, three and five-door models: remove and install
Special tools and workshop equipment required
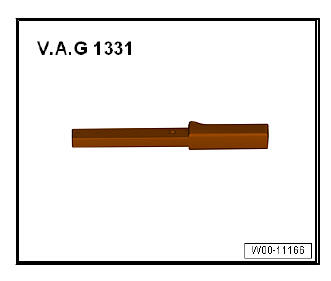
- Torque wrench - V.A.G 1331-
Removing
- Open the tailgate.
- Remove tail lights.
Note The number and arrangement of the bolts can vary according to the vehicle engine.
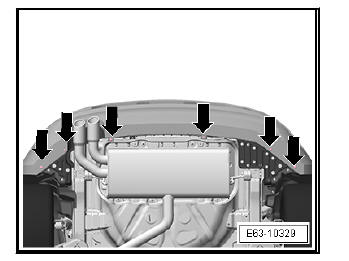
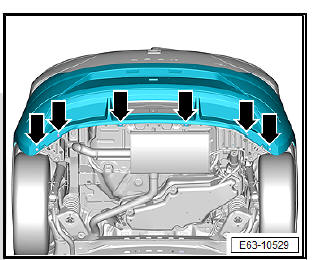
- Remove the screws -arrows- for fixing the rear bumper trim on the underside of the vehicle.
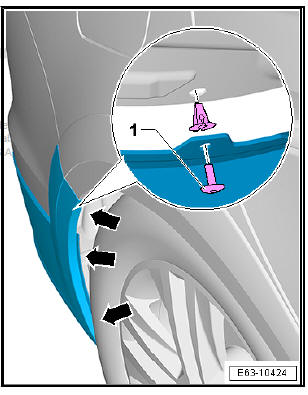
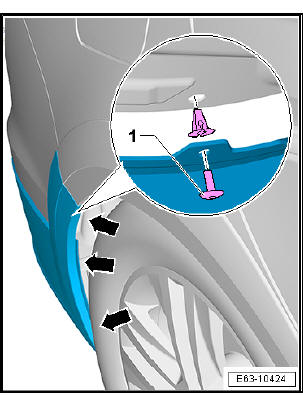
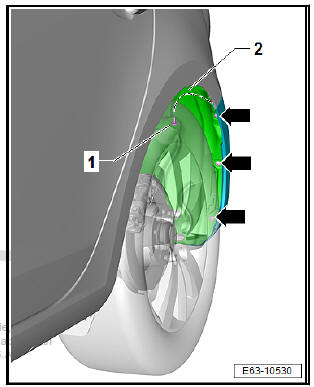
- Remove the bolts -arrows- that fasten the rear bumper trim to the wheel housing.
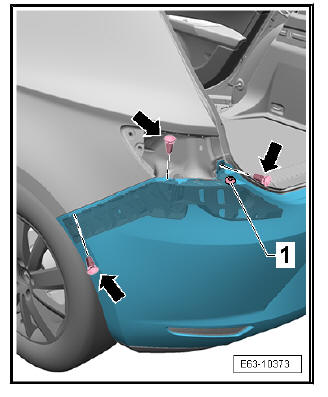
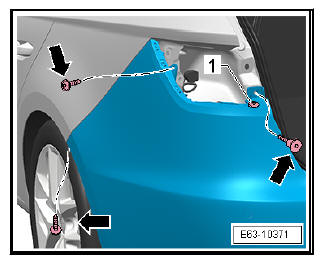
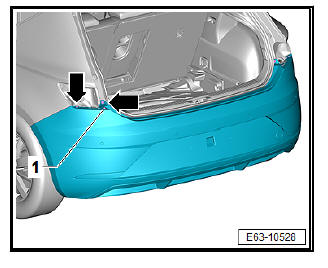
- Remove bolts -arrows-.
| Caution The following does not have to be removed when removing the rear bumper trim:
|
- Release the trim from the bumper. For this purpose, pull on one corner in order to clip the trim out of the guide.
| Caution There is a risk of damaging the electrical wiring harness |
Before completely removing the trim of the bumper:
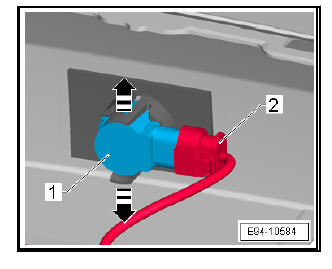
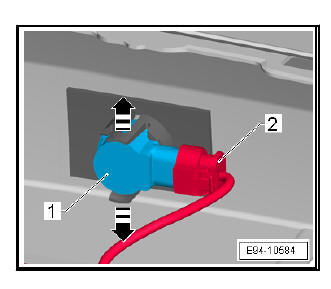
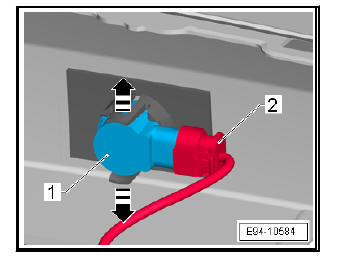
- Unclip and disconnect the plug for the parking assist sender.
- Unclip and disconnect the plug for the number plate light.
Continuation only for vehicles with rear view camera:
- Disconnect the plug connectors for the rear view camera.
All vehicles (continued):
Note To protect the components removed against damage, cover the resting surface with soft material.
- Remove he bumper trim.
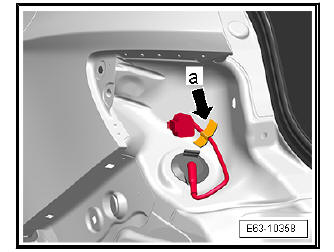
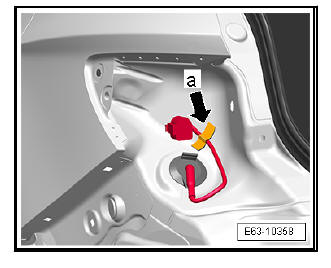
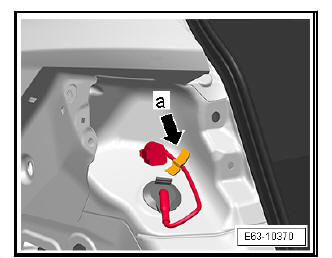
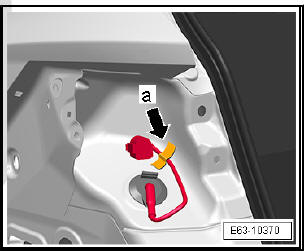
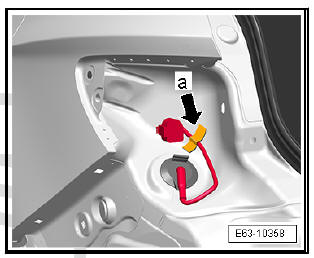
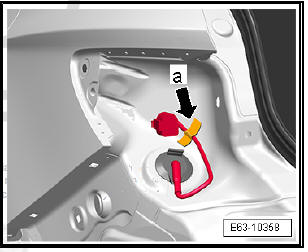
- Use some masking tape -arrow a- to attach the electrical connections of the lights to the inner surface of the light mounting.
fitting
Fit in reverse order from removal, remembering the following:
Note
- Check that the air vents are not blocked and that the butterfly valves function properly.
- Check that the electrical connections of the lights are secured with masking tape -arrow a-.
- Where applicable, check that the heat shield on the bumper trim is in perfect condition.
- Use the tightening torque of the screws.
Model ST rear bumper trim: remove and install
Special tools and workshop equipment required
- Torque wrench - V.A.G 1331-
Removing
- Open the tailgate.
- Remove tail lights.
Note The number and arrangement of the bolts can vary according to the vehicle engine.
- Remove the bolts -3- fixing the underbody protection -1- to the bumper trim.
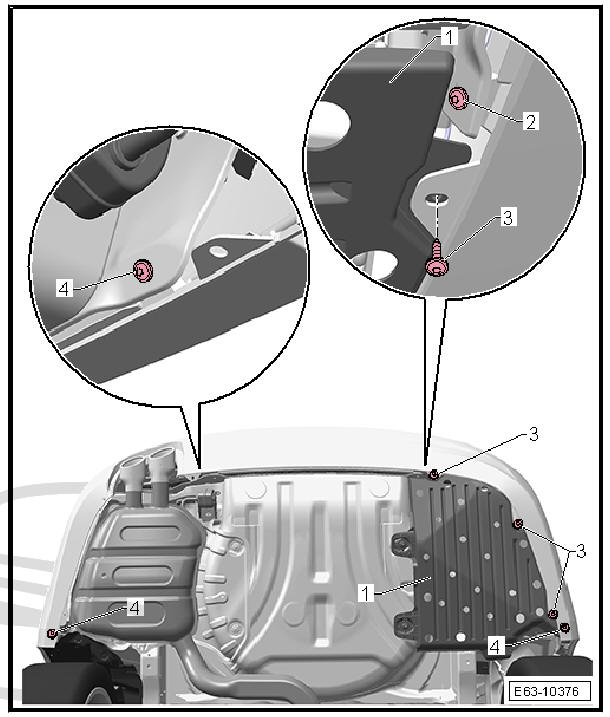
- Move the underbody protection -1- and remove the bolt -2-.
- Remove screws -4-.
- Remove the bolts -arrows- that fasten the rear bumper trim to the wheel housing.
- Remove bolts -arrows-.
| Caution The following does not have to be removed when removing the rear bumper trim:
|
- Separate the trim from the bumper: pull on the zone marked by -arrows a- and by this means, unclip the bumper out of the guide profile.
- Subsequently pull on the zone marked by -arrows b-.
- Pull on the zone of -arrows c-, to unclip the trim out of the securing strip.
| Caution There is a risk of damaging the electrical wiring harness |
Before completely removing the trim of the bumper:
- Unclip and disconnect the plug for the parking assist sender.
- Unclip and disconnect the plug for the number plate light .
Continuation only for vehicles with rear view camera:
- Disconnect the plug connectors for the rear view camera.
All vehicles (continued):
Note To protect the components removed against damage, cover the resting surface with soft material.
- Remove he bumper trim.
- Use some masking tape -arrow a- to attach the electrical connections of the lights to the inner surface of the light mounting.
fitting
Fit in reverse order from removal, remembering the following:
Note
- Check that the air vents are not blocked and that the butterfly valves function properly.
- Check that the electrical connections of the lights are secured with masking tape -arrow a-.
- Where applicable, check that the heat shield on the bumper trim is in perfect condition.
- Unclip and disconnect the plug for the parking assist sender.
- Connect the plugs for the number plate light.
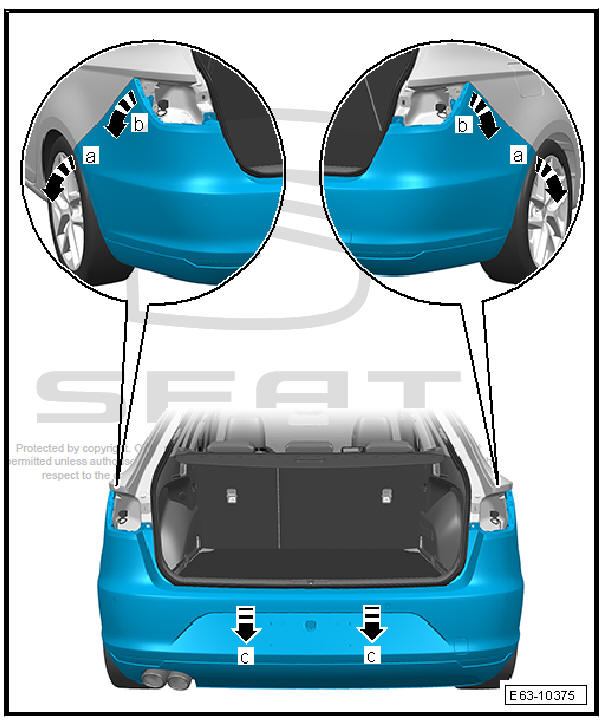
- Install bumper trim; for this purpose fit to the specified points indicated by the -arrows a- in order to press it into the securing strip -1-. Push in the zone of -arrows a- against the bumper trim.

- Push in the zone of -arrows b- from both sides.
- Push in the zone of -arrows c- from both sides.
Continue installation in opposite order as removal
- Use the tightening torque of the screws.
Rear bumper trim, vehicles with 3 and 5 doors: Leon 2017 removing and fitting
Special tools and workshop equipment required
- Torque wrench - V.A.G 1331-
Removing
- Open the tailgate.
- Remove tail lights.
Note The number and arrangement of the bolts can vary according to the vehicle engine.
- Remove the screws -arrows- for fixing the rear bumper trim on the underside of the vehicle.
- Remove the bolts -arrows- that fasten the rear bumper trim to the wheel housing.
- Unscrew wheel housing -2- and loosen bolts -1- on both sides.
- Remove bolts -arrows-.
| Caution The following does not have to be removed when removing the rear bumper trim:
|
- Pull bumper trim 1 at both end out of the guides.
| Caution There is a risk of damaging the electrical wiring harness |
Before completely removing the trim of the bumper:
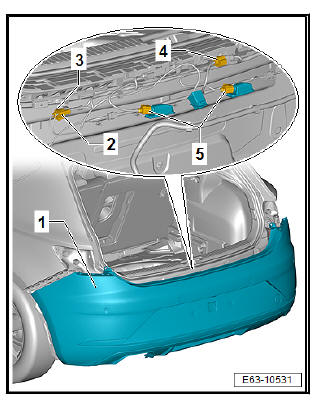
- Unclip and remove electrical plug connector of the parking assist sender -4-.
- Unclip and remove the plug for the number plate light -5-.
Continuation only for vehicles with rear view camera:
- Unplug electrical connectors of the reverse camera -2- and -3-.
All vehicles (continued):
Note To protect the components removed against damage, cover the resting surface with soft material.
- Remove he bumper trim.
- Use some masking tape -arrow a- to attach the electrical connections of the lights to the inner surface of the light mounting.
fitting
Fit in reverse order from removal, remembering the following:
Note
- Check that the air vents are not blocked and that the butterfly valves function properly.
- Check that the electrical connections of the lights are secured with masking tape -arrow a-.
- Where applicable, check that the heat shield on the bumper trim is in perfect condition.
- Use the tightening torque of the screws.
 Remove and install securing strip
Securing strip, vehicles with 3 and 5
doors: removing and fitting
Special tools and workshop equipment required
Torque wrench - V.A.G 1331-
Removing
Remove the bumper trim.
Release co ...
 Removing and installing attachments
Replacement of the rear parking steering
aid sender holder
Special tools and workshop equipment required
Release lever - 3409-
Hot-air blower - VAG 1416-
Materials
Plastic clean ...
See also:
Removing and installing speed sensors
on front axle -G45- / -G47-
Special tools and workshop equipment required
Torque wrenches - V.A.G 1410-
Lubricating paste - Electronic parts catalogue .
Removing
Remove appropriate front wheel.
Remove electr ...
