Seat Leon >> Sealing rings
SEAT Leon Service and Repair Manual / 5-speed manual gearbox 0AH / Final drive - differential / Sealing rings
Location overview - seals
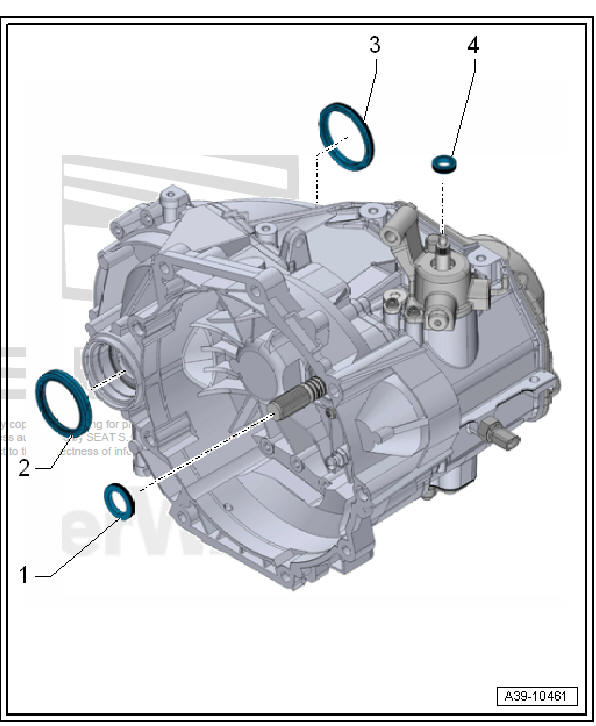
- - Oil seal
- For the input shaft
- Replace after removal
- - Oil seal
- For right flange shaft
- Replace after removal
- - Oil seal
- For left flange shaft
- Replace after removal
- - Oil seal
- For the gear selection shaft
- Replace after removal
Renewing left oil seal
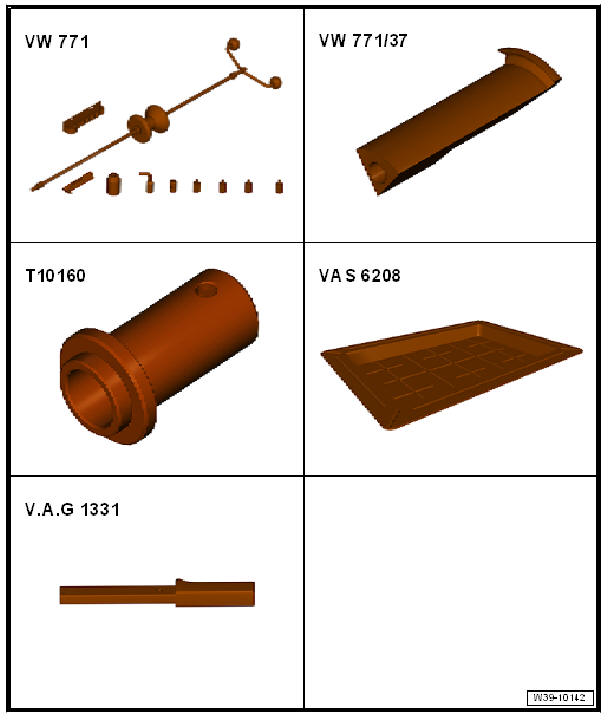
Special tools and workshop equipment required
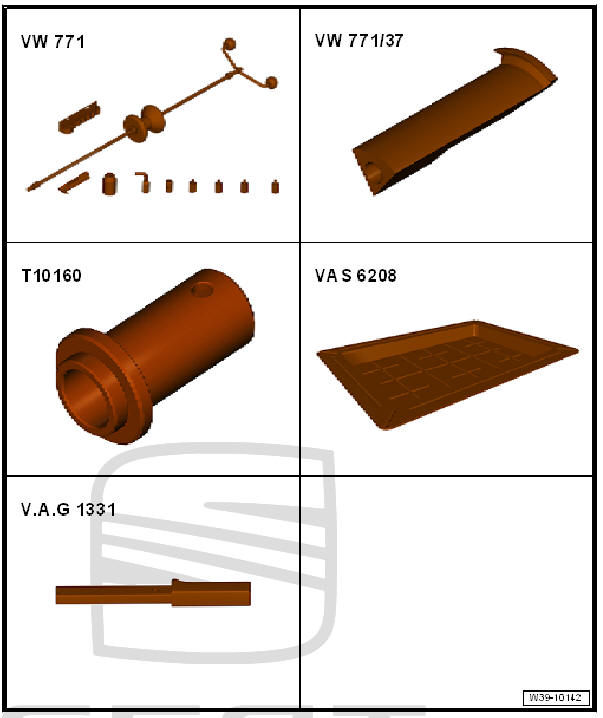
- Universal tool - VW 771-
- Puller hooks - VW 771/37-
- Thrust pad - T10160-
- Tray - V.A.G 1306-
- or drip tray for workshop hoist - VAS 6208-
- Torque wrenches - V.A.G 1331-
- Sealing grease
- For grease allocation, refer to - Electronic parts catalogue (ETKA) .
Removing
- Remove the left hand side wheel.
- Remove noise insulation .
- Turn the steering toward the left.
- Remove drive shaft from flange shaft .
- Raise drive shafts as high as possible and secure, taking care not to damage surfaces.
- Place drip tray under gearbox.
- Extract the bolt fastening the flanged shaft. To do so, thread 2 bolts on the flange and lock the shaft using the assembly lever.
- Remove flanged shaft together with compression spring.
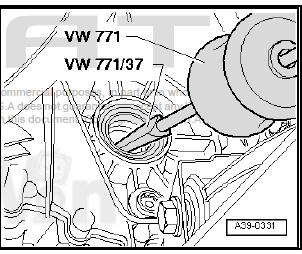
- Remove the flanged shaft seal with the universal tool - VW 771- and the extraction hook - VW 771/37- .
Installing
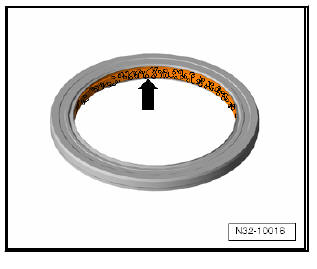
- Drive in new seal to stop, being careful not to cant seal.

- Fill space between sealing lip and dust lip -arrow- with sealing grease .
- Insert flange shaft.
- Secure flange shaft with countersunk bolt and tighten to 25 Nm.
- Install drive shaft to flange shaft .
- Check gear oil level and top up to lower edge of oil filler hole if necessary .
- Install the lower part of the front left wheel housing liner.
- Install noise insulation .
Specified torques
- Flange shaft to gearbox
Renewing right oil seal
Special tools and workshop equipment required
- Universal tool - VW 771-
- Puller hooks - VW 771/37-
- Thrust pad - T10160-
- Tray - V.A.G 1306-
- or drip tray for workshop hoist - VAS 6208-
- Torque wrenches - V.A.G 1331-
- Sealing grease
- For grease allocation, refer to - Electronic parts catalogue (ETKA) .
Removing
- Remove noise insulation .
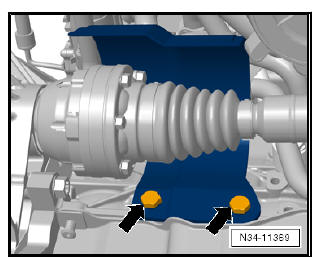
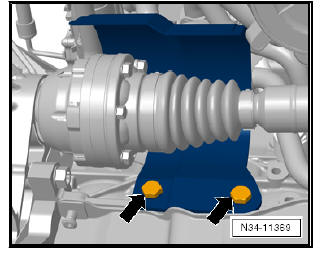
- If present, remove the heat shield -arrows- of the drive shaft.
- Remove drive shaft -1- from flange shaft .
- Raise drive shaft as high as possible and secure, taking care not to damage surfaces.
- Place drip tray under gearbox.
- Extract the bolt fastening the flanged shaft. To do so, thread 2 bolts on the flange and lock the shaft using the assembly lever.
- Remove flanged shaft together with compression spring. If necessary, remove engine/gearbox connecting bolt in area of flange shaft.

- Pull out flange shaft oil seal using multi-purpose tool - VW 771- and puller hooks - VW 771/37- or prise out using a lever.
Installing
- Drive in new seal to stop, being careful not to cant seal.
- Half-fill space between sealing lip and dust lip with sealing grease .
- Insert flange shaft.
- Secure flange shaft with countersunk bolt and tighten to 25 Nm.
- Install drive shaft to flange shaft.
- Install heat shield for drive shaft, if present -arrows- .
- Check gear oil level and top up to lower edge of oil filler hole if necessary.
- Install noise insulation .
Specified torques
- Flange shaft to gearbox

 Differential
...
See also:
Repairing steering box
- Right track rod ball joint
Marked with "A"
Removing and installing
Installation position
Corresponding to -
Electronic parts
catalogue "ETKA"
- Nut
To tighten and l ...
