Seat Leon >> Removing and installing coupling rod (for anti-roll bar)
SEAT Leon Service and Repair Manual / Running gear, axles, steering / Steering / Steering box / Removing and installing coupling rod (for anti-roll bar)
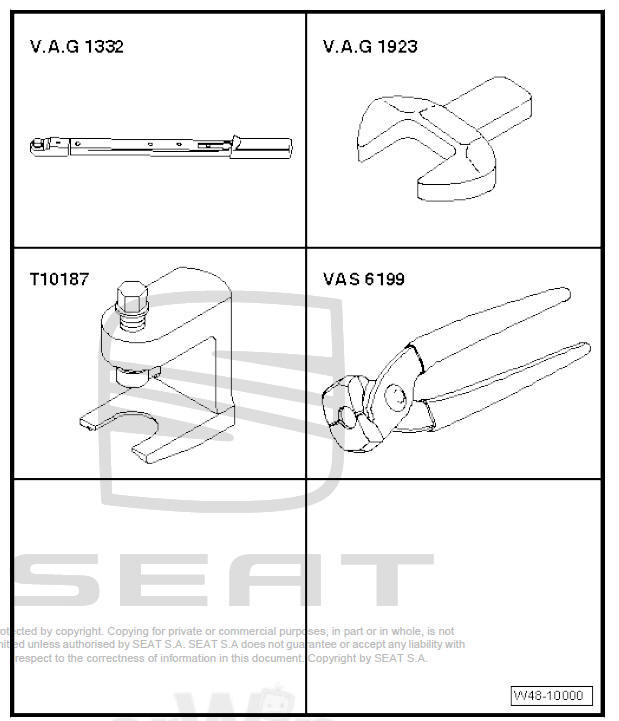
Special tools and workshop equipment required
- Torque wrenches - V.A.G 1332-
- Open-end spanner attachment (38 mm) - V.A.G 1923-
- Ball joint puller - T10187-
- Locking pliers for Phaeton steering box - VAS 6199-
Carry out the following work:
Removing
- Turn steering wheel to straight-ahead position.
- Remove front wheel on affected side.
- Clean outside of steering box in vicinity of boot.
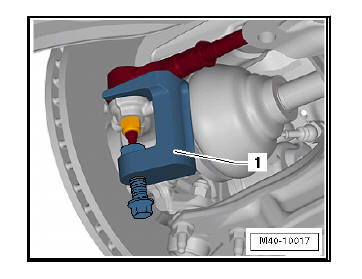
- Loosen nut on track rod ball joint but do not remove completely.
- Using ball joint puller - T10187- -1-, press track rod ball joint off wheel bearing housing, and unscrew nut.
| Caution Leave nut screwed several turns onto track rod ball joint shank to protect thread. |
- Open clamps and push boot back.
- Turn steering as follows:
- For left track rod, turn steering to full left lock.
- For right track rod, turn steering to full right lock.
- Unscrew track rod.
- - Open-end spanner attachment - V.A.G 1923-
- - Torque wrenches - V.A.G 1332-
Note
- Renew complete steering box if there are signs of corrosion, damage, wear or dirt on the steering rack.
- The complete steering box must also be renewed if there is no visible lubricating film on the steering rack.
Installing
Carry out installation in the reverse sequence, noting the following:
| Caution Do not grease steering rack. |
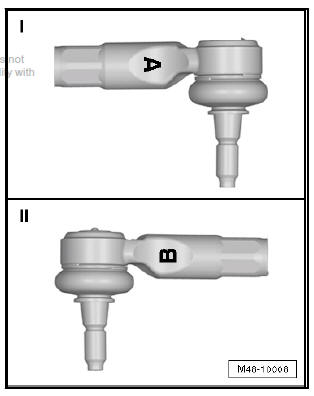
- Make sure that correct track rod ball joint is installed on each side.
I - Track rod ball joint on right marked with an "A"
II - Track rod ball joint on left marked with a "B"
- Turn steering wheel to straight-ahead position.
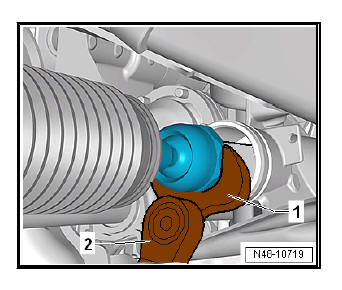
- Fit new hose clips and rubber boot onto track rod.
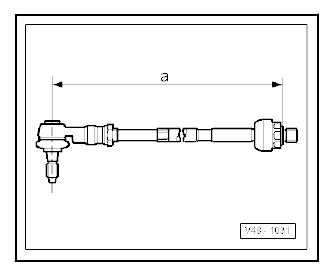
- Screw track rod into track rod ball joint until dimension -a- is attained.
Dimension -a- = 373 +- 1 mm
- Tighten track rod.
- - Open-end spanner attachment - V.A.G 1923-
- - Torque wrenches - V.A.G 1332-
- Lightly grease sealing surface between boot and track rod with grease from repair kit.
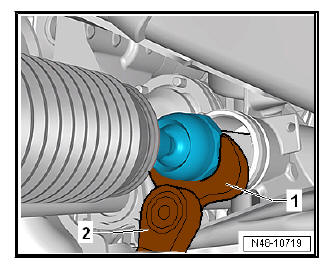
- Push rubber boot -2- onto track rod -1- (make sure boot is positioned correctly).
- Secure spring tyre clamps with pliers - V.A.G 1275- to the dustguard.
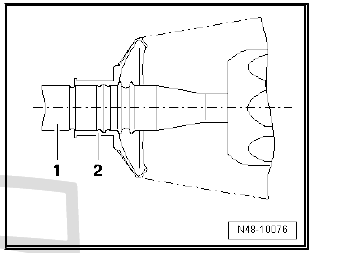
- Lightly grease sealing surface between boot and steering box housing with grease from repair kit.
- Push rubber boot onto steering box housing as far as it will go.
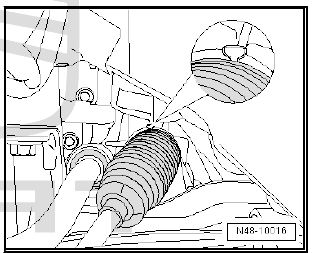
- Fasten the new clamp using the Pliers for the steering box - VAS 6199- as shown in the diagram.
- Check wheel alignment.
- If both track rods have been exchanged, basic setting must be carried out for steering angle sender - G85- - Vehicle diagnostic tester.
- Then carry out basic setting of steering - Vehicle diagnostic tester.
 Dustguard: disassembly and assembly
Special tools and workshop
equipment required
Pliers for clamps - V.A.G
1275-
Torque wrenches - V.A.G
1332-
Tool insert 24 mm - V.A.G
1332/11-
Locking pliers for steering
box - VAS ...
 Removing and installing track rod ball
joint
Removing and installing track rod ball
joint
Special tools and workshop equipment required
Ball joint puller - T10187-
Torque wrenches - V.A.G 1332-
Removing
Remove front wheel on affected side.
Loosen nut -1-.
Mark posi ...
See also:
Indicator and main beam headlight lever
The turn signal and main beam lever also operates the
parking lights and the headlight flasher.
Fig. 76 Turn signal and
main beam headlight
lever
The turn signal and main beam headlight lever h ...
