Seat Leon >> 1.0 l TSI engines
Removing
- Remove the air filter housing.
- Remove air guide hose.
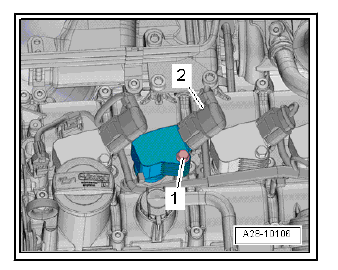
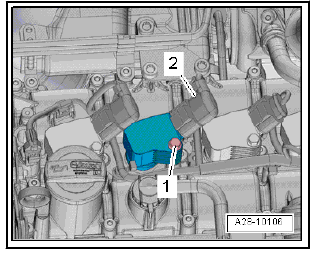
- Unplug the electrical connector -2-.
- Unscrew the bolt -1-.
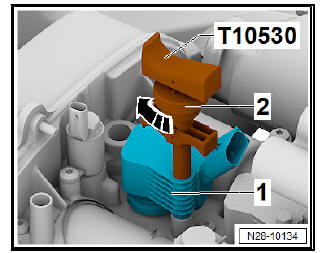
- Push puller - T10530- into hole in ignition coil -1- to stop.
- Tighten knurled nob -2- in -direction of arrow-.
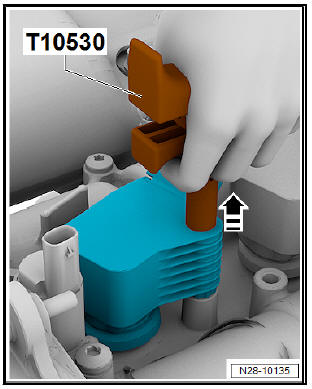
- Pull ignition coil out of camshaft housing in -direction of arrow- using puller - T10530- .
Repeat step for all ignition coils with output stage.
NOTICE Observe installation position of ignition coils with output stages! Check that the conducts have not been bent or damaged.
- Unscrew spark plugs using spark plug socket and extension - 3122 B- .
NOTICE Please observe requirements for disposal.
Installation
NOTICE When installing new spark plugs, the ignition coils with output stage must be regreased with silicon paste.
The correct silicon paste is shown in the - Electronic Parts Catalogue under ignition coils and/or spark plugs.
- Screw in new spark plugs and tighten them to specified torque using spark plug socket - 3122 B-.
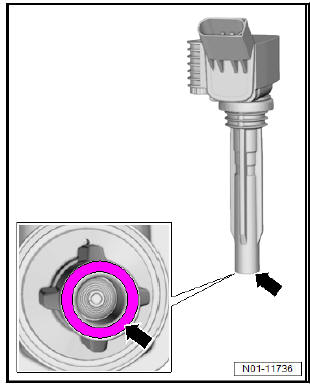
- Apply a thin bead of silicone paste on the circumference of the sealing hose of the ignition coil with output stage -arrow-.
- Align and insert all ignition coils with output stage one after another loosely into spark plug hole.
- Press ignition coils with output stage onto spark plugs evenly by hand (do not use any tools).
- Tighten bolt -1- of ignition coil with output stage to specified torque.
- Connect the electrical connector -2-.
Repeat step for all ignition coils with output stage.
- Continue installation in reverse order.

 Spark plugs: replace
Special tools and workshop equipment required
Spark plug socket and extension - 3122 B-
Puller - T10530-
Torque wrench - VAG 1331-
NOTICE
Identification of the spark plugs.
...
 1.2l and 1.4I TSI engines
Removing
Loosen hose clips -1- and -2- and remove air hose.
Only engines with code CZEA
Disconnect connectors -2-, and pull off air hose -1-.
Continue for all engines
Unplug elec ...
See also:
Checking ABS sensor ring
Special tools and workshop equipment required
Sensor gauge - T10473-
Operation process
Wheel bearing unit is removed.
Using sensor gauge - T10473- , check ABS sensor ring -2- all
roun ...
