Seat Leon >> Removing and installing attachments
Removing and installing lock carrier cover
Special tools and workshop equipment required
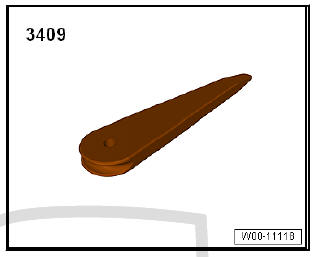
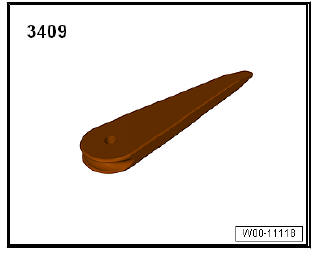
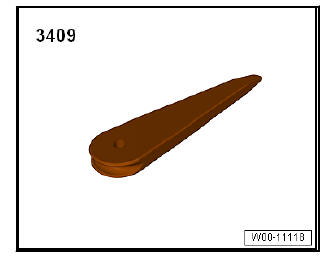
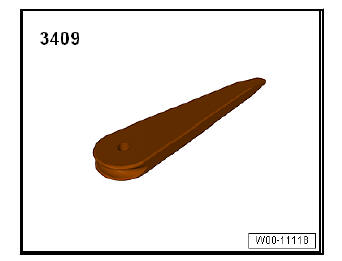
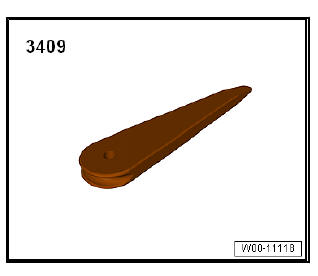
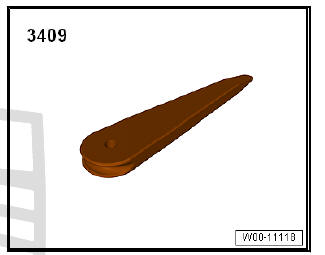
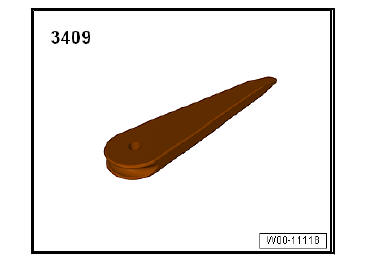
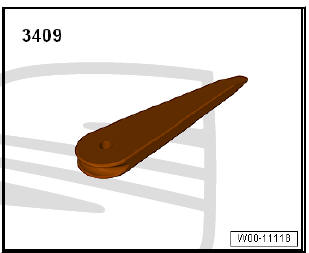
- Release lever - 3409-
Removing
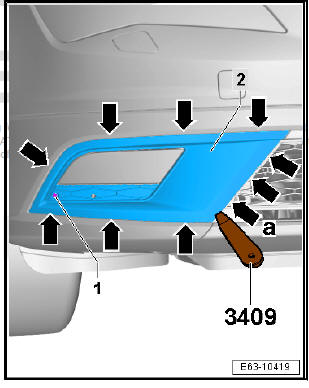
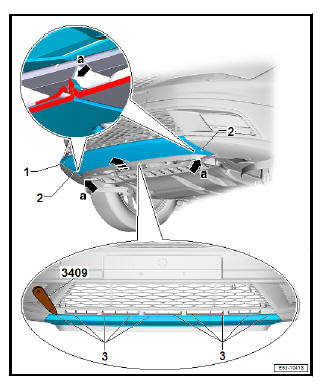
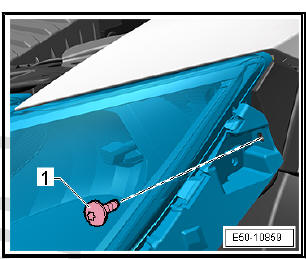
- Lift the front bonnet. Use the rod to keep it open.
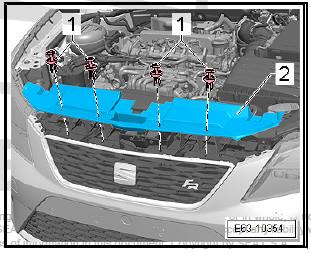
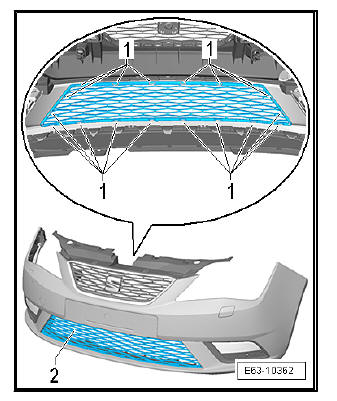
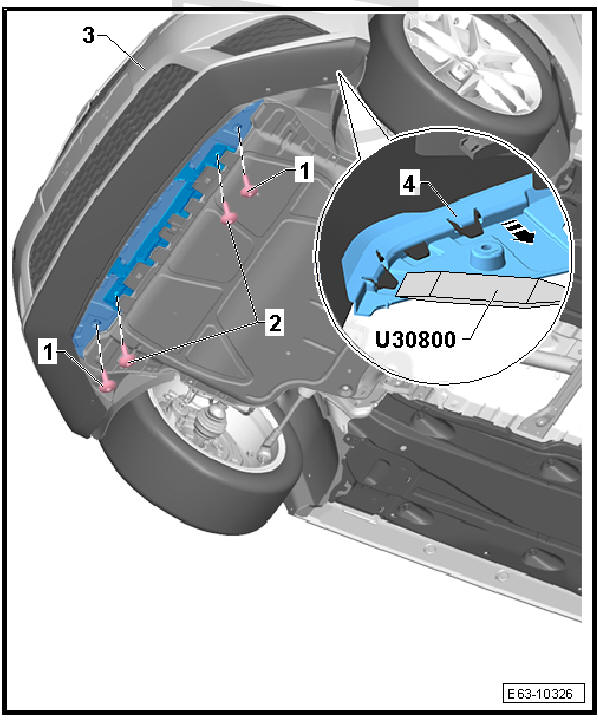
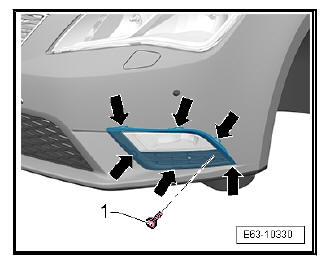
- Remove cover of the lock carrier -2-; for this purpose use a flange screwdriver; turn the rivet heads -1- by 90º to the left and then pull them out with the lever - 3409- .
- Press lock carrier cover -2- upwards.
fitting
Installation is done in reverse order of removal operations.
Replacing the sensor holder for the front steering parking aid
Special tools and workshop equipment required
- Release lever - 3409-
- Hot-air blower - VAG 1416-
Materials
- Plastic cleanser 100 ml - D 195 850 A1- .
- Plastic primer, 150ml - D 822 150 A1-
Removing
- Remove bumper cover (front).
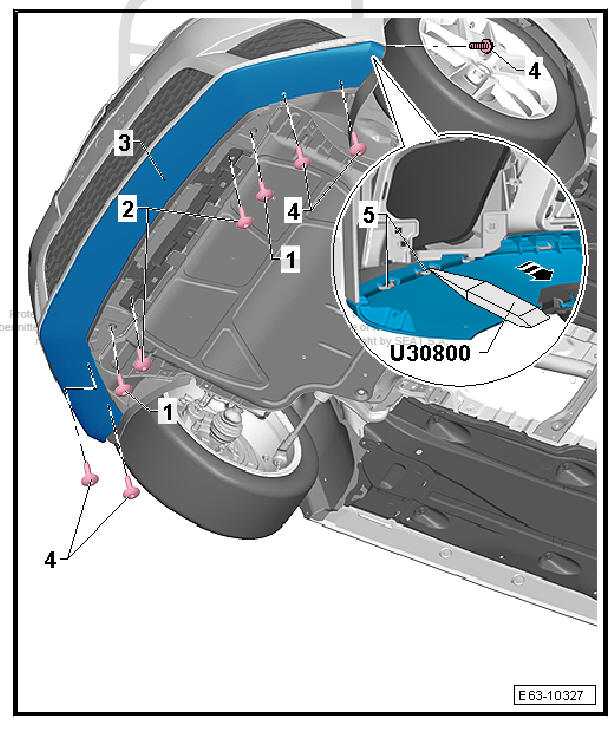
- Remove the parking assist sender.
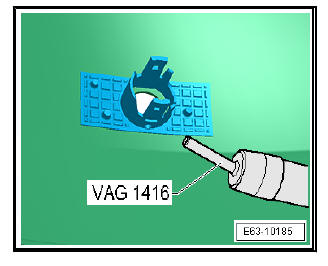
- Before removal, the holder must be heated using the hot air blower - VAG 1416- .
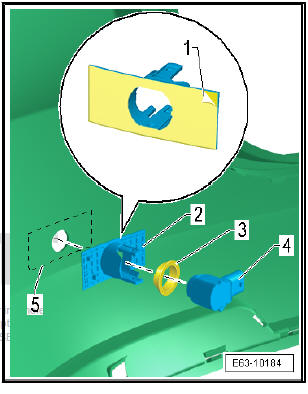
- Using the lever - 3409- remove the holder from the bumper trim.
fitting
Note The holder of the steering parking aid sender cannot be swapped with each other as each has its own installation position.
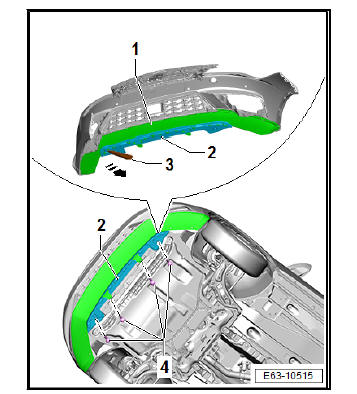
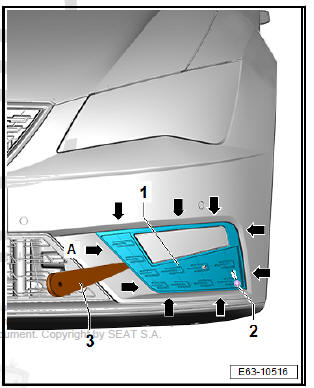
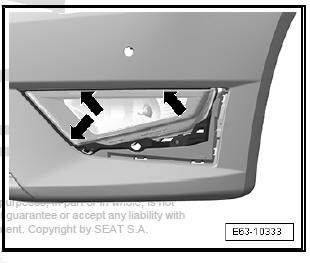
- Using 100 ml plastic cleanser - D 195 850 A1- , clean the area -5- of the bumper trim where the new holder should be fitted.
Flashing-off time, approx. 5 minutes.
- Apply a thin layer of Plastic cleanser 150 ml - D 822 150 A1- to the surface -5- of the bumper trim.
- Remove the protective paper -1- from the adhesive foam tape.
- Position the holder -2- in the bumper trim within the marked field.
- Press the holder -2- against the bumper trim.
- Connect the connector to the sender.
- Check the condition of the seal -3- and replace when damaged
- Insert the seal -3- in the sender -4-.
- Install the parking assist sender
- Installing front bumper cover
Removing and installing the spray jet cover for the headlight washer system
Special tools and workshop equipment required
- Release lever - 3409-
Removing
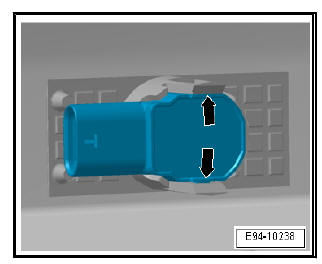
- Turn off the ignition and all electricity consumers.
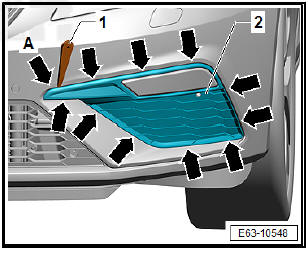
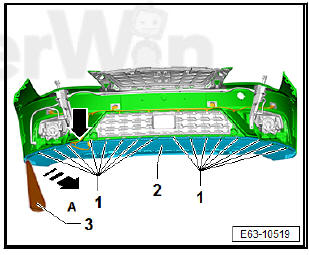
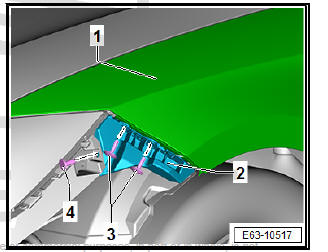
- With the lever - 3409- , remove the cover -1- in the direction of the -arrow-.
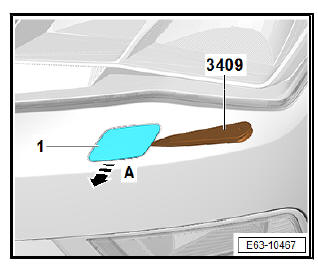
- Take care not to damage the nozzle. Fix the mobile holder -2- with suitable tools.
- Clip the cover -1- out of the tabs -arrows- and remove.
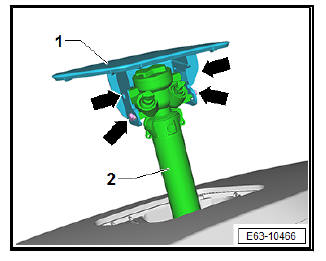
fitting
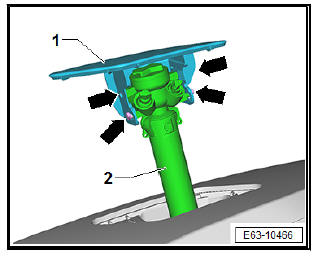
- Take care not to damage the nozzle. Fix the mobile holder -2- with suitable tools.
- Place the cover -1- on the mobile holder -2-.
Note The cover -1- must engage in the mobile holder -2-.
Removing and installing the lower centre grill
Special tools and workshop equipment required
- Release lever - 3409-
Removing
- Remove bumper cover (front).
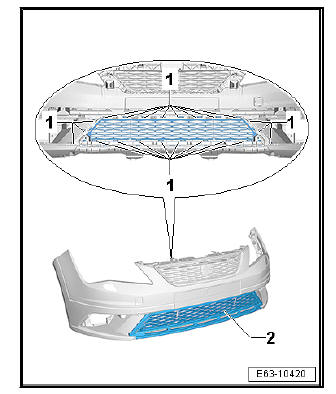
- Undo the fixings -1-, beginning in one corner and remove the bottom centre grille -2-.
fitting
Installation is done in reverse order of removal operations.
Removing and installing the lower, centre grill, X-PERIENCE version
Special tools and workshop equipment required
- Release lever - 3409-
Removing
- Removing the bottom spoiler wing.
- Remove the lower spoiler (front bumper trim).
- Remove the grille on the side of the bumper trim.
- Remove bumper cover (front).
- Undo the fixings -1-, beginning in one corner and remove the bottom centre grille -2-.
fitting
Installation is done in reverse order of removal operations.
Removing and installing bottom centre grille (Leon 2017 version)
Special tools and workshop equipment required
- Release lever - 3409-
Note The removal and installation procedures may have to be modified slightly depending on model variants.
Removing
- Remove bumper cover (front)
- Undo the fixings -1-, beginning in one corner and remove the bottom centre grille -2-.
fitting
Installation is done in reverse order of removal operations.

Removing and installing the bottom spoiler wing
Special tools and workshop equipment required
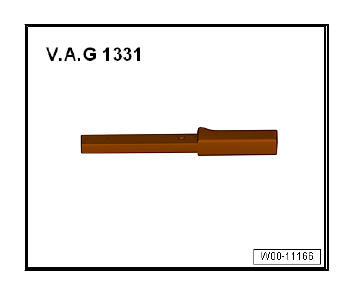
- Torque wrench - V.A.G 1331-
- Release lever - 3409-
| Caution The following does not have to be removed when removing the bottom spoiler wing:
|
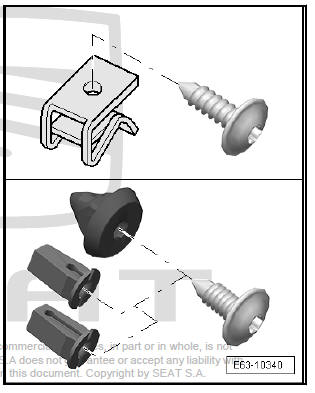
Note Do not interchange! The screws have another thread pitch depending as to it they are fixed to a plastic block or on a quick locking nut.
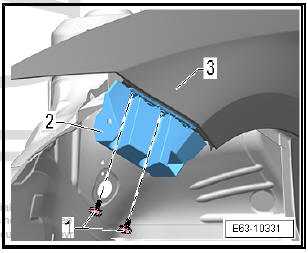
- Unscrew the bolts -1- and -2-.
- Lower the spoiler wing -3- using your hand and, using the lever - 3409- , release the retaining clips -4- starting at one of the outer sides.
- Remove the wing of the bottom spoiler -3- in the direction of the -arrow-.
fitting
Fit in reverse order from removal, remembering the following:
Note Do not interchange! The screws have another thread pitch depending as to it they are fixed to a plastic block or on a quick locking nut.
Removing and installing bottom spoiler wing (Leon 2017 version)
Special tools and workshop equipment required
- Torque wrench - V.A.G 1331-
- Release lever - 3409-
| Caution The following does not have to be removed when removing the bottom spoiler wing:
|
Note Do not interchange! The screws have another thread pitch depending as to it they are fixed to a plastic block or on a quick locking nut.
- Remove screws -4-.
- Lower the spoiler wing -2- using your hand and, using the removal wedge - 3409- , release the retaining clips -3- starting at one of the outer sides.
- Remove the wing of the bottom spoiler -2- in the direction of the -arrow-.
fitting
Fit in reverse order from removal, remembering the following:
Note Do not interchange! The screws have another thread pitch depending as to it they are fixed to a plastic block or on a quick locking nut.
Removing and installing the side grille on bumper trim
Special tools and workshop equipment required
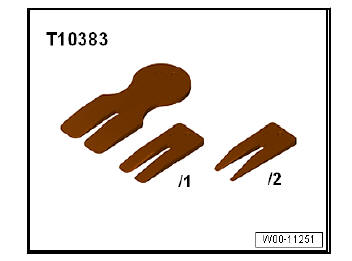
- Wedges - T10383-
- Release lever - 3409-
| Caution When removing the side grille from the bumper trim panel, there is no need to remove the following items:
|
Note
- The sequences below describe the processes for removal and installation for the left side of the vehicle. The corresponding sequences for the right side are similar with the exception that, where applicable, the scope of the process is written by yourself.
- The sequences below describe the processes for removal and installation for vehicles with fog lights. The sequences for the vehicles without fog lights is similar.
Removing
Only vehicles with fog lights, except version "FR"
- Unscrew the bolt -1-.
The grille is fitted with six retaining tabs; the -arrows- point to the locations.
- Using wedge - T10383/1- and wedge - T10383/2- , press the upper and lower retaining clamps -arrows- and remove the grille.
Only vehicles with fog lights, version "FR"
The grille is fitted with six retaining tabs; the -arrows- point to the locations.
- Using wedge - T10383/1- and wedge - T10383/2- , press the upper and lower retaining clamps -arrows- and remove the grille.
Only vehicles with fog lights, "X-PERIENCE" version
- Unscrew the bolt -1-.
The grille is fitted with ten retaining tabs; the -arrows- point to the installation locations.
Note To enable removal of the grille, you must thus start to remove the retaining tab -arrow A-.
- Press with the lever - 3409- on the upper and lower retaining clamps -arrows- and remove the grille.
Only vehicles with fog lights, version Leon 2017
- Unscrew the bolt -2-.
The grille is fitted with nine retaining tabs; the -arrows- point to the installation locations.
Note To enable removal of the grille, you must thus start to remove the retaining tab -arrow A-.
- Press with the removal wedge - 3409- -3- on the upper and lower retaining clamps -arrows- and remove the grille.
Only for vehicles with fog lights, version FR and FR Plus Leon 2017
The grille -2- is fitted with ten retaining tabs; the -arrows- point to the installation locations.
Note To enable removal of the grille, you must thus start to remove the retaining tab -arrow A-.
- Press with the removal wedge - 3409- -1- on the upper and lower retaining clamps -arrows- and remove the grille.
Fog light bracket: removing and installing
| Caution The following does not have to be removed when removing the fog light bracket:
|
Note
- The sequences below describe the processes for removal and installation for the left side of the vehicle. The corresponding sequences for the right side are similar with the exception that, where applicable, the scope of the process is written by yourself.
- The sequences below describe the processes for removal and installation for vehicles with fog lights. The sequences for the vehicles without fog lights is similar.
Removing
- Remove bumper cover (front)
Vehicles with headlight washers.
- Remove jet.
Continued for all vehicles
- Remove the grille on the side from the bumper trim.
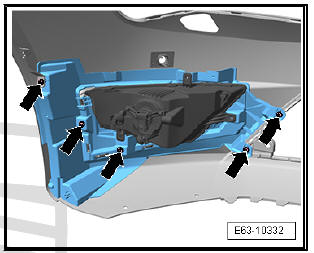
- Remove bolts -arrows-.
- Remove the bracket.
fitting
Fit in reverse order from removal, remembering the following:
- Make sure that the fog lights are engaged in the bumper correctly -arrow-.
- Install the grille in the side from the bumper trim.
- Use the tightening torque of the screws
Label cover CUPRA
Special tools and workshop equipment required
- Hot-air blower - SAT 1416-
- Digital thermometer - SAT 4013-
- Thrust piece - T20098-
- Release lever - U30800-
- Adhesive strip remover - VAS 6349-
Removing
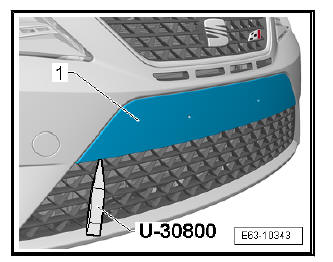
- Before removing the label cover on the front bumper trim, heat it up to approx. 25 ºC with a hot air gun - SAT 1416- .
- Using the lever - U30800- carefully loosen the label cover-1- from the front bumper trim.
- Remove any residue from the adhesive tape using the adhesive strip remover - VAS 6349- .
fitting
- Clean the area of the front bumper trim where the new label cover is to be applied with isopropanol or heptanes alcohol.
- Then treat the area where the new label cover should be applied using silicone cleaner.
- Allow to dry well.
- Using the hot air blower - SAT 1416- , heat the application area on the bodywork to approx. 35℃. Check the temperature using the digital thermometer - SAT 4013- .
- Attach the cover and press down with thrust piece - T20098- with force of approx 5 kg.
Lower spoiler (front bumper): remove and install
Special tools and workshop equipment required
- Release lever - U 30800-
| Caution The following does not have to be removed when removing the bottom spoiler:
|
Note Do not interchange! The screws have another thread pitch depending as to it they are fixed to a plastic block or on a quick locking nut.
- Unscrew the bolts -1- and -2-.
- Remove the screws -4- from both sides.
- Lower the spoiler -3- using your hand and, using the lever - U30800- , release the retaining clips -5- starting at one of the outer sides.
- Remove the spoiler -3- in direction of -arrow-.
fitting
Fit in reverse order from removal, remembering the following:
Note Do not interchange! The screws have another thread pitch depending as to it they are fixed to a plastic block or on a quick locking nut.
- Use the tightening torque of the screws.
Lower spoiler (front bumper), X-PERIENCE version: remove and install
Special tools and workshop equipment required
- Torque wrench - V.A.G 1331-
- Release lever - 3409-
Removing
- Removing the bottom spoiler wing
- Remove screws -2-.
- Loosen the clamps -arrows A-.
- Lower the spoiler -1- using your hand and, using the lever - 3409- , release the retaining clips -3- starting at one of the outer sides.
- Remove the spoiler -1- in direction of -arrow-.
fitting
Fit in reverse order to removal.
Lower spoiler (front bumper), Leon 2017 version: remove and install
Special tools and workshop equipment required
- Release lever - 3409-
Note The removal and installation procedures may have to be modified slightly depending on model variants.
Removing
- Remove bumper cover (front) .
- Undo wiring harness from the fastening -arrow-.
- Release retaining clips -1- using the removal wedge - 3409- -3-, starting at one of the outer sides.
- Pull out spoiler -2- in -direction of arrow-.
fitting
Installation is done in reverse order of removal operations.
Removing and installing guide profile ?
Special tools and workshop equipment required
- Torque wrench - V.A.G 1331-
Note The sequences below describe the processes for removal and installation for the left side of the vehicle. The corresponding sequences for the right side are similar with the exception that, where applicable, the scope of the process is written by yourself.
Removing
- Remove bumper cover (front).
- Remove screws -1-.
- Undo the screws -1- and remove the guide profile -2- of the wing -3-.
fitting
Fit in reverse order from removal, remembering the following:
- Use the tightening torque of the screws.
Note
The bumper trim must engage seamlessly in the guide profile.
Removing and installing guide profile (Leon 2017 version)
Special tools and workshop equipment required
- Torque wrench - V.A.G 1331-
Note The sequences below describe the processes for removal and installation for the left side of the vehicle. The corresponding sequences for the right side are similar with the exception that, where applicable, the scope of the process is written by yourself.
Removing
- Remove bumper cover (front).
- Unscrew screws -3- and -4- and remove the guide profile -2- from the wing -1-.
fitting
Fit in reverse order from removal, remembering the following:
- Use the tightening torque of the screws.
Note The bumper trim must engage seamlessly in the guide profile.
Repairing bumper cover
Note If bumper trim is damaged, determine whether plastic can be repaired before exchanging bumper.
Description under.
 Removing and installing impact bar
Special tools and workshop equipment required
Torque wrench - VAG 1332-
Release lever - 80 200-
Removing
Remove bumper cover (front).
Remove the main headlight unit with the low ...
 Rear bumper
...
See also:
Cleaning evaporator
Special tools and workshop equipment required
Ultrasonic cleaning unit for the air conditioner circuit - VAS
6189B-
Cleaning liquid - VAS 6189/1-
Suction nozzle - VAS 6288-
Commercially av ...
