Seat Leon >> Removing and installing rear glass panel
SEAT Leon Service and Repair Manual / General body repairs, exterior / Sunroof / Panorama sliding roof / Removing and installing rear glass panel
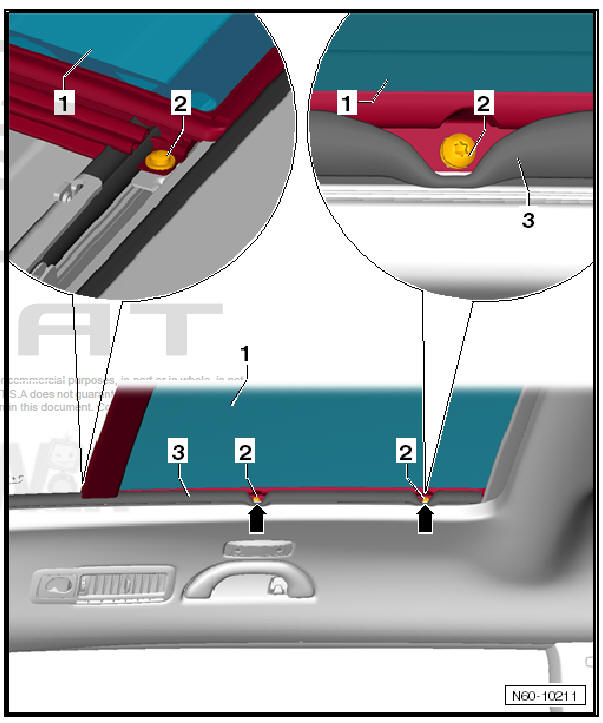
Removing
Note To unscrew bolts, use a magnetic tool so that bolts do not fall into panoramic sliding roof guide.
- Operate front glass panel until it is in tilted-open position.
- Undo front screws -2- of rear glass panel -1-.
- Make a note of the number of spacers and take out under the screw-attachment surface.
- Pull inner seal -3- inwards slightly at the points -arrows- and undo screws -2-.
- Lift out rear glass panel -1- upwards.
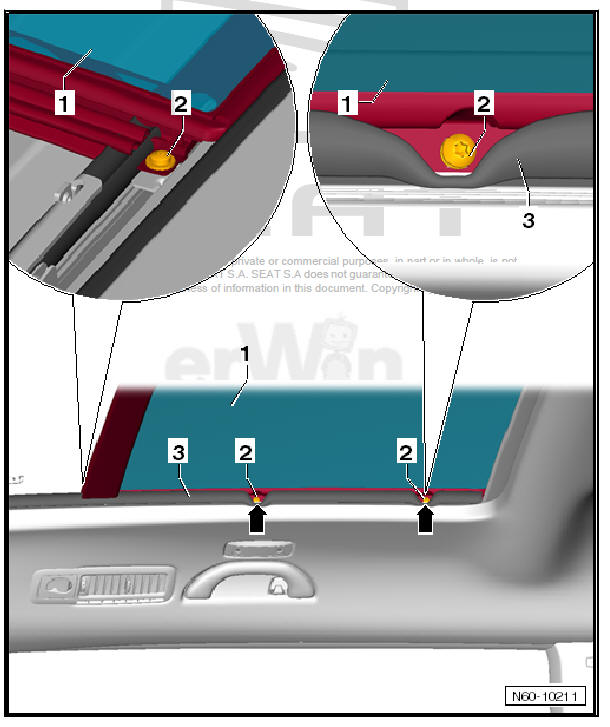
fitting
Note
- Always use new screws when installing or removing glass panel.
- To screw in bolts, use a magnetic tool so that bolts do not fall into panoramic sliding roof guide.
The installation is carried out in reverse order of removal for the removal procedures described.
- Insert glass panel -1- from above.
- Align spacers and tighten screw -2- from above, specified torque: 5 Nm.
- Pull inner seal -3- inwards slightly at the points -arrows- and screw in screws -2- but do not tighten completely.
- Adjust rear glass panel .
- After adjusting rear glass panel, tighten screws, 5 Nm.
- On completion of all work, operate sliding roof motor to establish reference points.
 Removing and installing front glass panel
Removing
Open glass panel -1- until trim -1- is accessible.
Release locking lugs -4- by pressing -arrow B- on rear -3-.
Pull trim -1- off downwards at rear end -arrow A-.
Push trim forward ...
 Adjusting glass panel
Checking height adjustment
Note
Front glass panel must only be adjusted at front edge -1- and rear
glass panel at rear edge -2-.
To achieve the best possible optical appearance, ensure that ...
See also:
Removing and installing voltage regulator
Voltage regulator: removing and installing
- manufacturer: Bosch .
Special tools and workshop equipment required
Torque screwdriver - V.A.G 1624-
Removing
Remove alternator
Carefully ...
