Seat Leon >> Adjusting door
Special tools and workshop equipment required
- Torque wrench - V.A.G 1331-
- Adjustment gauges - 3371-
Back door adjustment (hinges on pillar)
Note The door can be adjusted back and forth as well as the height by loosening the bolts for the hinges on the B-pillar.
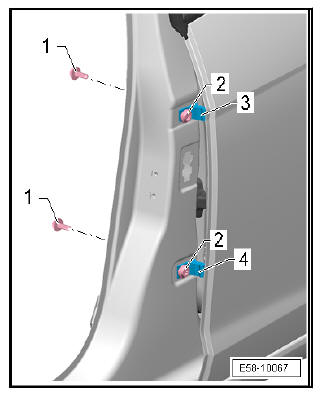
- Remove upper B-pillar cover ;
- Undo the screws -1- and -2- of the upper -3- and lower -4- hinges, but do not screw out, and adjust the door.
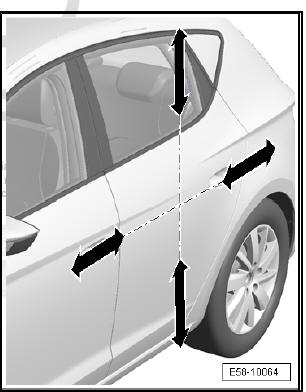
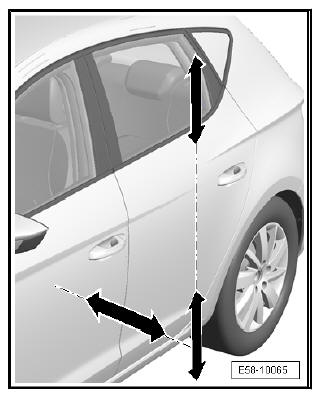
Check the spacings
- Use the tightening torque of the screws.
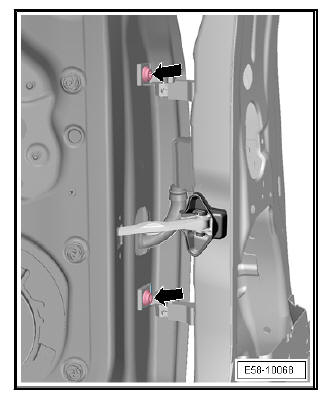
Back door adjustment (hinges on door)
Note The door can be adjusted back and forth as well as the height by loosening the bolts for the hinges on door.
- Open the door.
- Loosen bolts -arrows- on hinges, but do not screw out, and adjust door.
Check the spacings
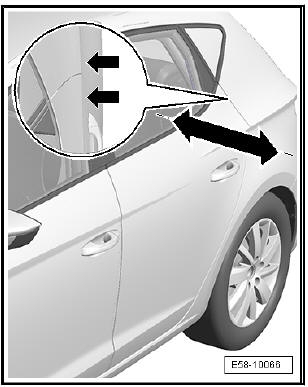
Adjusting the striker plate (back door)
Note Adjust the striker plate to fit the rear door flush against the rear side panel.
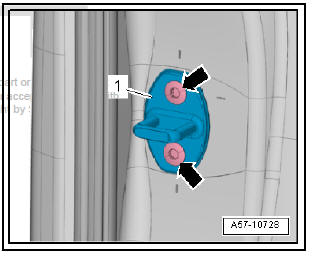
- Remove bolts -arrows-.
- Adjust catch -1- until the door is flush with surrounding body
Note
- The striker plate is only to be used for adjustment towards the centre of the vehicle.
- The door height must not be adjusted by way of the striker plate, as the door lock would be damaged in the process.
- When correctly adjusted, the lock catch should be centred on the door lock.
- Loosely tighten securing bolts -arrows-.
Check the spacings
- Use the tightening torque of the screws.
 Removing and installing door
Special tools and workshop equipment required
Torque wrench - V.A.G 1331-
Note
The sequences below describe the processes for removal and
installation for the left side of the vehicle. The ...
 Removing and installing door hinges
Special tools and workshop equipment required
Torque wrench - V.A.G 1331-
Removing
Note
The sequences below describe the processes for removal and
installation for the left side of the veh ...
See also:
Waxing the car
Regular waxing protects the paintwork.
You need to apply wax to your car if water does not form small drops and run
off the paintwork when it is clean.
Good quality hard wax is available from you ...
