Seat Leon >> Removing and installing front treble loudspeakers R20 / R22
Note The removal and installation of the front left treble loudspeaker - R20- is described. The removal and installation of the front right treble loudspeaker takes place - R22- in the same way.
removing
- Switch off ignition and all electrical equipment.
Vehicles without access and start authorisation system
- Remove ignition key, if fitted.
Vehicles with access and start authorisation system
- Store ignition key outside the vehicle to prevent the ignition from being switched on unintentionally.
Continued for all vehicles
- Remove A-pillar trim.
- Release and unplug electrical connector -1- at front left treble loudspeaker - R20- .
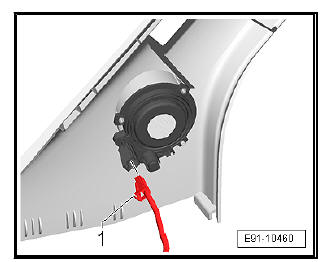
The front left treble loudspeaker - R20- -1- is thermo-welded to the upper A-pillar trim at three points -arrows-.
- Using a roughing file, remove the thermo-welded material off until you reach the bracket section -arrows- of the front left-hand treble loudspeaker - R20- -1-.
- Remove front left treble loudspeaker - R20- -1-.
fitting
Installation is carried out in the reverse sequence; note the following:
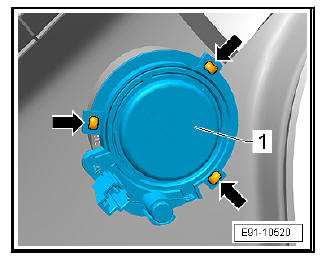
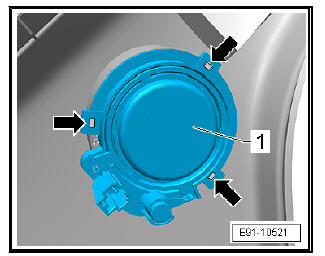
- Insert the new front left treble loudspeaker - R20- -1- into its seat.
- Using the plastic repair kit - VAS 5155- , apply material to the three points -arrow-.

 Removing and installing rear treble
loudspeakers R14 / R16
Removing and installing rear treble
loudspeakers R14 / R16
Removing and installing rear treble
loudspeakers R14 / R16, 2-door vehicle
Note
The removal and installation of the rear left treble loudspeaker -
R14- is described. The removal and installation o ...
 Removing and installing rear bass loudspeakers
R15 / R17
Removing and installing rear bass loudspeakers
R15 / R17
Removing and installing rear bass loudspeakers
R15 / R17, 2-door vehicle
Note
The removal and installation of the rear left bass loudspeaker -
R15- is described. The removal and installation of th ...
See also:
Preparing new windows for installation
CautionNew panes of glass have the following
characteristics:
You make a reference line on the inside in order to make
the application of the adhesive sealing material (PUR)
...
